A guide about how to use Fireebok Data Recovery
Use Fireebok Data Recovery to recover deleted files or partition from computer disk or external disk, USB device, SD card or camera devices. It supports the recovery from many file systems include: HFS+ (Mac OS Extended (Journaled)), HFSX (Mac OS Extended (Case-sensitive, Journaled), NTFS, FAT32, FAT16, ExFAT. It has five modes to restore your lost files, and it's very easy and convenient to use. Please reduce the operation to avoid the deleted data be rewritten by other new data. This is very important to protect your data. First download Fireebok Data Recovery demo version on your computer.
When you have finished the installing, click the Data Recovery icon to launch the program. Then you’ll see the main window.
Note: The guide will show you how to scan, preview and recover your deleted data.
Part1: How to use Deleted Recovery to recover your data
Part2: How to use Volume Recovery to recover your data
Part3: How to use Deep Recovery to recover your data
Part4: How to use Lost Partition Recovery to recover data
Part5: How to use Create Image Backup to protect your data
Part6: How to use Fireebok Data Recovery in macOS 10.13 and later
Part 1: How to use Deleted Recovery to recover your data
When you lost the files due to empty trash, or other reasons in a period of time. Deleted Recovery will be your best choice, it can keep the entire folder as the original file and folder. It supports to recover any file format and it's very quick to complete the scanning.
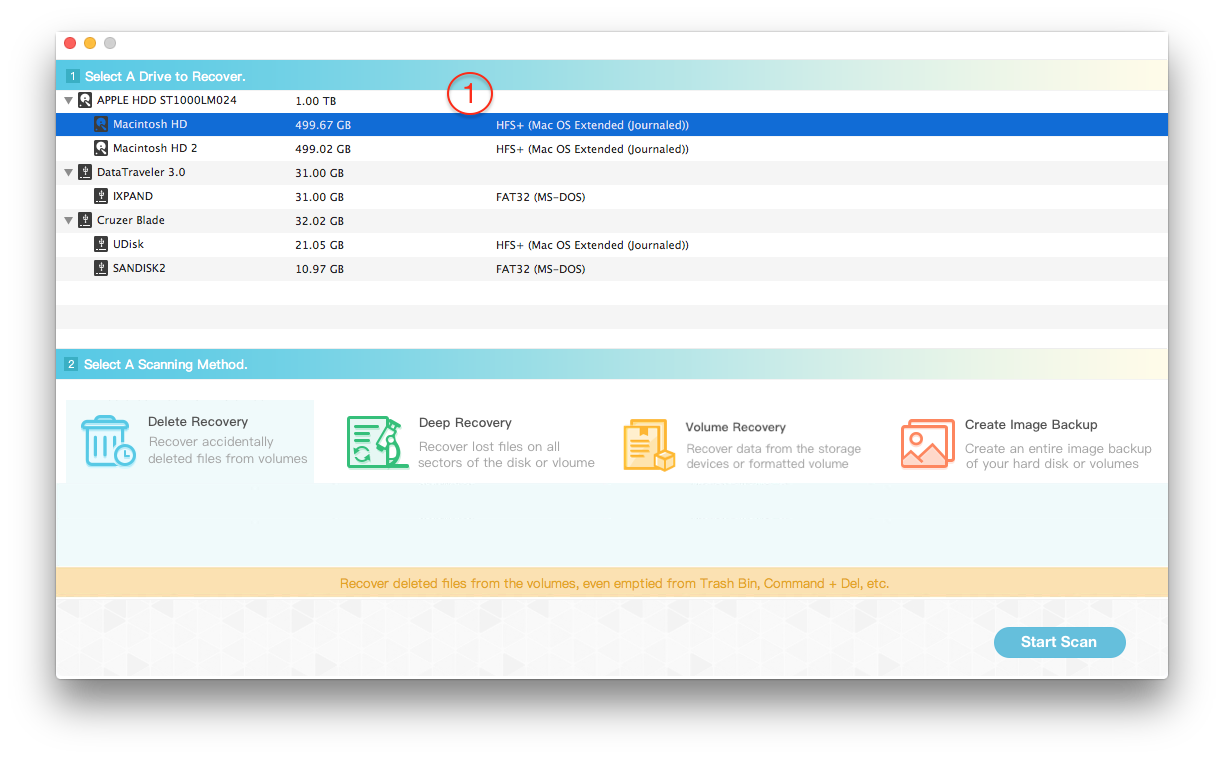
Step 1: Launch the program and Select the partition or volume where the deleted file stored
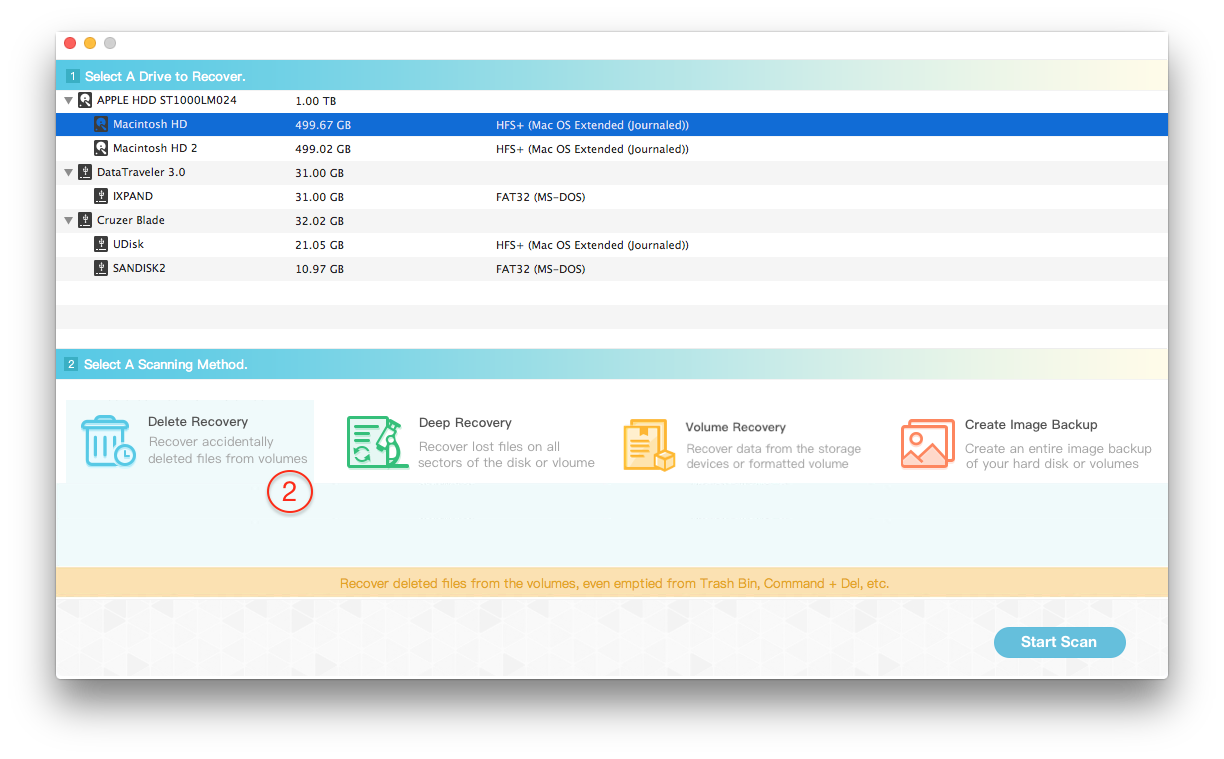
Step 2: Choose "Delete Recovery" and click "Start Scan" button
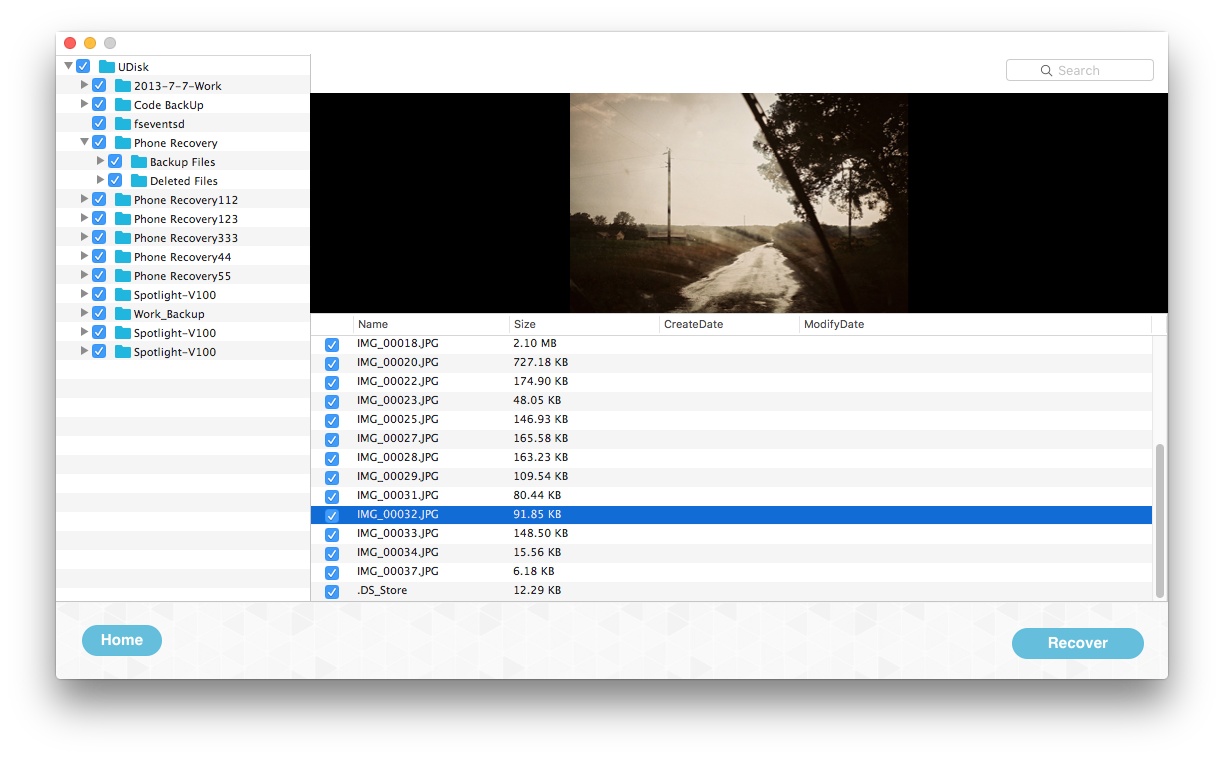
Step 3: Preview the scanning result and select them to save to the different disk or USB device.

Part 2: How to use Volume Recovery to recover your data
Volume Recovery scans your volume data by file system of the volume, it's a fast and efficient method of scanning volumes for data recovery. It's a good choice to recover your lost data from the normal and formatted volumes. Here are the detail steps.
Step 1: Launch the program and Select the the partition or volume where the deleted file stored

Step 2: Choose "Volume Recovery" and click "Start Scan" button

Step 3: Preview the scanning result and save them to the different disk or USB device.
Part 3: How to use Deep Recovery to recover your data
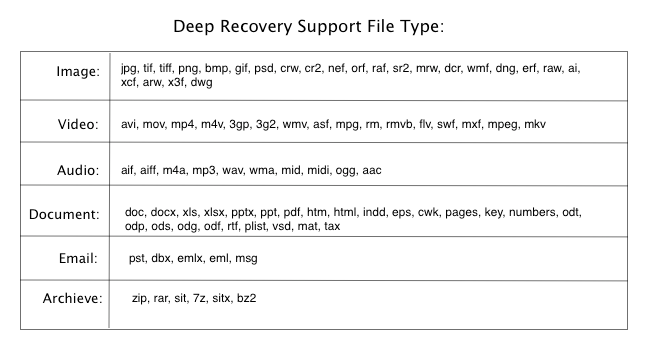
Deep Recovery scan your all partition or disk by each sector. It will take a few minutes to a few hours, depending on the size of the disk. All disk files include deleted and already exist on your disk or will be displayed. They are divided into 6 types according to different file format: Image, Documents, Video, Audio, Email and Archive. And the original file name will be changed into new file name. If you can't find lost files with Deleted Recovery or volume recovery, it will be the second choice to recover them.
Step 1: Launch the program and Select the volume or the entire disk where the deleted file stored
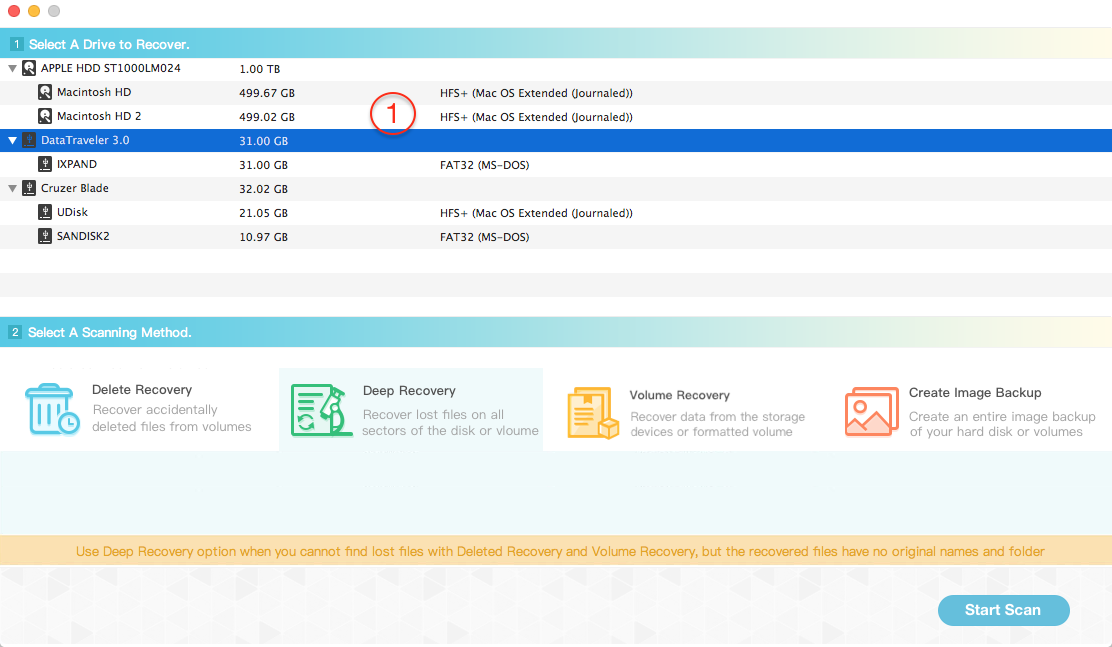
Step 2: Choose "Deep Recovery" and click "Start Scan" button/p>

Step 3: Preview the scanning result and select them to save to the different disk or USB device.

Part 4: Use Lost Volume Recovery to recover your data
When you format or remove the volume from hard disk or usb device, Lost Volume Recovery will help you to find those volumes and volumes data. And you can select different file system to scan those found partition. The scanning result will be listed by the original file directory and institutions.
Step 1: Launch the program and Select the hard disk or USB device

Step 2: Choose "Lost Volume Recovery" and choose the scanning mode: Quick Search Volume, Completely Search Volume, then click "Start Scan" button
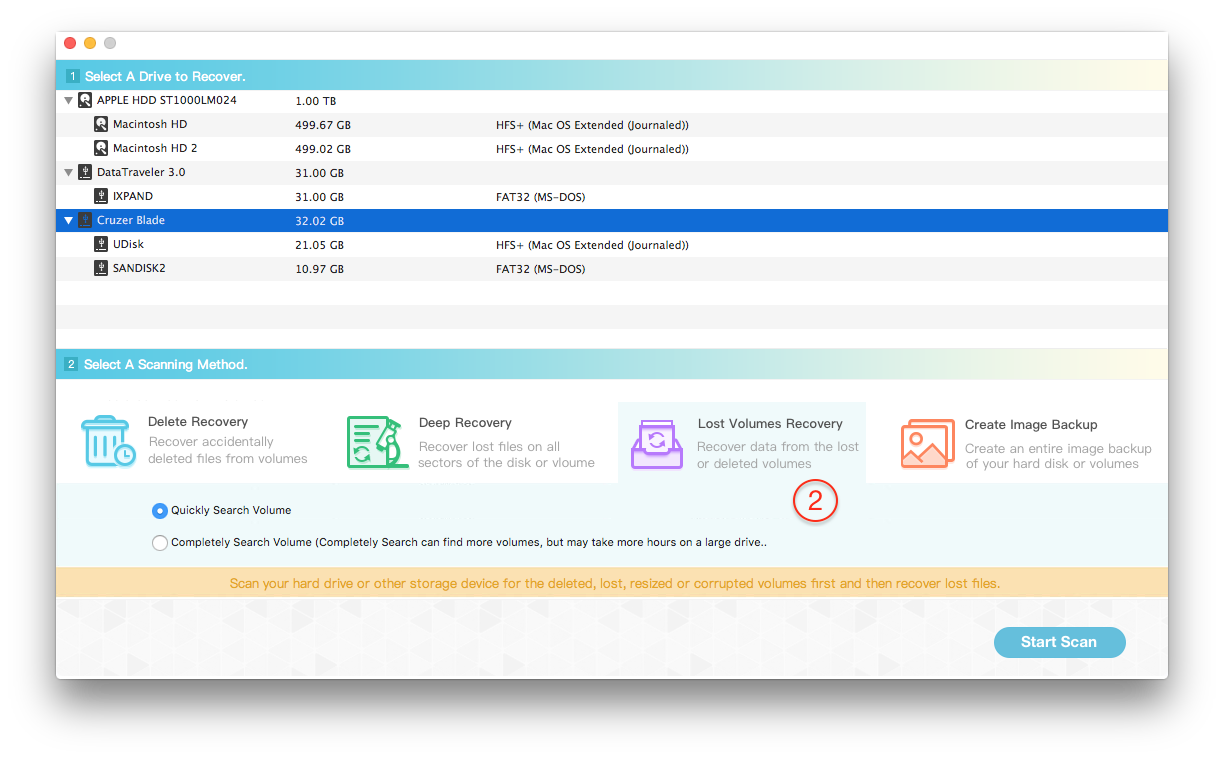
Step 3: During the volume scanning, all found volumes will be added to the table again. And they will be marked the gray icon and named with "Lost Volume Num".

Step 4: After the scanning has completed, all the volumes will be listed into the table view. You can choose the right volume by the size of volume.
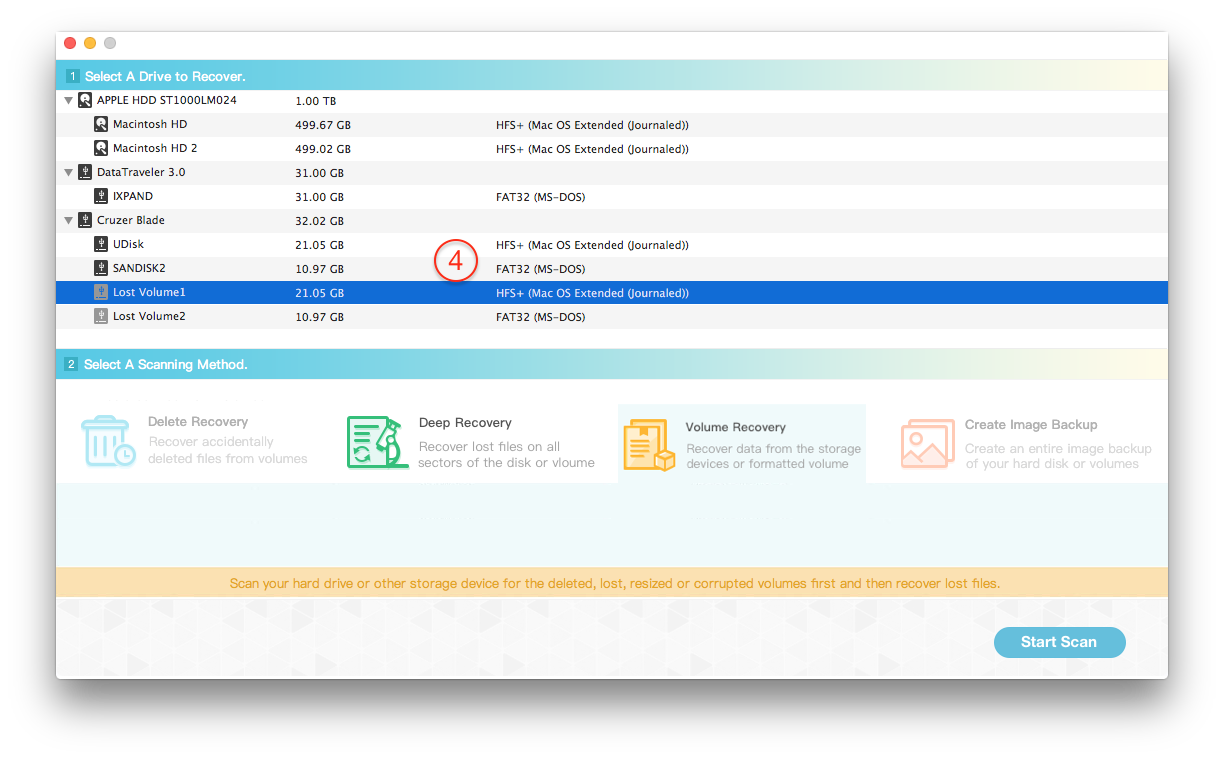
Step 5: There are two scanning methods for the lost volume: Volume Recovery and Deep Recovery. We choose the volume recovery to scan here. Click "Start Scan" button to start the scanning of the selected volume.
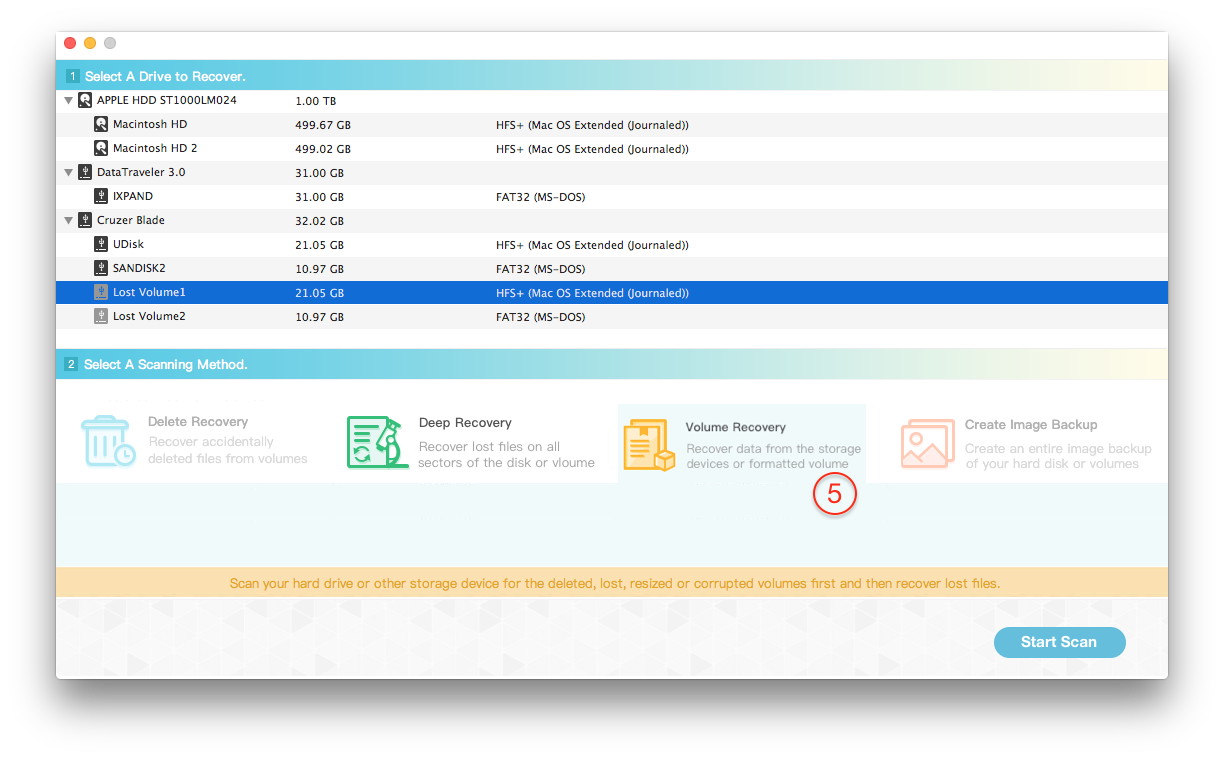
Step 6: Preview the scanning result and select them to save to the different disk or USB device.

Part 5: How to use Create Image Backup to protect your data
Protect your disk or volume data by creating an exact image of storage drive to backup or avoid missing data is overwritten by other data. And It is also a good choice to use this function to backup the volumes. The backup time depends on the file size of the volume. Here are the steps.
Step 1: Launch the program and Select the volume
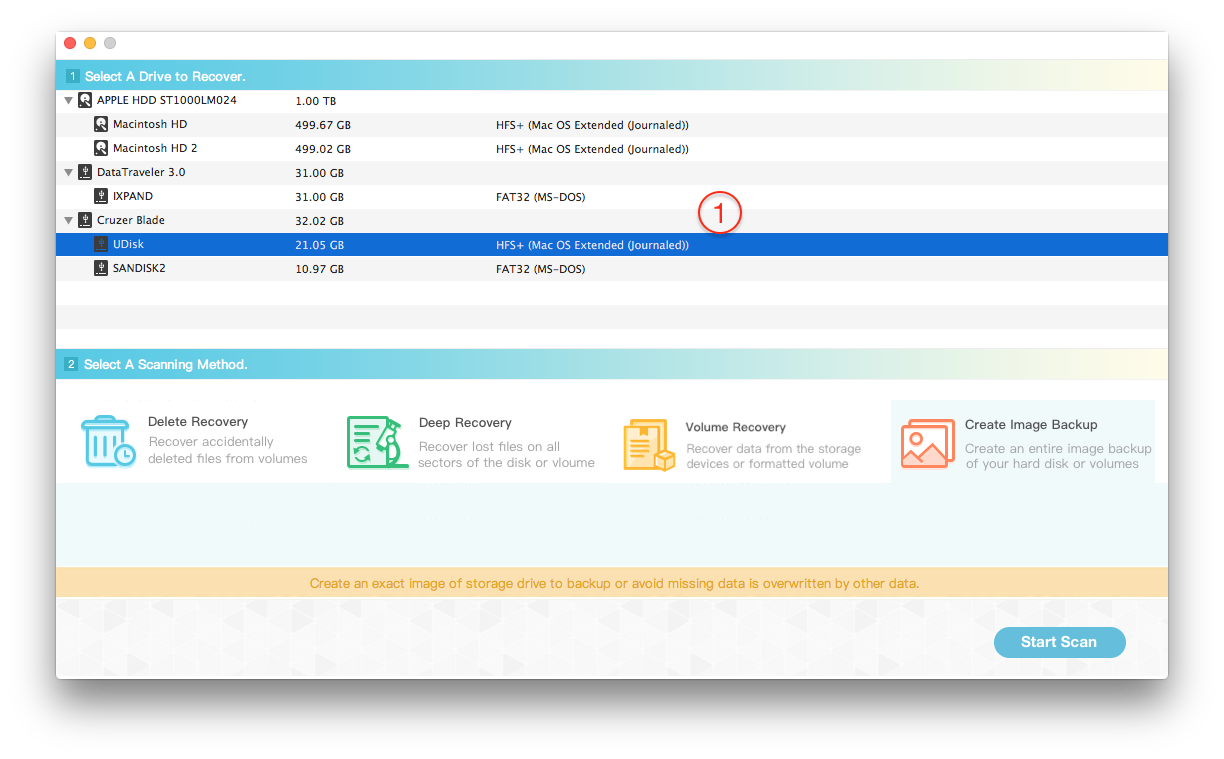
Step 2: Choose "Create Image backup" and click "Start Scan" button
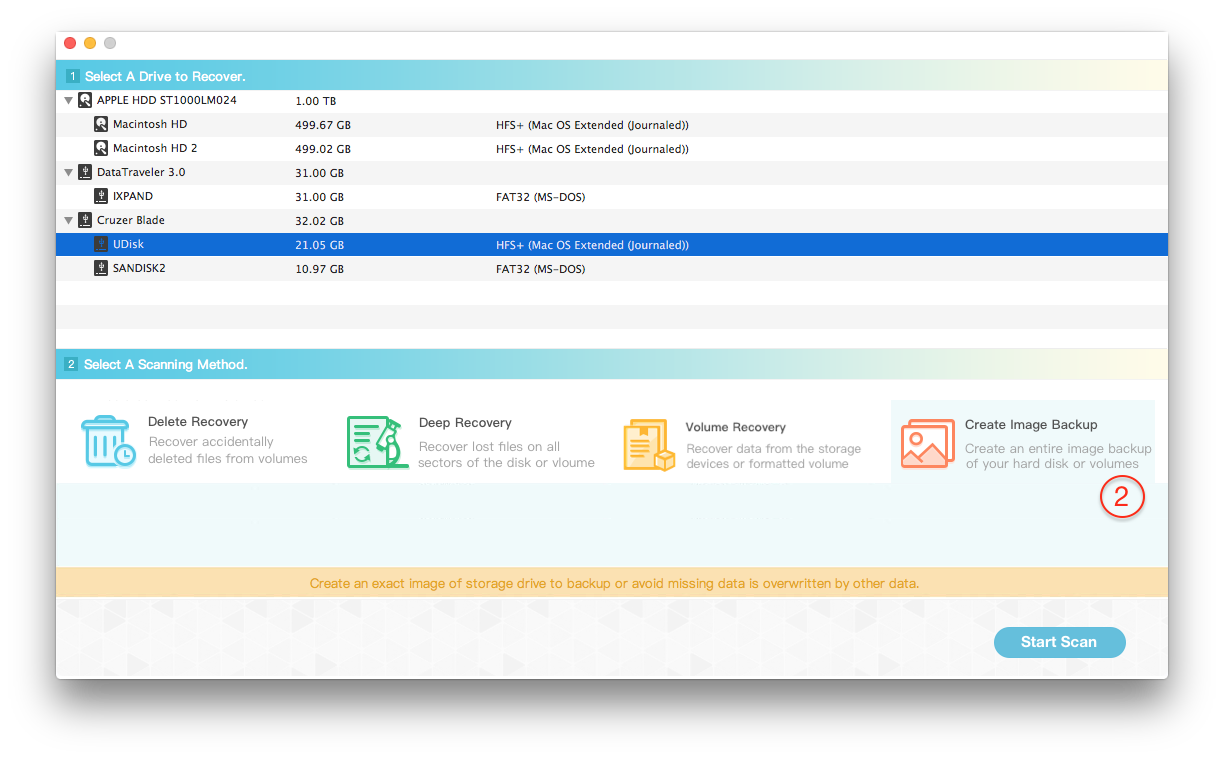
Step 3: Choose the location to save the image backup. It must be a large enough and different from the original volume
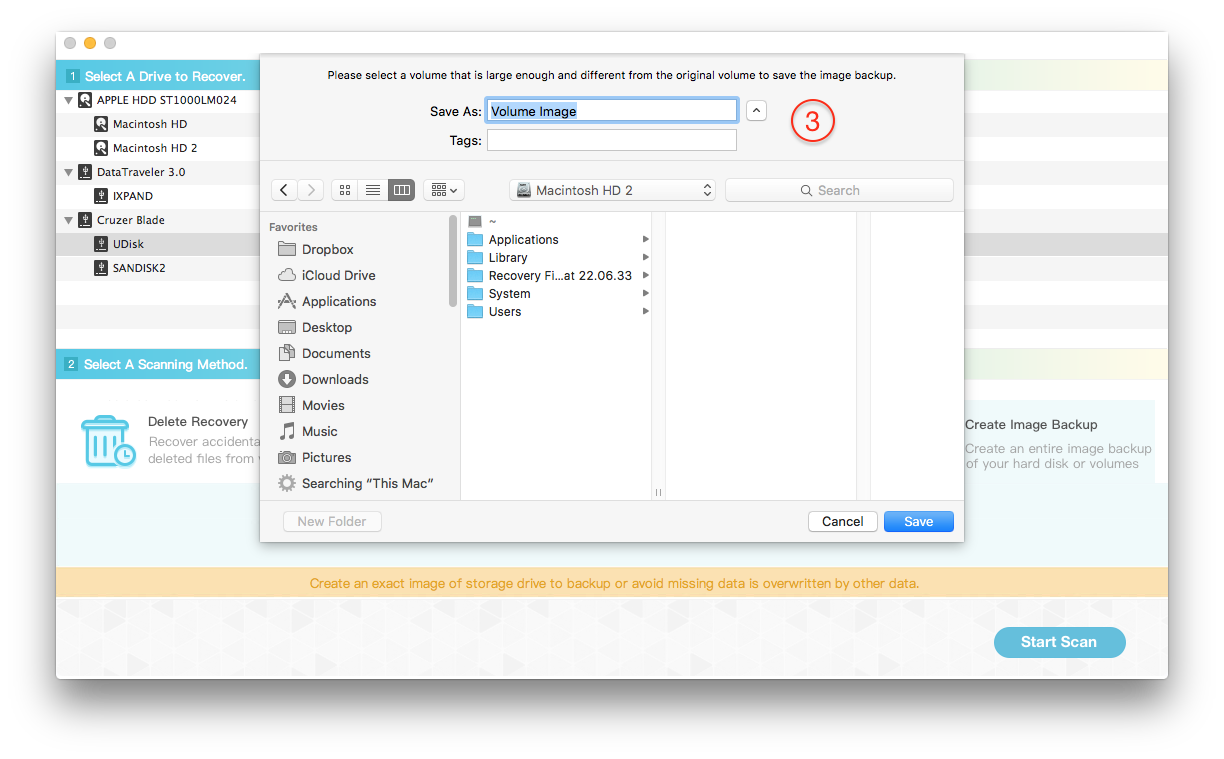
Step 4: After the backup process has completed, there will be a image backup in the save location.

Part 6: How to use Fireebok Data Recovery in macOS 10.13 and later
Since Apple released the new macOS system- High Sierra, and one of the important new feature is APFS (Apple File System). APFS will be new the new default file system. It will bring some heavy-duty security, including built‑in encryption, crash‑safe protections, and simplified data backup and more. Many data recovery apps can no longer access your startup disk directly.
Fortunately, Fireebok Data Recovery has solved this problem, it can scan your system startup disk or partition for the deleted files in the latest macOS High Sierra.
In order to recover lost data from your startup drive, Fireebok Data Recovery requires read-only access. To grant this level of access on macOS 10.13 and later, you need to disable file system protection. This is part of the System Integrity Protection module (SIP or “rootless”) introduced in macOS El Capitan and substantially severed in High Sierra.
Partially disabling SIP is absolutely safe! Once you are done with data recovery, you can re-enable it.
Step #1: Reboot your Mac
Click the menu on your Mac and select Restart.
Step #2: Boot into macOS Recovery Mode
Hold down Command + R on your keyboard immediately after your Mac begins to restart. Continue holding both keys until you see the Apple logo or a spinning globe. Startup is complete when you see the Utilities window.

Step #3: Run Terminal app
Click the Utilities menu and choose Terminal. The Terminal window will appear on your screen.

Step #4: Disable file system protection
In the "Terminal" window, type in "csrutil disable" and press "enter" then restart your Mac.

Run Fireebok Data Recovery in macOS High Sierra
After restart your Mac, run Fireebok Data Recovery. It will list the startup disk and partition, connected external disks and USB device. It support the five scan modes: Deleted Recovery, Deep Recovery, Volume Recovery, Lost Volumes Recovery, Create Image Backup. Here we use the Deleted Recovery to recover the deleted data from system volume -- Macintosh HD.
Launch the program and Select the Macintosh HD volume

Have more questions or need help from us?
Contact our support team here.

