Download iPhone Recovery below to have a try. Note: Choose the right version for your computer.
Part 1: How to Restore Data Directly from iPhone 3GS ~ iPhone 14 Pro Max
Part 2: How to Recover iPhone Data from iTunes Backup
Part 3: How to Retrieve iPhone Data from iCloud Backup
Part 4: How to Restore iPhone third party app data
Part 5: How to Recover deleted information with Hex Preview
Part 6: How to Activate Fone Rescue
Part 1: How to Restore Data from iPhone 3GS ~ iPhone 14 Pro Max
Step 1: Launch the program and connect your iPhone to computer.
Choose "Recover from iOS Device" and it will scan your iPhone automatically. This process may take some time, please be patient.
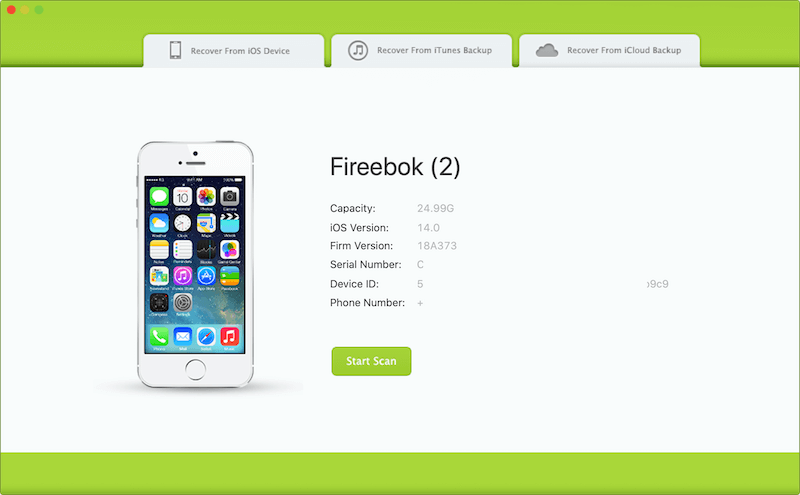
Step 2: Preview and restore lost data from iPhone
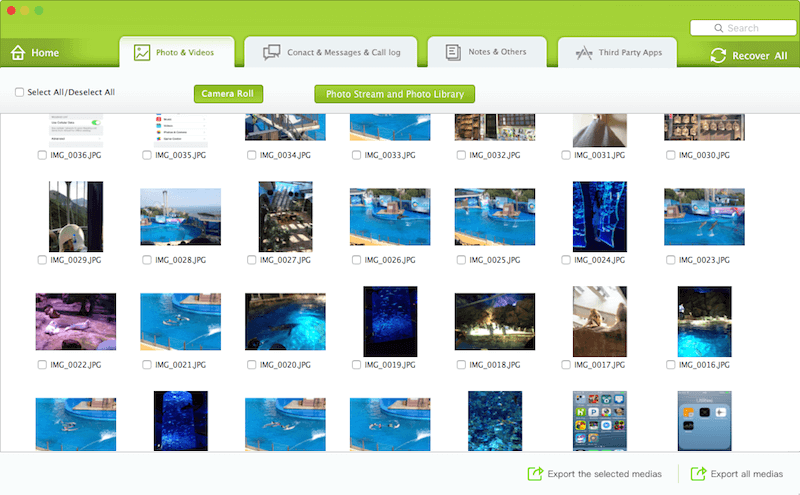
After scanning, you will find all found data will be showed below. You can choose a tab to preview the detailed of your data. To view only the deleted files, you can check the button "Only display deleted files" in red box below. Just choose the data you want to recover and click "Recover" button to save them on your computer.
Download iPhone Recovery below to have a try. Note: Choose the right version for your computer.
Part 2: How to Recover iPhone Data from iTunes Backup
Step 1: Launch the program and choose "Recover from iTunes Backup File"
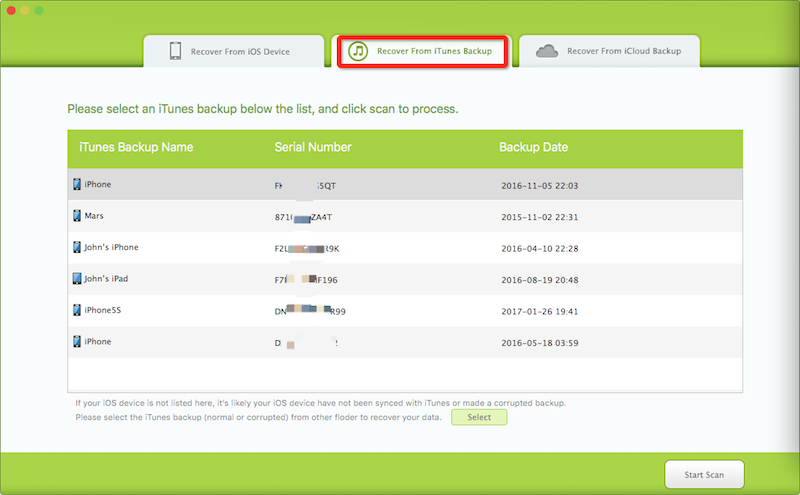
All your iTunes backup files have been found and displayed. Select one for your iPhone and click "Start Scan" button.
Step 2: Preview and restore iPhones data
After scanning, you will find all found data will be showed below. You can any tab to preview the detailed of your files. To view only the deleted files, you can check the button "Only display deleted files" in red box below. Just choose those data you want and click "Recover" button to save them on your computer.

Download iPhone Recovery below to have a try. Note: Choose the right version for your computer.
Part 3: How to Retrieve iPhone Data from iCloud Backup
Step 1: Launch the program and choose "Recover from iCloud Backup"
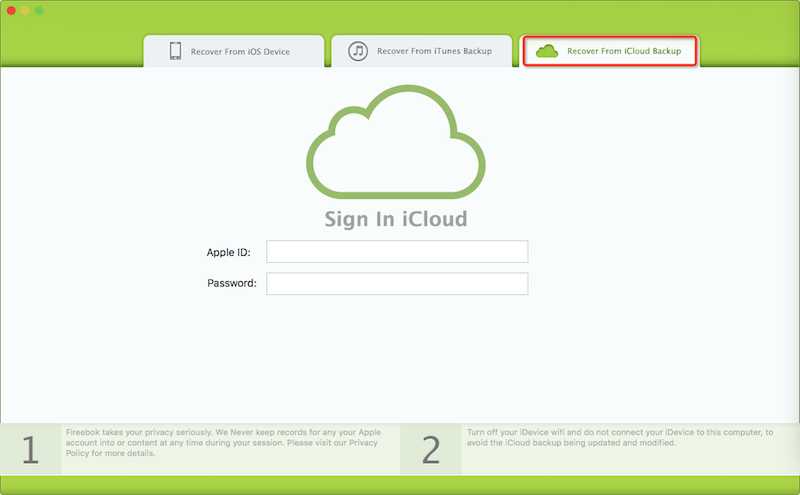
All your iCloud backups have been found and displayed. Select one for your iPhone and click "Start Download" button.
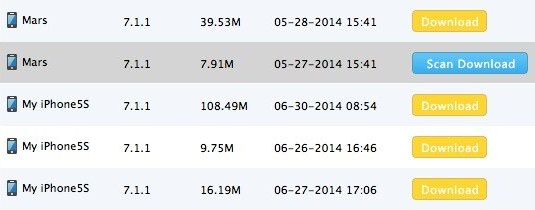
Step 2: Preview and restore iPhones data
After scanning, you will find all found data will be showed below. You can choose any tab to preview the detailed of your data. To view only the deleted files, you can check the button "Only display deleted files" in red box below. Just choose those data you want and click "Recover" button to save them on your computer.

Finally, sync recovered files to your device
1. Photos/Videos: Sync to your iPhone with iTunes;
2. Contacts: Open up Address Book which will sync your contacts automatically, then sync with iTunes;
3. Notes: Enable Notes for an email account, then sync with Notes app. (requires OS X 10.8 Mountain Lion), click here learn more;
4. Other data can only be saved on your computer.
Part 4: How to Recover iPhone third Party Apps data
Fireebok Fone Rescue can not only restore deleted contacts, notes, messages, photos and other iOS system application data, it also supports the recovery of third party App data, such as WhatsApp, Viber, Kik etc.. When you use the above three recovery mode, after the end of the scanning, click Third Party Apps tab.
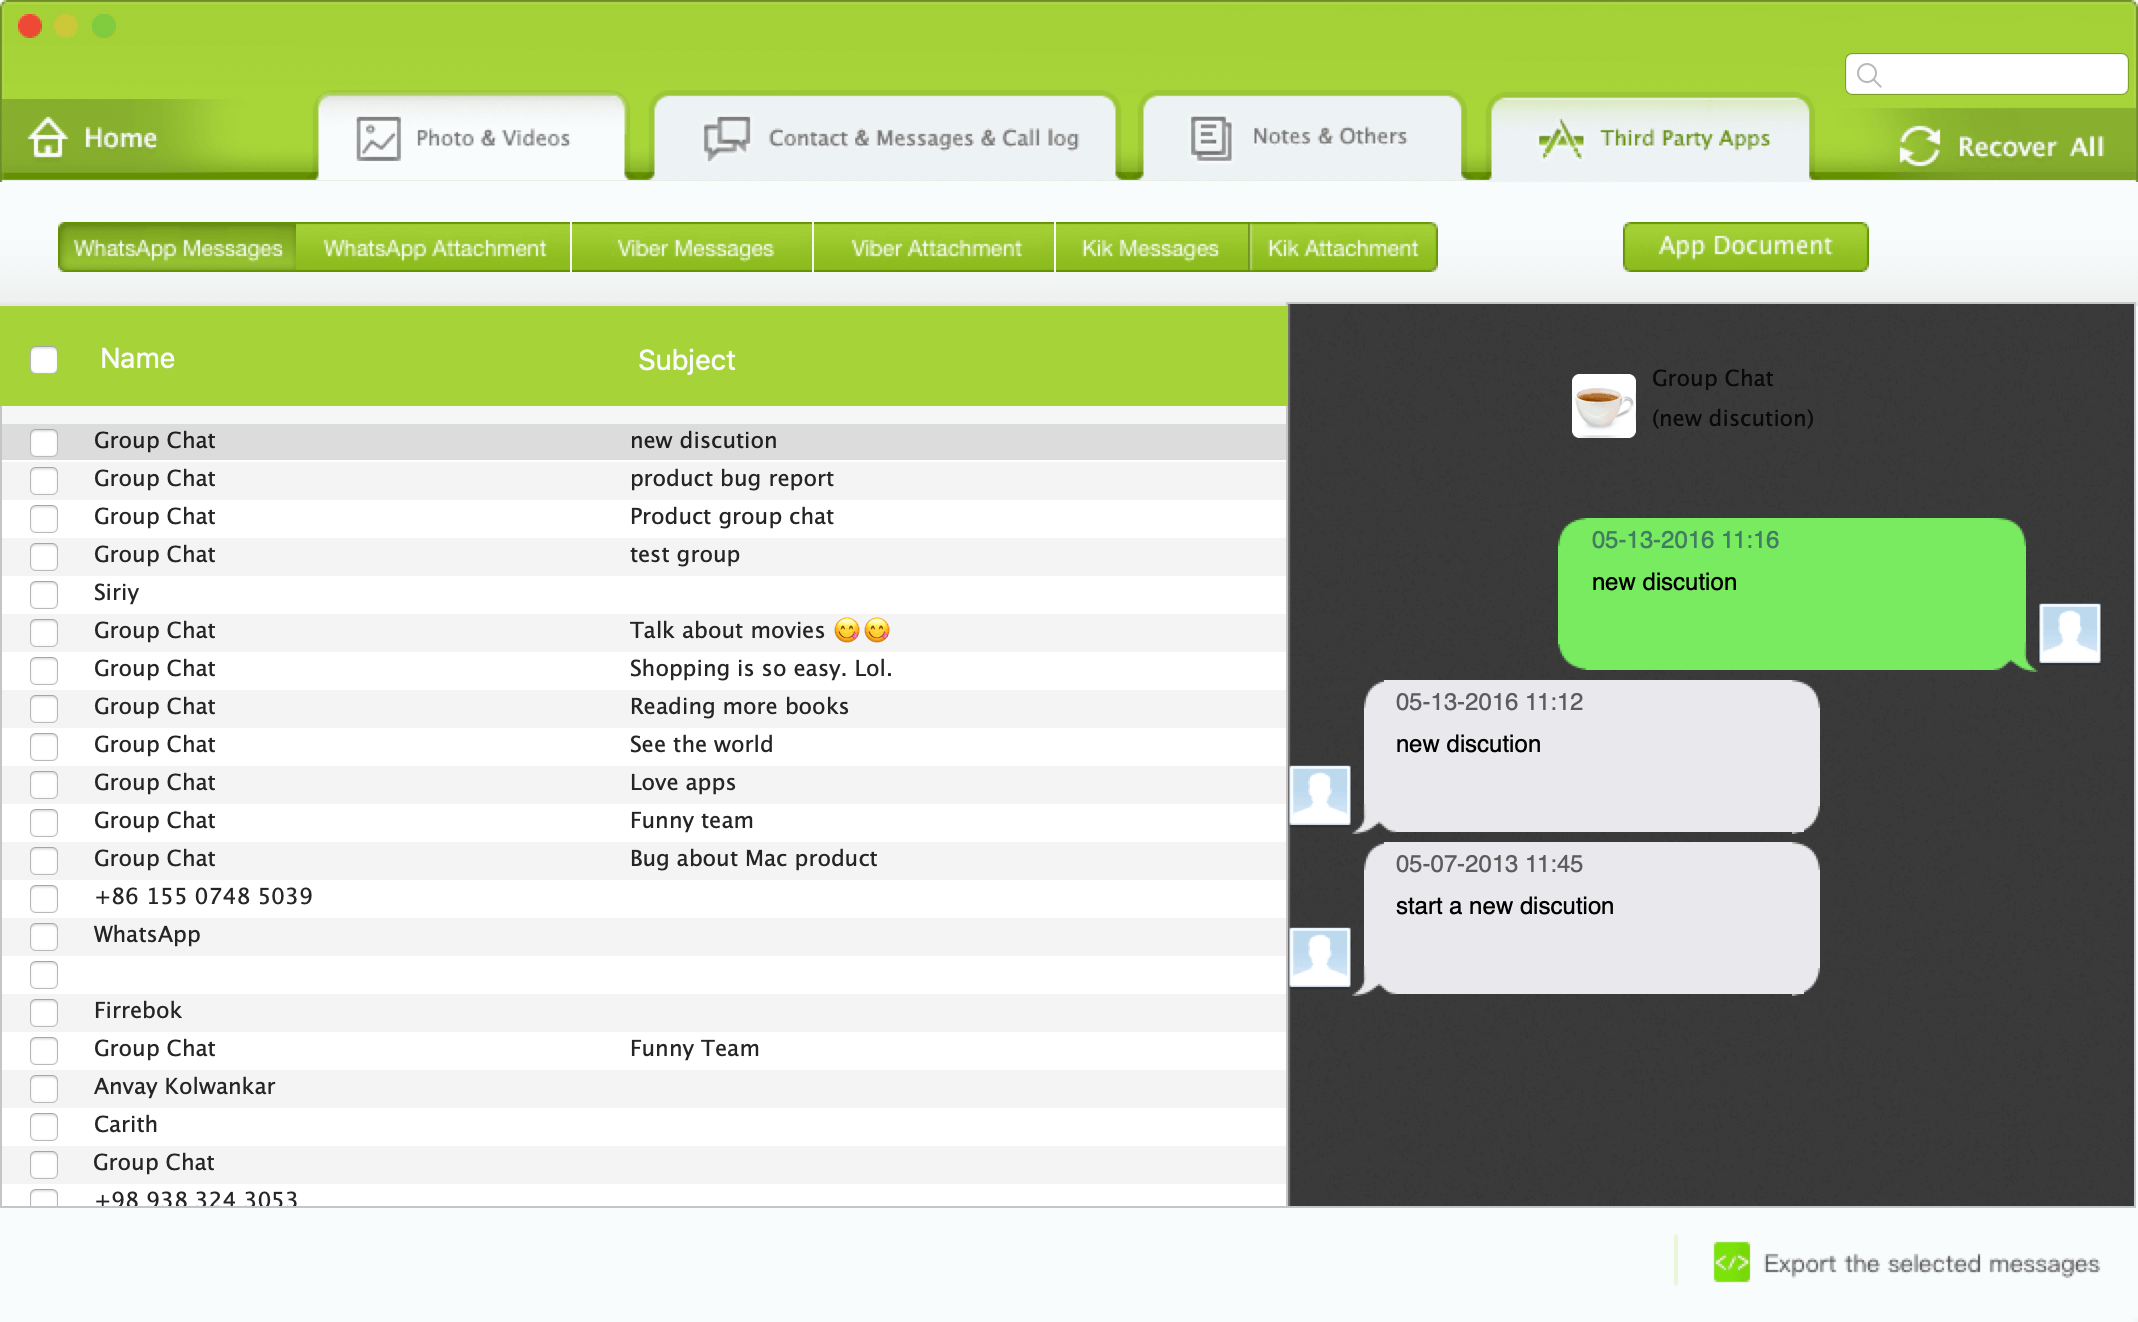
Click Viber messages, Viber Attachments to view and recover your Viber Chat message and attachments files.
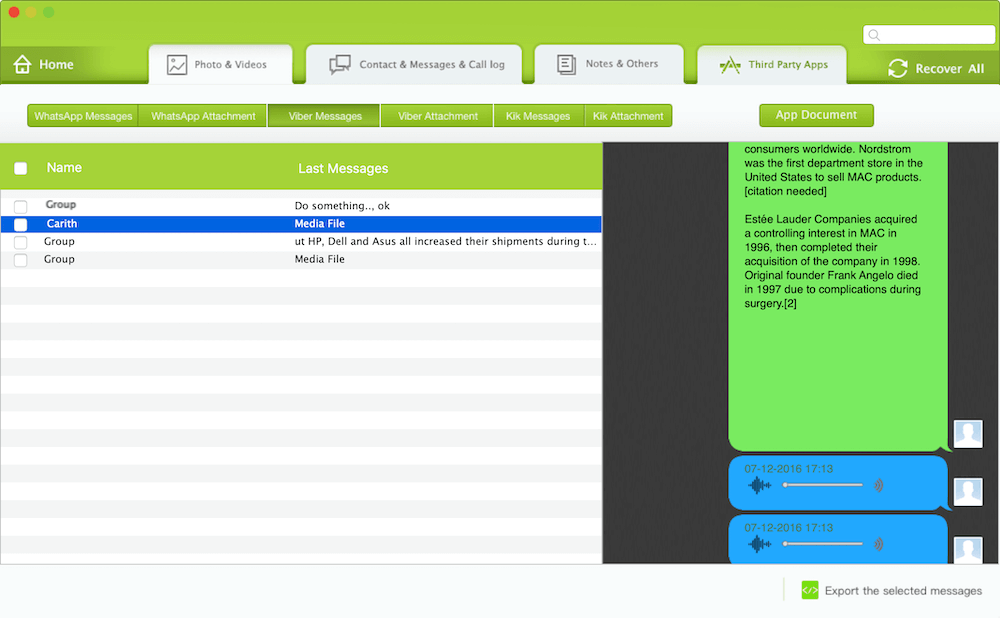
Click Kik messages, Kik Attachments to view and recover all Kik Chat message and attachments files from the iPhone and backup.
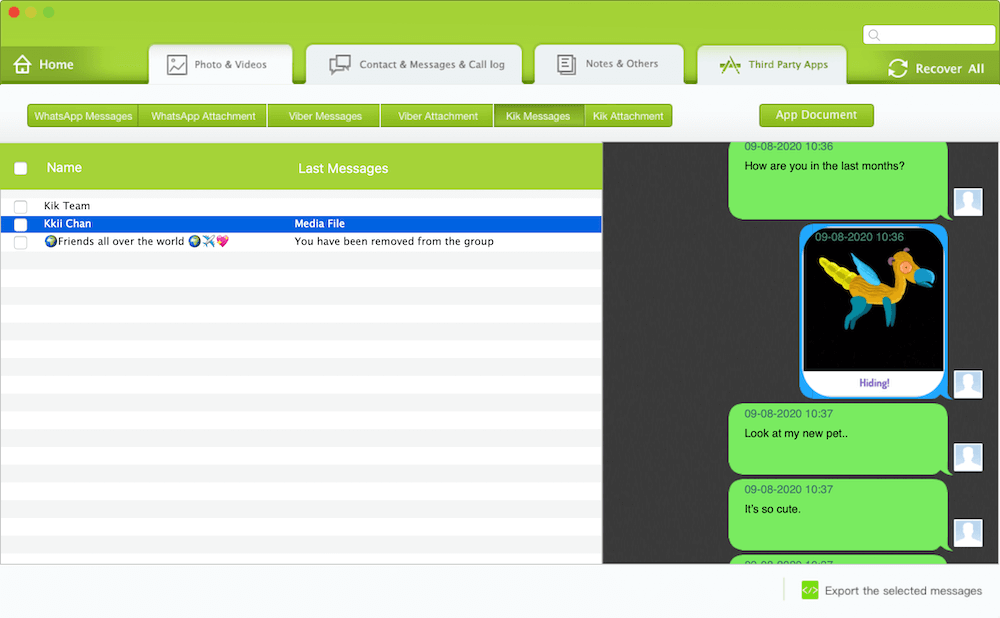
And you can also extract and recover other third party app data from App Document tab.

Part 5: How to Recover deleted information with Hex Preview
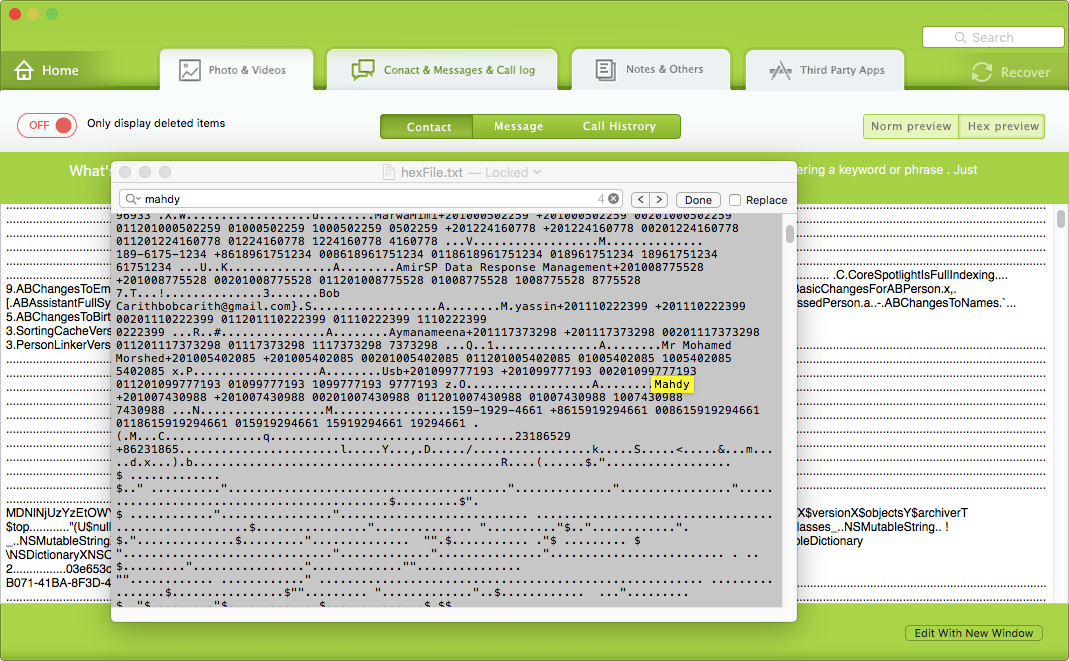
There are two mode to preview all the record information, such as Contact, Text Message/iMessages, Call History, Notes, Reminder and more. After the scanning has completed, our product display the Normal Preview by default, which closer to the original preview on the iPhone, and more convenient to view. As the normal preview will filter to a lot of information fragmentation which can not match, so it does not show the most comprehensive data. So if you want recover some deleted information and remember a few key words about them, Hex Preview will help you.
It's very simple to use Hex Preview. After the scanning has completed, the Normal preview and Hex preview button display on the top of right side. Click Hex Preview button to change to the hex preview mode.

After switching to this mode, all record data will be converted into the hexadecimal data display. It looks a bit messy, but it doesn't affect what we want to find.
1. Create a new blank file with TextEdit
2. Press “Command + F” to search deleted information by key words. You can search a few simple character or part of name in Hex preview, it will match more results.
3. When you find the right information, choose to copy the whole block of information content, and then paste it into the new document file 4. Press “Command + G” to find next block about this key words, or “Command +F” to search new key words.
Part 6: How to Activate Fone Rescue
The demo version of Fone Rescue ssupports free scanning and previewing. But the demo version can't preview all the message content and can't save chat messages and media files to the computer. So if you need use these features, you need to activate Fone Rescue. In the view of the results after completing the scan, you will find the "Activate Now" button in the upper right corner. When you click it, there will be a pop-up window to enter your license email and code, if you don't have a license, you'll need to purchase a Fone Rescue license on the store page.
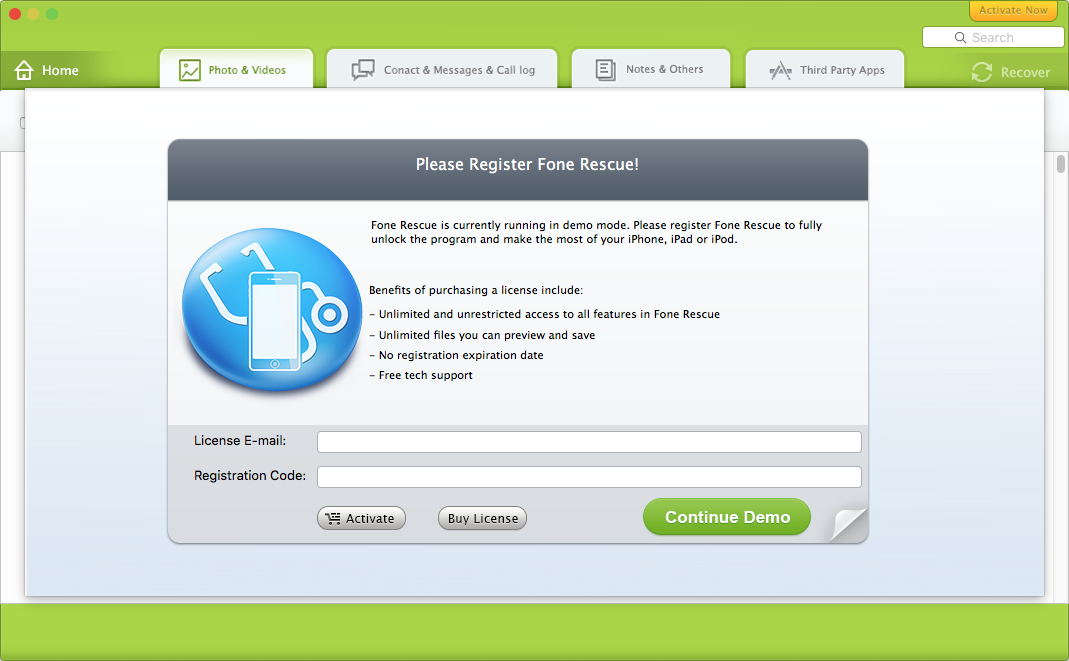
After entering the license email and code, please click the "Activate" button to complete the registration. After success, the "Activate Now" button on the top right corner will disappear and you can save and recover all the scan result data without any limitation.
Have more questions or need help from us?
Contact our support team here.

