As a Mac user, when you want to remove files, you typically move them to the Trash. However, you may encounter issues where you can't empty the Trash due to various error messages. Common errors include:
• The operation can’t be completed because the item is in use.
• The emptying process gets stuck and never finishes.
• Other similar warning messages preventing deletion.
If you’re looking for effective ways to fix Trash-related issues on Mac, this guide will help you resolve them.
Understanding the Mac Trash System
When you move files or folders to the Trash, they are stored in a hidden .Trash folder. Each disk drive connected to your Mac—including external USB drives—has its own Trash folder. When you empty the Trash, all .Trash folders across connected drives, including the startup disk and external storage, are cleared.
Sometimes, the error preventing you from emptying the Trash comes from an external USB drive rather than the startup disk. Identifying which file or folder is causing the issue is key to resolving the problem.
Solutions to Fix Trash Emptying Issues
1. Show Hidden Files
In some cases, the Trash appears empty, but you still get a warning message when trying to empty it. This may be due to hidden files or folders inside the Trash folder.
To reveal hidden files, press Command (⌘) + Shift + Period (.) on your keyboard. Alternatively, use the Terminal app (/Applications/Utilities/Terminal) and enter the following command:
defaults write com.apple.finder AppleShowAllFiles TRUE; killall Finder
This will display all hidden files in Finder.

2. Check Connected USB Hard Drives
If you're using an external USB hard drive, the issue may be caused by files inside the Trash folder of that drive. Check the Trash folder in /Volumes/~/.Trash to see if any files cannot be removed.
One common issue is that Time Machine backup folders inside the Trash folder may be locked or restricted, preventing deletion.
3. Force Quit Applications Using the File
Some applications may still be using the files in the Trash, preventing their removal. To close these applications:
1. Open Activity Monitor (/Applications/Utilities/Activity Monitor).
2. Look for processes that may be using the files in the Trash. Select the process and click Quit.
3. If the issue persists, try quitting and relaunching Finder in Activity Monitor.

4. Identify the Source of the Trash Files
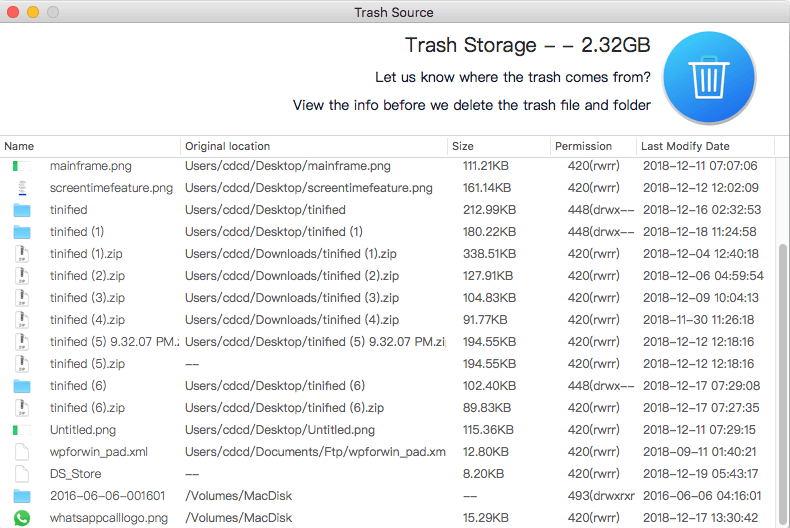
If you know the original location of the files in the Trash, it may help in troubleshooting. If you don’t remember, you can use a third-party app like Better Trash to locate the source of deleted files.
1. Download and install Better Trash.
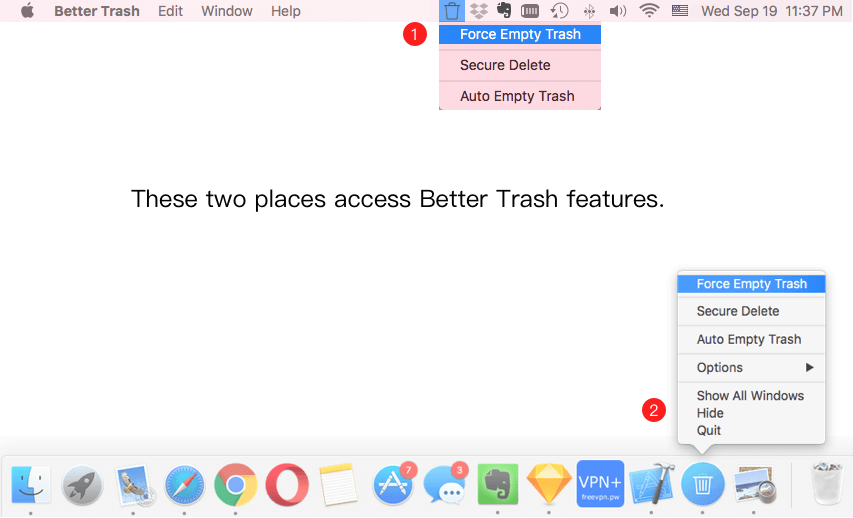
2. Click on the Better Trash menu bar icon.
3. Select View Trash Source to see the file paths of items before they were moved to the Trash.
5. Force Empty Trash with Better Trash
If Finder cannot remove certain files, Better Trash also provides a powerful force empty function to process and delete junk files and folders that cannot be emptied.
1. Open Better Trash from the menu bar.
2. Select Force Empty Trash to remove files that Finder couldn’t delete.

About Fireebok Studio
Our article content is to provide solutions to solve the technical issue when we are using iPhone, macOS, WhatsApp and more. If you are interested in the content, you can subscribe to us. And We also develop some high quality applications to provide fully integrated solutions to handle more complex problems. They are free trials and you can access download center to download them at any time.
| Popular Articles & Tips You May Like | ||||
 |
 |
 |
||
| Five ways to recover lost iPhone data | How to reduce WhatsApp storage on iPhone | How to Clean up Your iOS and Boost Your Device's Performance | ||