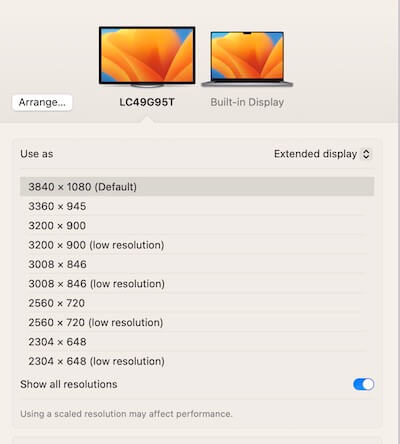
Many Mac users connect a 4K or 5K display to their Mac as an external display that works fine, but after upgrading to macOS Ventura, choose Apple menu -> System Settings, then click Displays in the sidebar, the external display resolution menu only has a low resolution option and everything looks small. We’ve collected the reasons for Mac External display issues, tips for fixing them.

Mac computers can use an HDMI cable or adapter to connect to a TV, display, or other HDMI device. Different Mac models and adapters support different HDMI ports, you need to check the compatibility of Mac models and adapters.
For Mac mini introduced in 2012 through 2014, Mac Pro introduced in 2013, MacBook Pro introduced in 2012 through 2015: You can connect a display with a resolution up to 4K at 30Hz to the HDMI port.
For Mac Studio introduced in 2022, Mac mini introduced in 2018 or later, Mac Pro introduced in 2019, MacBook Pro introduced in 2021 or later: You can connect a display with a resolution up to 4K at 60Hz to the HDMI port.
For MacBook Pro introduced in 2023, Mac mini (2023 with M2 Pro): You can connect a display with a resolution up to 4K at 240Hz or 8K at 60Hz to the HDMI port.
1. Replace with an Apple USB-C Digital AV Multiport Adapter
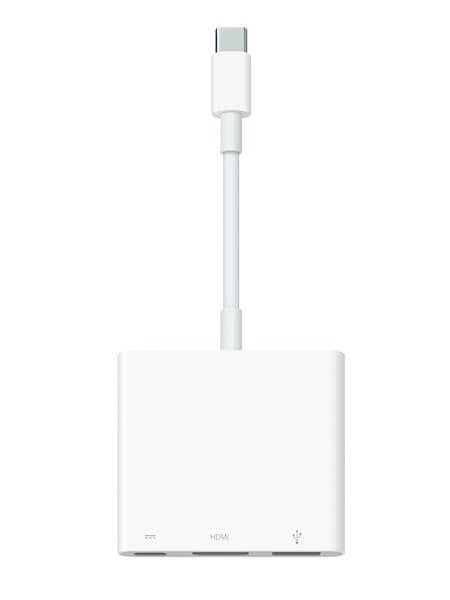
Some third-party Adapters aren't supported for these resolutions and refresh rates in macOS Ventura, please change to an Apple USB-C Digital AV Multiport Adapter to connect the display. https://www.apple.com/shop/product/MUF82AM/A/usb-c-digital-av-multiport-adapter

2. Disconnect the Monitor from a dock or USB-C hub
If you're using a docking station or USB-C hub to connect an external display, please disconnect it. If your Mac has an HDMI port, connect an external display directly to your Mac for best results. If your Mac has a Thunderbolt 4, Thunderbolt 3, or USB-C port, use an Apple USB-C Digital AV Multiport Adapter to connect to HDMI. Because some USB-C hubs and docking stations don't work on macOS Ventura.
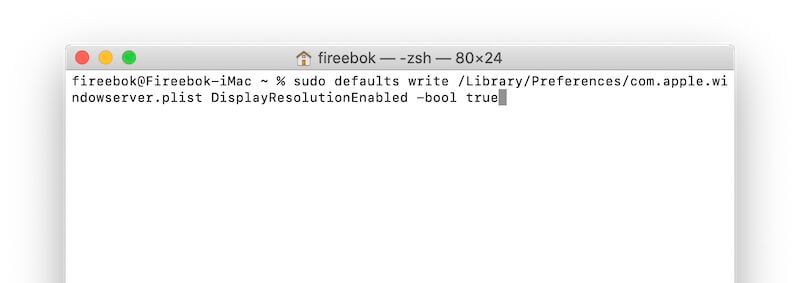
3. Use Terminal command to enable more Display resolutions
Open Terminal.app(/Applications/Utilities), and then paste or type this following command in Terminal: “sudo defaults write /Library/Preferences/com.apple.windowserver.plist DisplayResolutionEnabled -bool true”, then press Return and enter password. Restart the Mac, you will find the the resolutions with HiDPI enabled in System Settings -> Display.

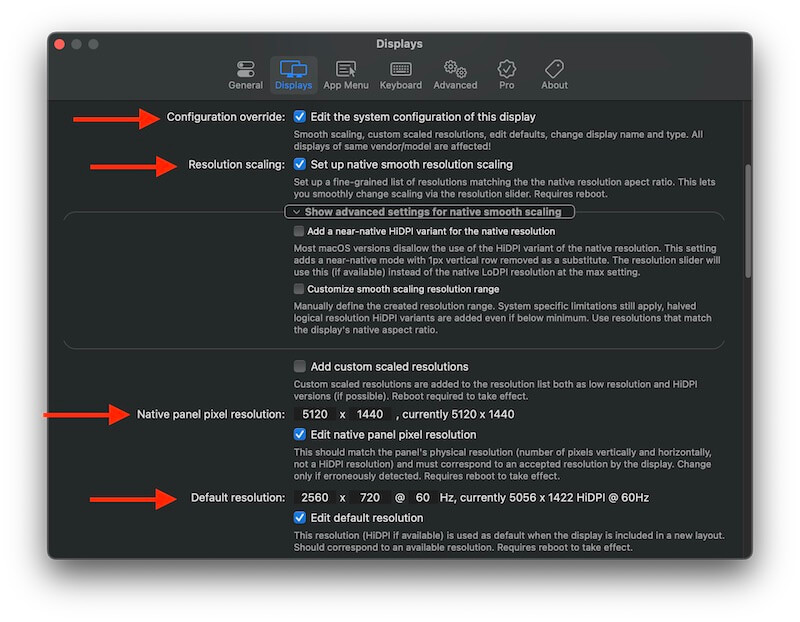
4. Use Better Display app to adjust display
Better Display is a free third-party application which provides a feature to edit and change default resolution and resolution scaling. You can download and have a try.

| More Related Articles | ||||
 |
1. How to find and remove duplicate photos from Photos? 2. How to batch rename photos within the Photos app on Mac? |
|||
About Fireebok Studio
Our article content is to provide solutions to solve the technical issue when we are using iPhone, macOS, WhatsApp and more. If you are interested in the content, you can subscribe to us. And We also develop some high quality applications to provide fully integrated solutions to handle more complex problems. They are free trials and you can access download center to download them at any time.
| Popular Articles & Tips You May Like | ||||
 |
 |
 |
||
| Five ways to recover lost iPhone data | How to reduce WhatsApp storage on iPhone | How to Clean up Your iOS and Boost Your Device's Performance | ||