Some iPhone users have encountered frustrating issues when they use Quick Start feature to transfer phone data from their previous iPhone to new iPhone, where the data transfer process is unexpectedly canceled for no reason. If you’re experiencing the same problem, there are several effective solutions to resolve it.
1. Verify Wi-Fi and Bluetooth Connectivity
Ensure that both your old and new iPhones have stable Wi-Fi connections and active Bluetooth, and keep your devices near each other and plugged in to power until the data migration process is complete.
2. Update Your New iPhone to the Latest iOS Version
Please update your new iPhone to the latest iOS version before attempting data transfer from your old phone. And tap Set Up Without Another Device option to activate and complete the setup process. Go to iPhone Settings -> General -> Software Update -> download and install latest iOS version.
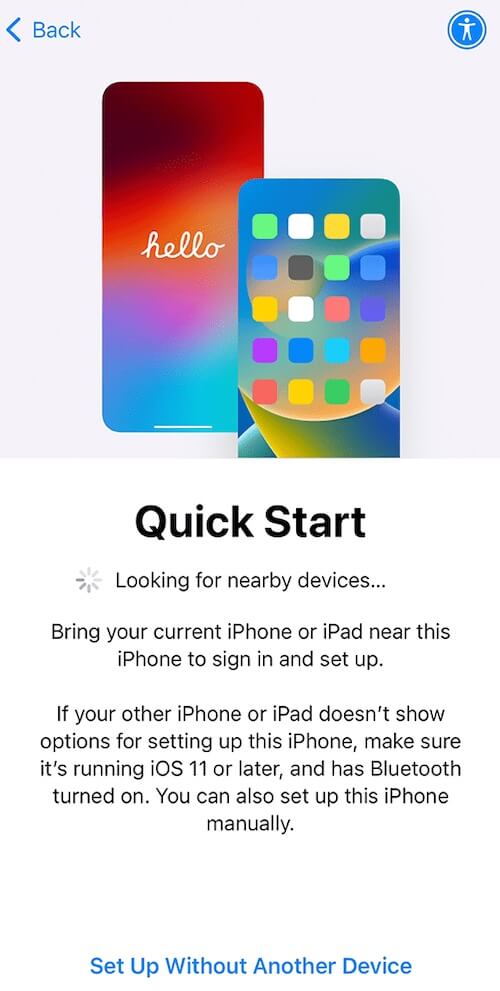
After installing the new iOS version, Go to Settings -> General -> Transfer or Reset [Device] -> Erase All Content and Settings, to erase and reset iPhone device. Then setup your iPhone and use Quick Start feature to transfer phone data again.
3. Restore from iCloud Backup
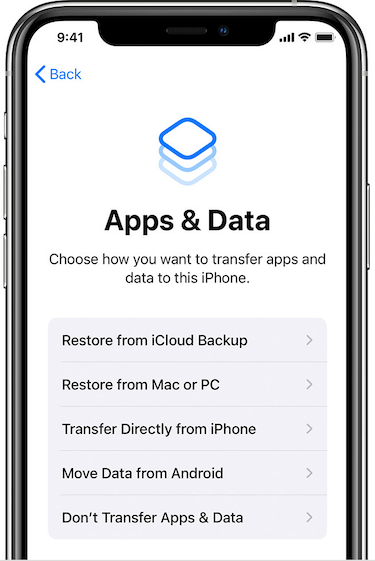
If you had backed up your old iPhone to iCloud and both iPhones are linked to the same iCloud account, you can restore data during the setup process. After connecting to Wi-Fi, follow the setup steps until you reach the Apps & Data screen. Choose "Restore from iCloud Backup", sign in to iCloud with your Apple ID and password, and select the desired backup to restore your data.
4. Restore from Local Computer Backup
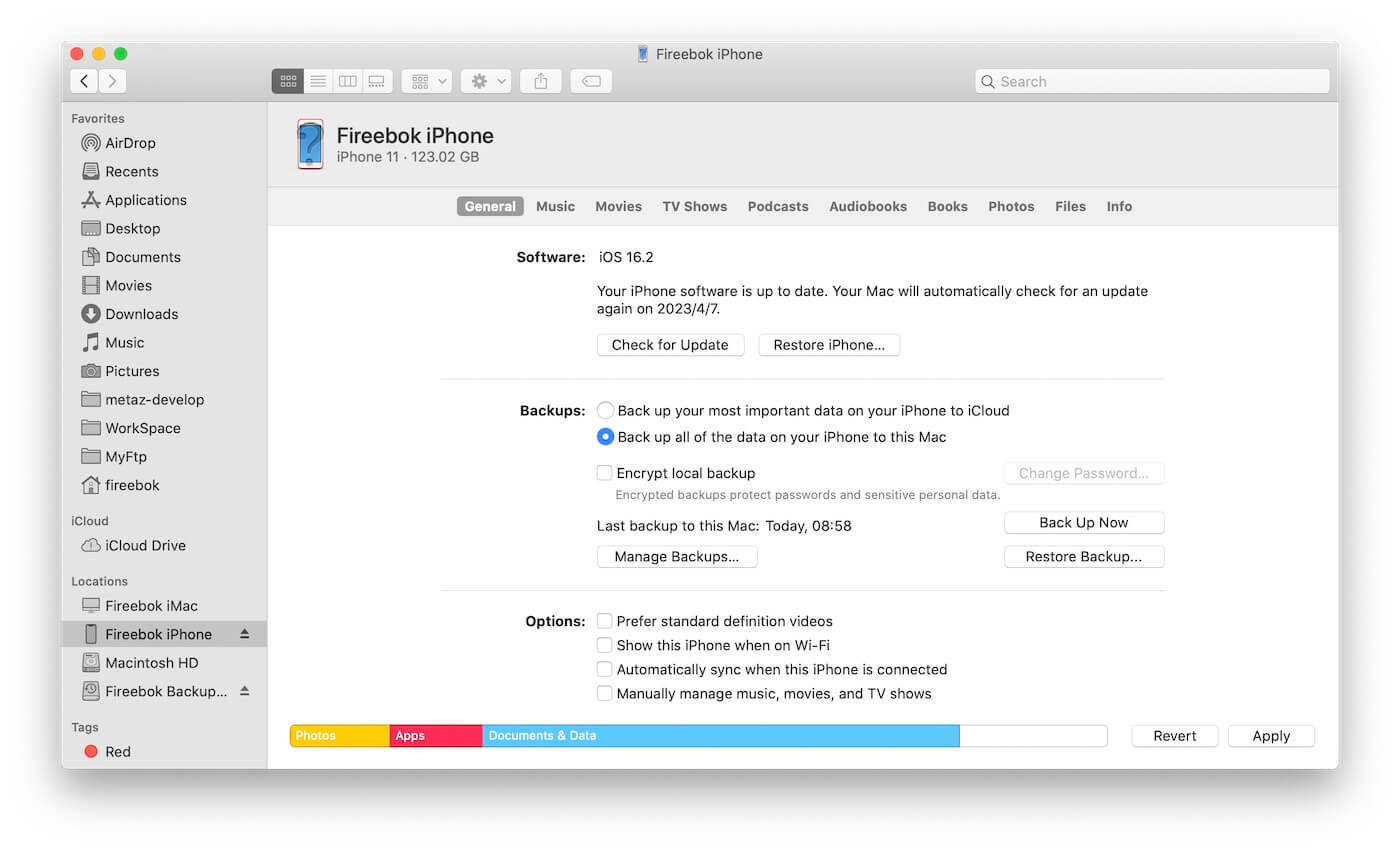
If your old iPhone was backed up using iTunes or Finder on your local computer, you can restore data from there. Connect your new iPhone to the computer and follow the setup steps until the Apps & Data screen appears. Select "Restore from Mac or PC" and choose the appropriate backup.
Alternatively, open iTunes or Finder, access the Summary or General page, and click on the "Restore Backup…" button to select the desired backup.
5. Manually Select Specific Data to Transfer
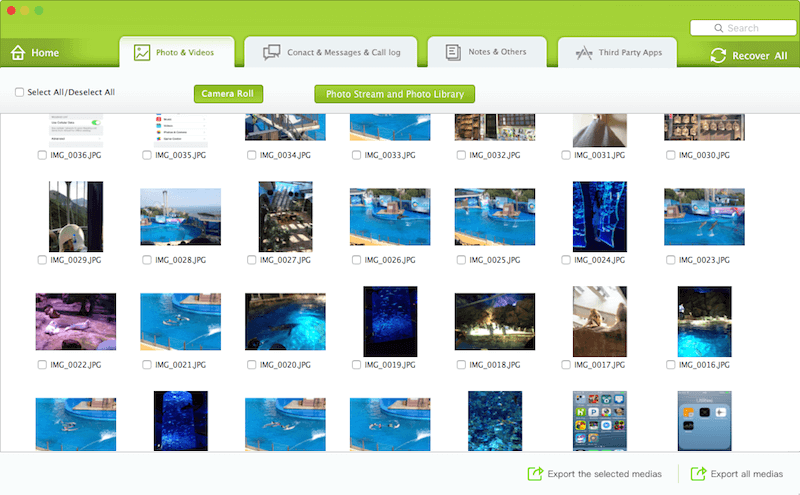
If you prefer not to transfer all data, you can manually select specific items to transfer, conserving storage space on your new iPhone. Here we recommend using Fone Rescue application, which supports extracting selected iPhone data from the iPhone device, iTunes or iCloud backup. Download and install Fone Rescue app on your local computer.
Launch the application, choose your iPhone device, iTunes, or iCloud backup, and initiate a scan. Once the scan is complete, you can selectively extract and save specific data such as photos, videos, contacts, messages, and more from your iPhone or backup.
About Fireebok Studio
Our article content is to provide solutions to solve the technical issue when we are using iPhone, macOS, WhatsApp and more. If you are interested in the content, you can subscribe to us. And We also develop some high quality applications to provide fully integrated solutions to handle more complex problems. They are free trials and you can access download center to download them at any time.
| Popular Articles & Tips You May Like | ||||
 |
 |
 |
||
| How to Recover Deleted Text Messages from Your iPhone | Top 6 reasons WhatsApp can’t backup | How to Clean up Your iOS and Boost Your Device's Performance | ||


