When your iPhone or Mac runs out of storage space, backing up photos and videos to an external hard drive can be a viable solution. While iCloud offers synchronization, it does not serve as a true backup option since deleting a photo on a device will also remove it from iCloud. Therefore, using external hard drives with ample storage space is still a popular choice among iPhone and Mac users.
There are several methods to back up photos from an iPhone or Mac to an external hard drive. It's important to organize these photos and videos with a proper album and folder structure and ensure that the original files, including all metadata, are preserved. The process differs slightly depending on whether iCloud Photos is enabled on your devices.
1. Backing Up Photos with iCloud Photos Disabled
On iPhone
To back up photos from an iPhone with iCloud Photos disabled:
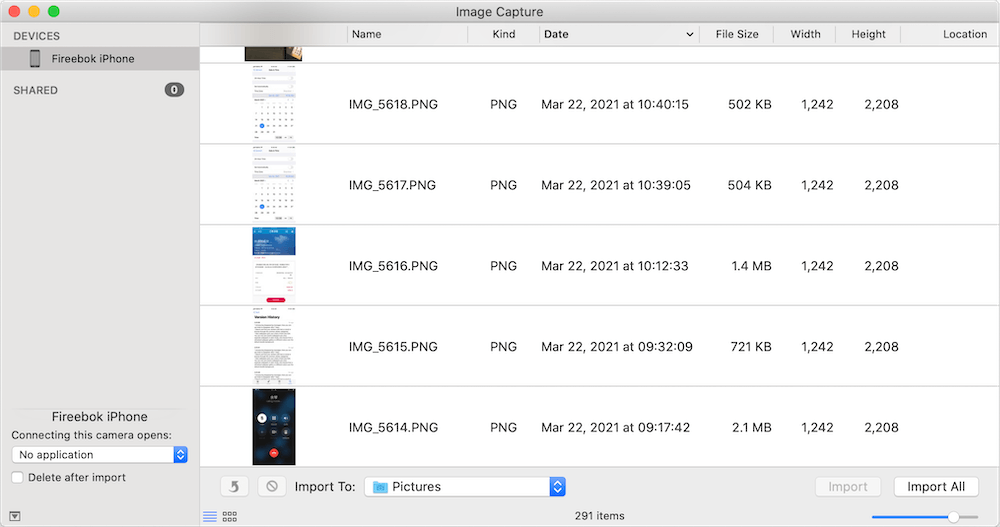
1. Connect your iPhone to a Mac using a USB cable. Open the Image Capture application (found in /Applications), a built-in macOS tool for transferring photos.
2. Unlock your iPhone screen. Select your iPhone icon in the sidebar in Image Capture app.
3. Click "Import To" and select the folder on your external hard drive as the destination. Download selected photos and videos or click "Download All" button to download all photos and videos.

If you use the Mac Photos application to manage all your iPhone photos, you need to first import them into the Mac Photos app. Once the photos are imported, select the desired photos within the app, and then export and back them up to an external hard drive.
2. Backing Up Photos with iCloud Photos Enabled
On iPhone and Mac
If iCloud Photos is enabled, all your photos and videos will sync across your iOS and Mac devices. To back up these photos:
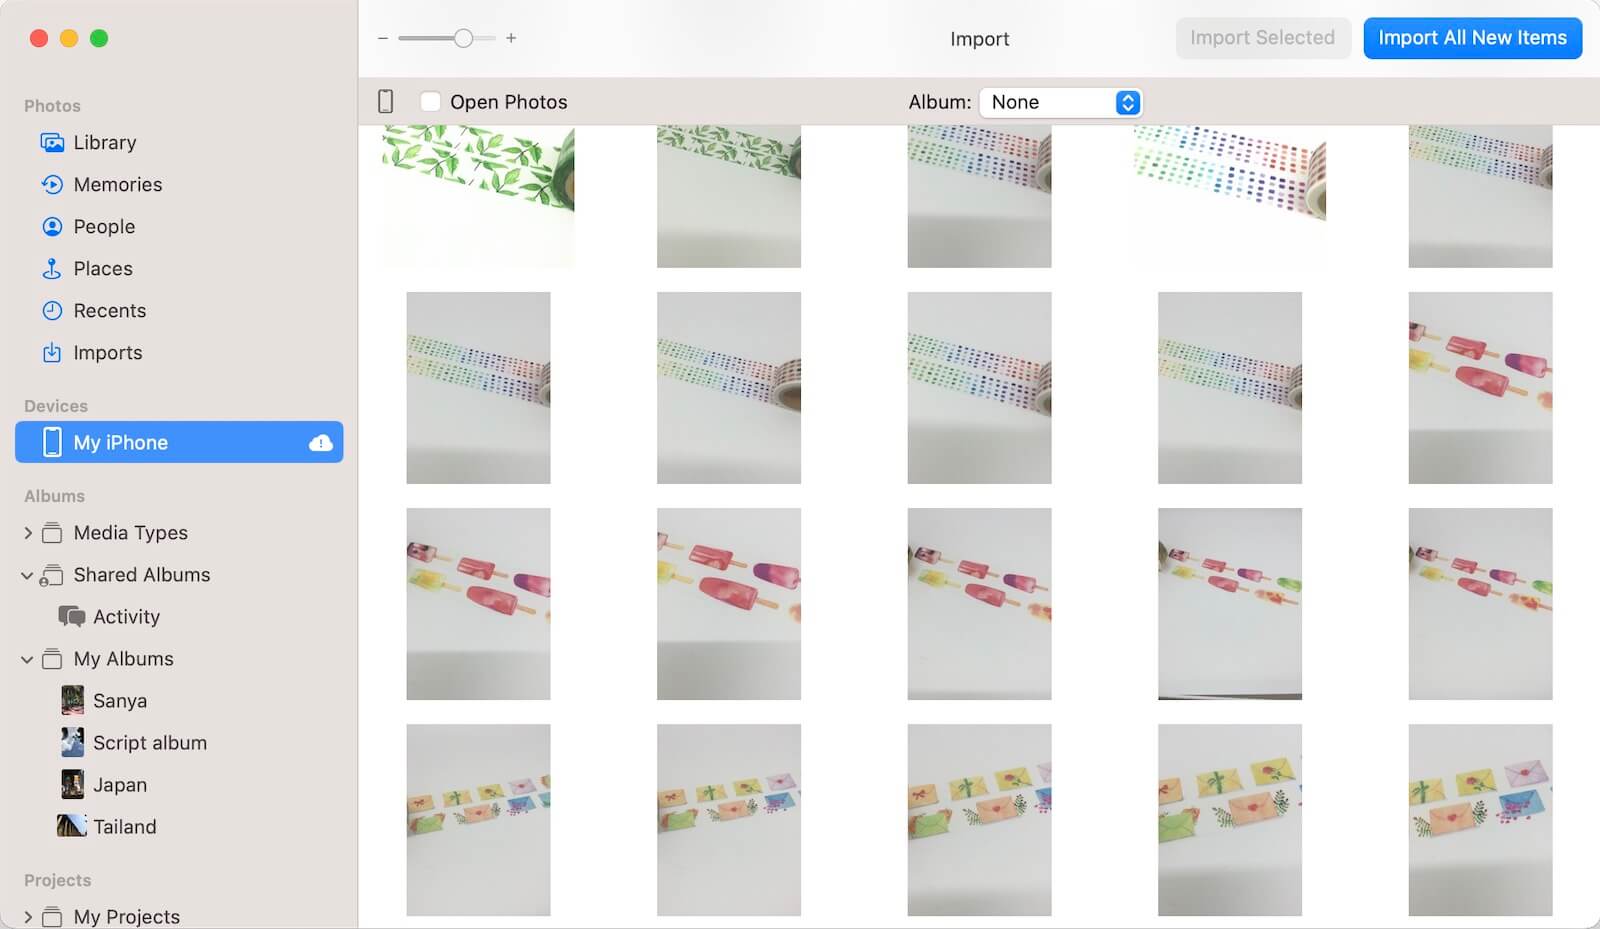
1. Open the Mac Photos app and select your iPhone icon. Click "Import All New Items" to import all photos and videos from your iPhone to the Mac Photos app.

2. In the Mac Photos app, select the photos and videos in the Library tab.
3. Go to the File menu -> Export -> Export Unmodified Originals. Choose your external hard drive folder as the backup location.

If your iCloud Photos haven't synced to the Mac Photos app: Download originals photos and videos directly from the iCloud website. Back up the downloaded photos to the external hard drive.
3. Backing Up Photos with Albums and Metadata
When exporting and backing up photos using Image Capture, Mac Photos, or other transfer applications, they may not include album structures and metadata. Additionally, the exported photos may have incorrect creation dates. To ensure the photos contain metadata and album structures:
Use a third-party application- Photo Exifer. It will help export photos and videos with metadata, maintaining album structures by year and month for better organization and management. Download and intall Photo Exifer application on your Mac.
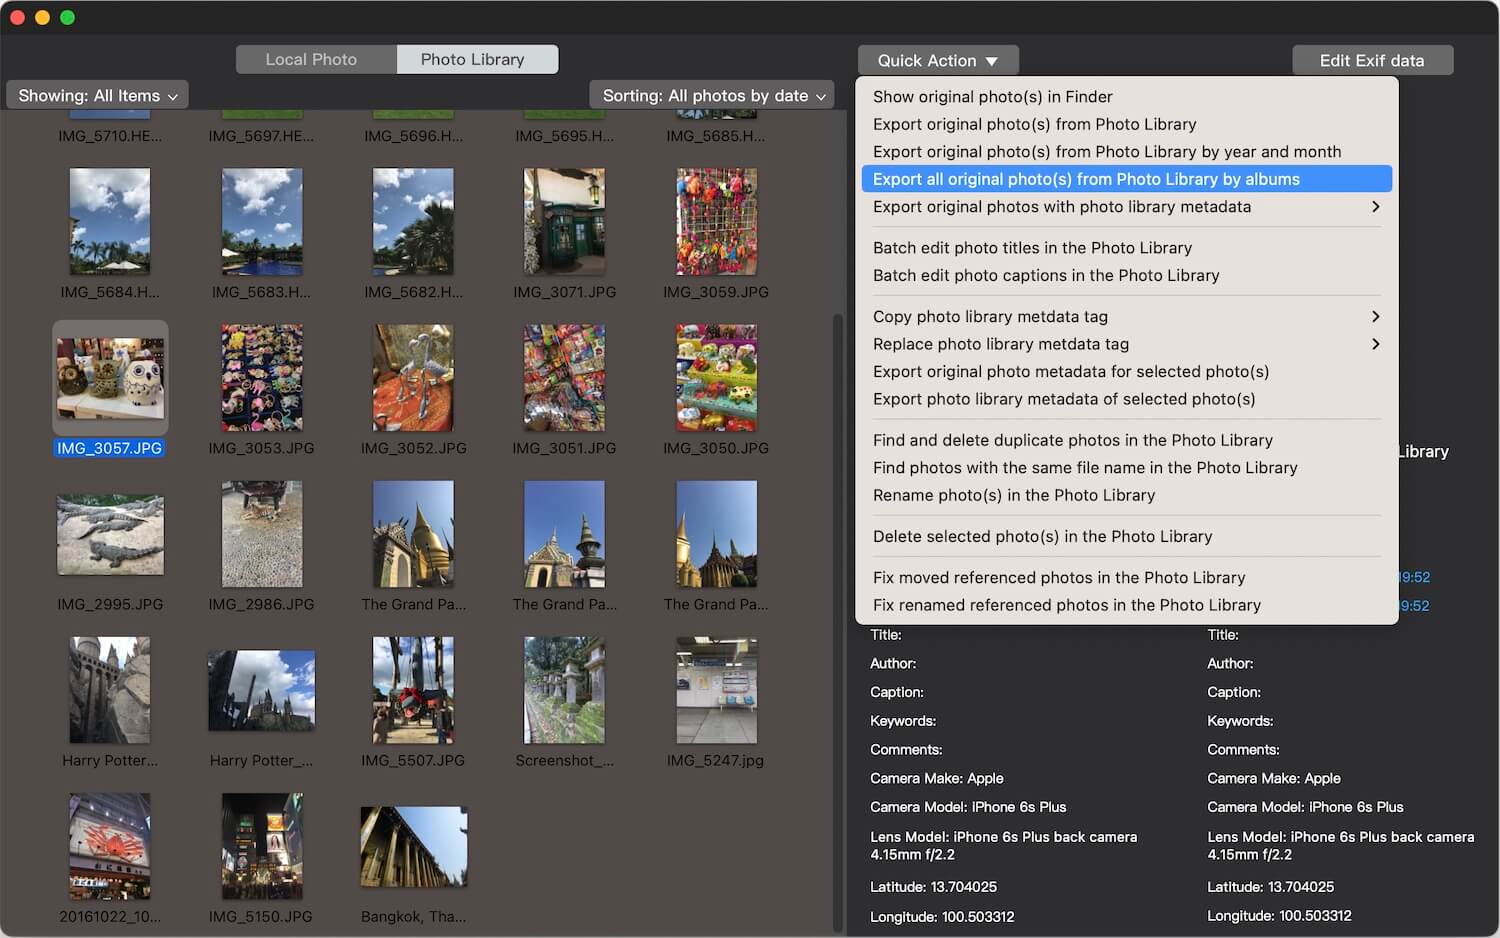
1. Open the Photo Exifer app and select Photo Library tab to load all photos and videos.
2. Select photos and videos and click Quick Action -> Export all original photo(s) from Photo Library by albums, or Export original photo(s) from Photo Library by year and month.

3. The exported photos will be saved in a folder structure organized by albums or by year and month.

About Fireebok Studio
Our article content is to provide solutions to solve the technical issue when we are using iPhone, macOS, WhatsApp and more. If you are interested in the content, you can subscribe to us. And We also develop some high quality applications to provide fully integrated solutions to handle more complex problems. They are free trials and you can access download center to download them at any time.
| Popular Articles & Tips You May Like | ||||
 |
 |
 |
||
| Five ways to recover lost iPhone data | How to reduce WhatsApp storage on iPhone | How to Clean up Your iOS and Boost Your Device's Performance | ||
