When you first use the Photos application on a Mac, it creates a photo library in the Pictures folder. This photo library stores and manages all imported and synced photos, videos, and photo information. Many Mac users plan to transfer their photo libraries to an external hard drive or a new Mac fro some reasons. This guide will explain how to correctly move and migrate your Mac Photos library, ensuring no photos or videos are lost and that the photo library structure remains intact.
1. Moving Your Photo Library to an External Hard Drive
Have you ever experienced your Mac running out of storage space? Upon checking, you may find that the Photos application is taking up a large portion of the space, possibly hundreds of gigabytes. To free up space, you can move your entire photo library to an external hard drive.
Prepare Your External Hard Drive:
1. Ensure the external hard drive is formatted as either APFS or Mac OS Extended (Journaled).

2. Do not store your photo library on the same external hard drive used for Time Machine backups.
Move and Open the Photos Library:
1. Drag the Photos Library to a location on your external storage device using Finder.
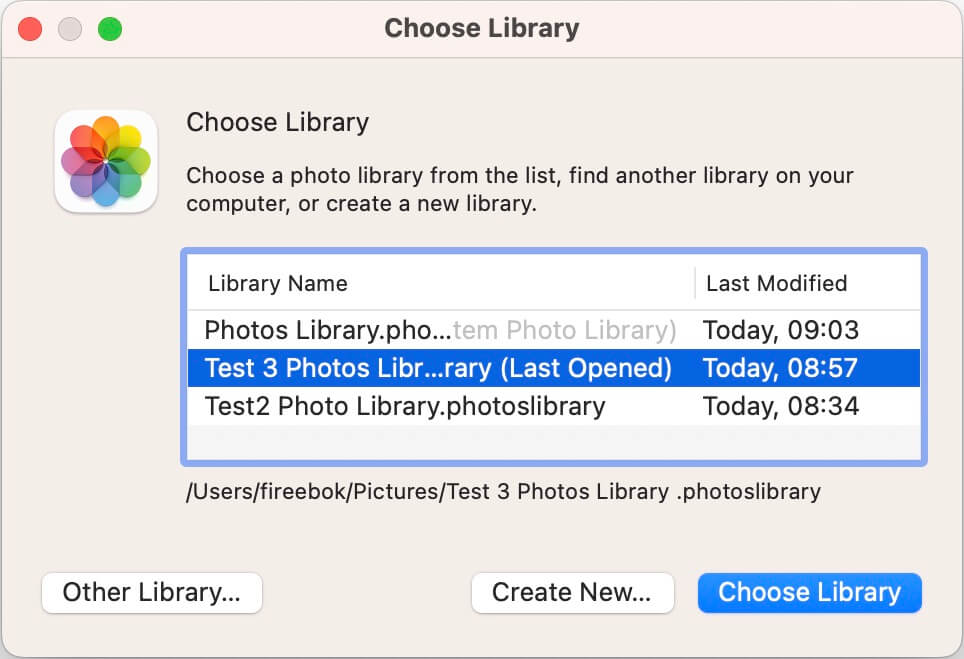
2. Once the move is complete, double-click the library to open it. If you encounter issues opening it, quit Photos, press and hold the Option key while opening Photos, select the library you want to open, then click Choose Library to open.
2. Migrating Your Photo Library to Another Mac
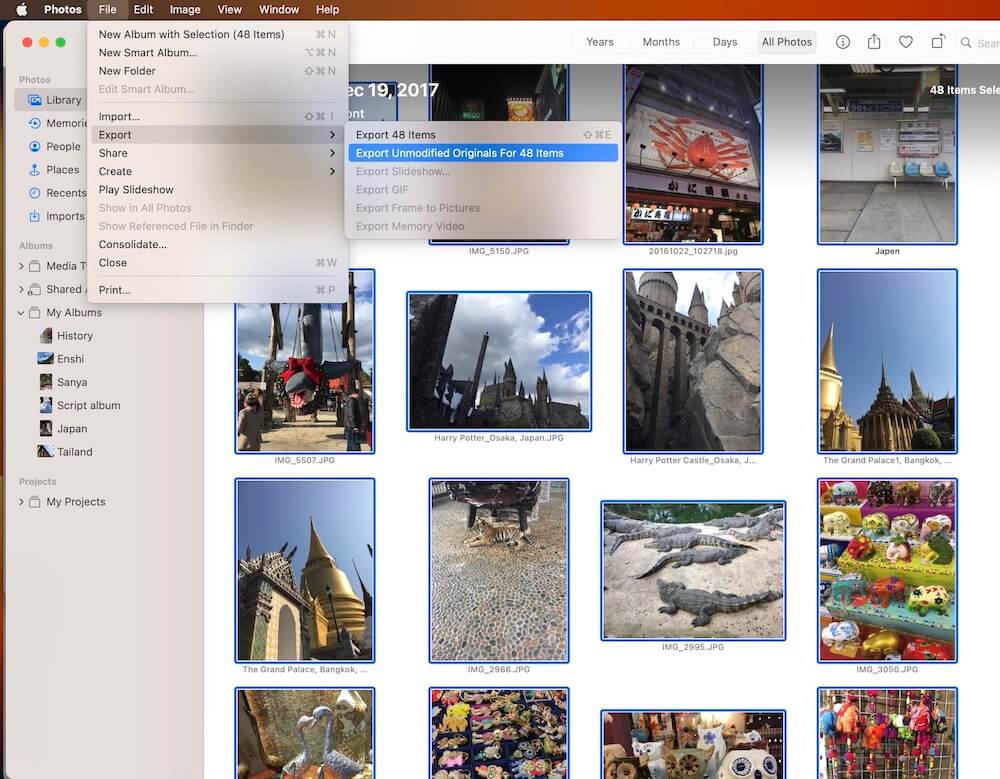
If you want to transfer your photo library to another Mac, you can keep both libraries and change the name of one to access them separately. However, this method is not ideal for syncing all photos and videos, especially if you have iCloud Photos enabled on your Mac. Instead, consider exporting all photos and videos from the old photo library and then importing them into the new photo library.
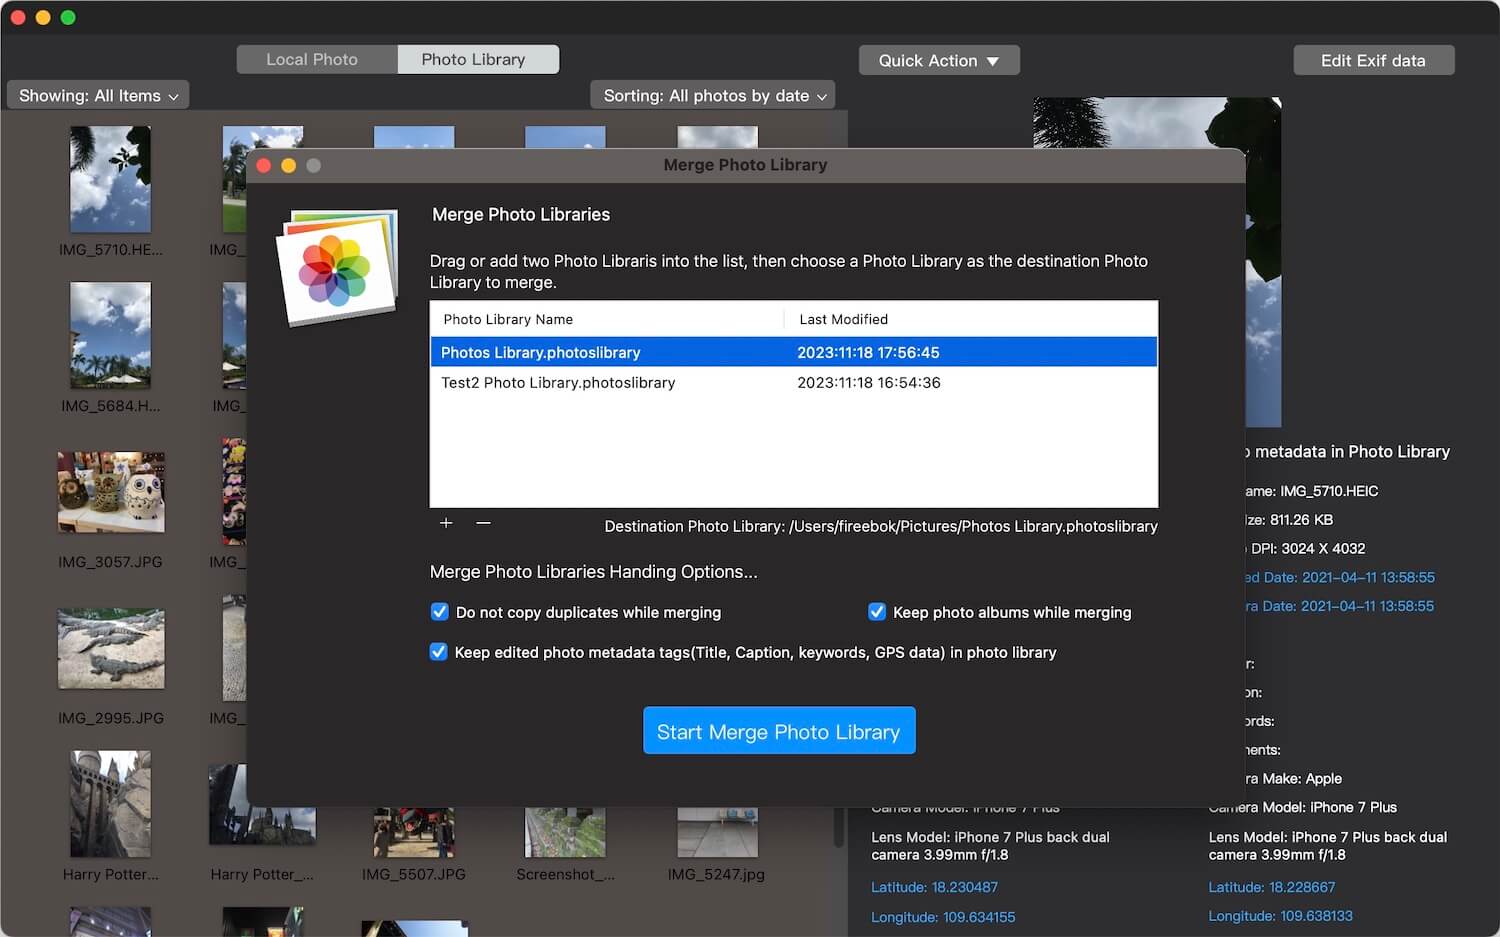
Alternatively, you can merge the old photo library with the new system photo library using the Photo Exifer application, a third-party app that preserves all photo metadata and album structures during the merging process. To do this, download and install the Photo Exifer app on your Mac.
Open Photo Exifer, go to the File menu, and select "Merge Photo Libraries...", click the + button to import the two different photo libraries. Select the system photo library as the destination. Click the "Start Merge Photo Library" button.
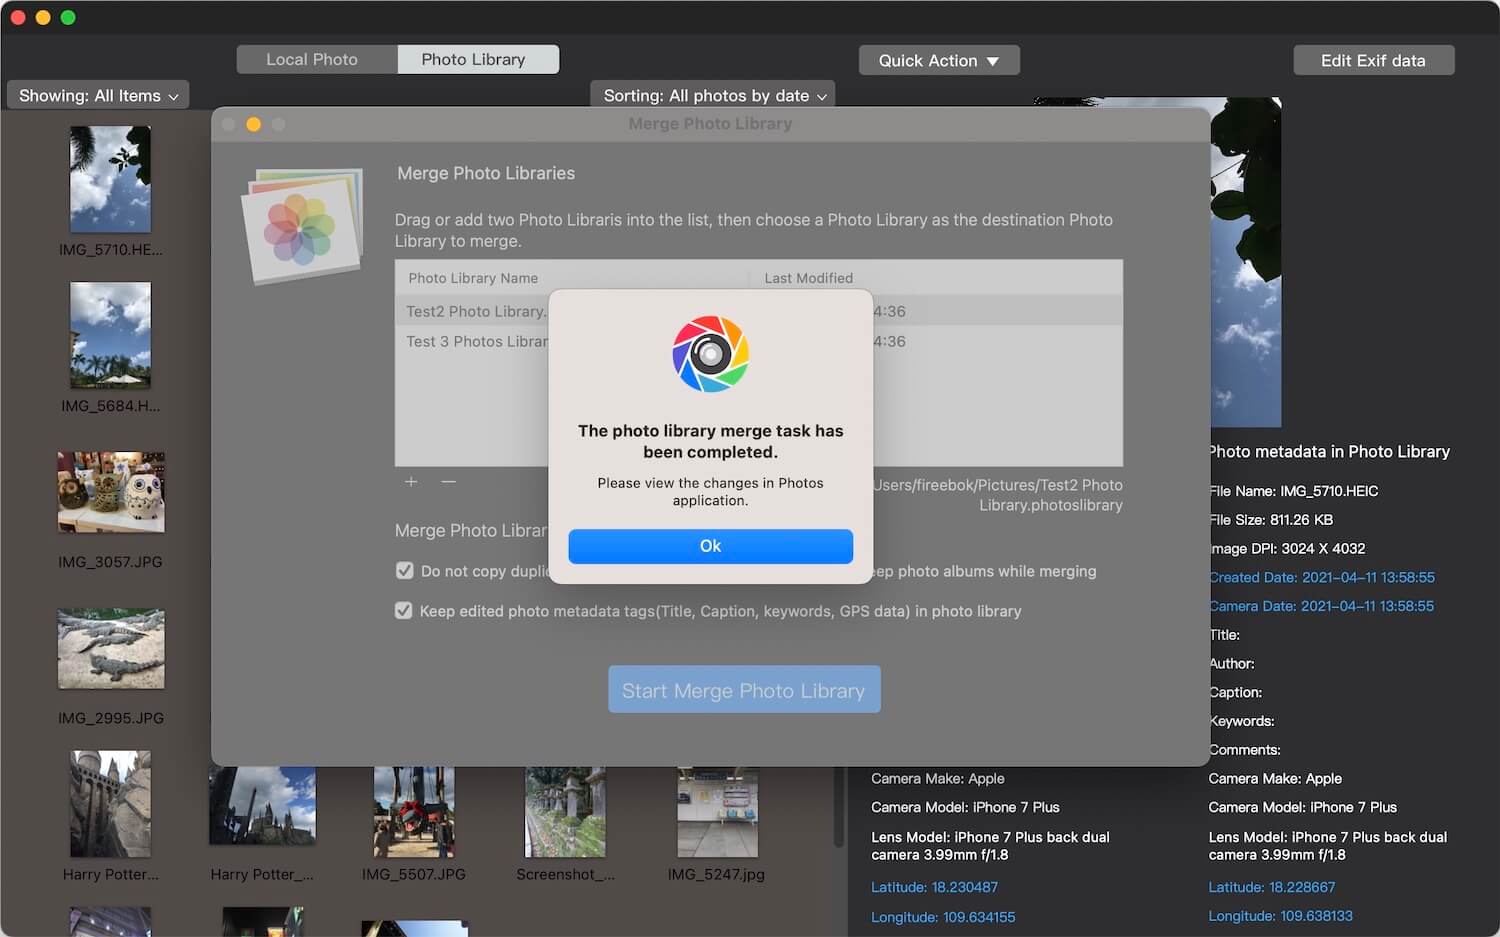
After the merge process is complete, open the system photo library to view and check your photos.

About Fireebok Studio
Our article content is to provide solutions to solve the technical issue when we are using iPhone, macOS, WhatsApp and more. If you are interested in the content, you can subscribe to us. And We also develop some high quality applications to provide fully integrated solutions to handle more complex problems. They are free trials and you can access download center to download them at any time.
| Popular Articles & Tips You May Like | ||||
 |
 |
 |
||
| Five ways to recover lost iPhone data | How to reduce WhatsApp storage on iPhone | How to Clean up Your iOS and Boost Your Device's Performance | ||