Hard drives have long been used for backing up or storing computer data. Over time, as we upgrade to new computers, we often keep old hard drives with important data. However, when we try to access these old drives, we may encounter issues such as the drive not mounting or being unable to locate important photos and documents. In this article, we will discuss how to recover data from an old hard drive on a Mac.
Older computer hard drives are often mechanical hard drives (HDDs), as opposed to the solid-state drives (SSDs) commonly found in modern computers. Mechanical hard drives contain moving parts, making them more prone to physical damage and data loss. Fortunately, recovering data from old HDDs can be easier than from SSDs. Here are some solutions:
1. Use macOS Disk Utility Tool
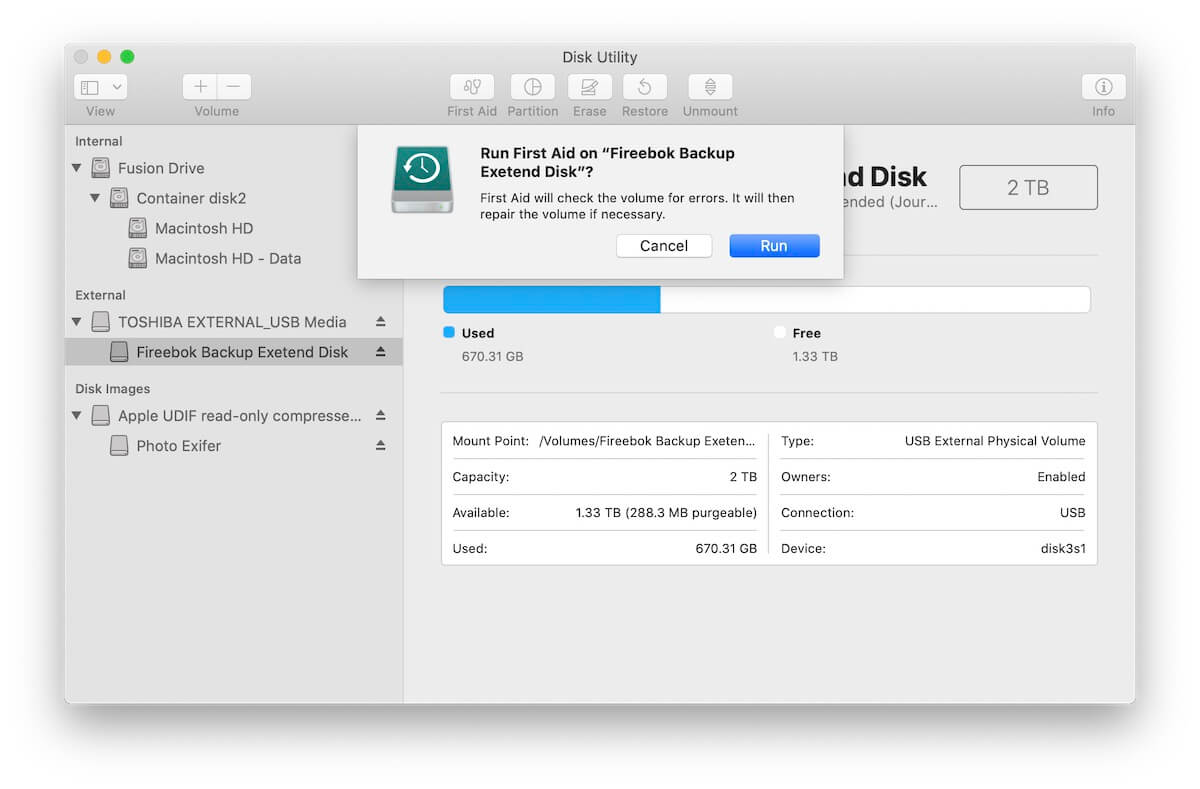
The First Aid feature in the macOS Disk Utility app can help examine and repair file system errors on your disk. If you cannot access the hard drive data due to file system errors, such as directory structure issues or bad sectors, you can use this tool.
Open the Disk Utility app, located in the Utilities folder within the Applications folder. Select your hard disk or partition. Click the "First Aid" button and confirm that you want to run it.

First Aid can fix some disk problems, but if your old Mac hard drive has lost data due to accidental deletion, formatting, physical damage, or severe corruption, First Aid will not be able to recover it. In such cases, you will need to use professional data recovery software.
2. Use Professional Data Recovery App
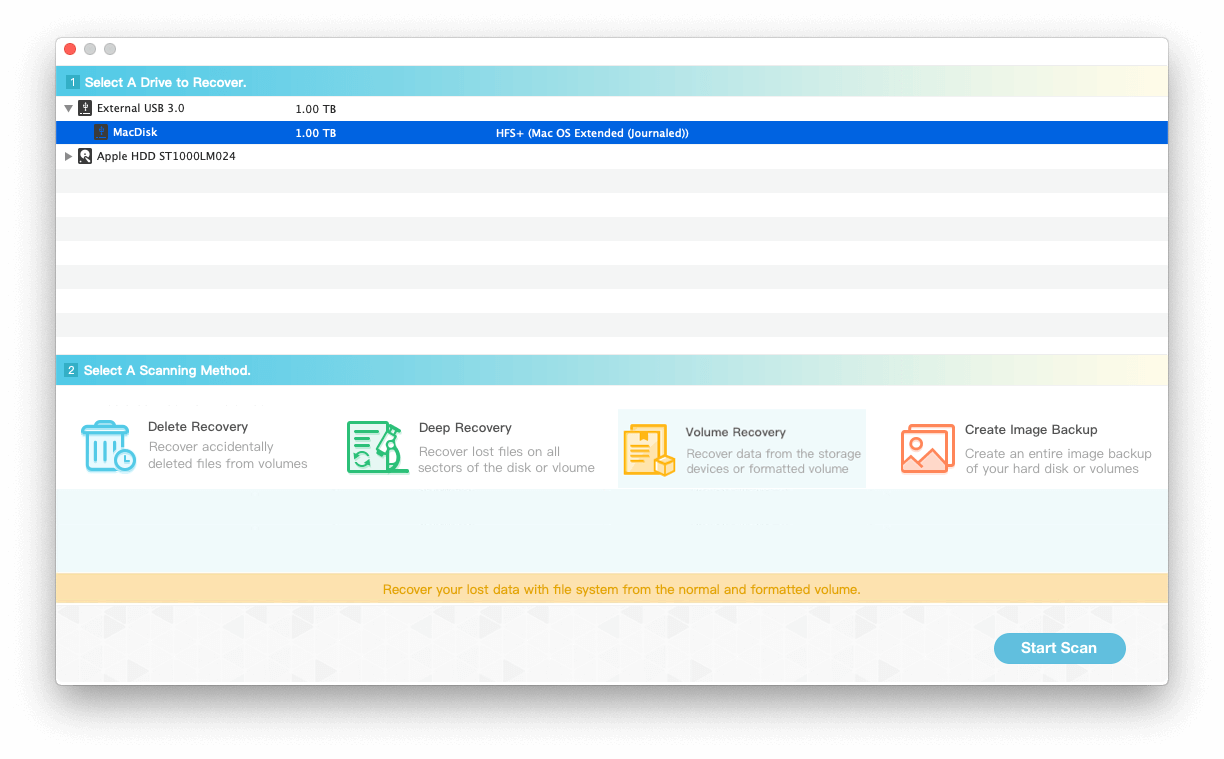
To recover data from an old hard drive, you need professional data recovery software that supports various disk brands and file system formats, such as FAT, EXFAT, NTFS, HFS+, and Mac OS Extended (Journaled). We recommend using Fireebok Data Recovery, which offers five recovery modes and supports nearly all file system formats. Follow these steps:
Download and install Fireebok Data Recovery on your Mac. Run the application and select your hard disk or partition. Choose a recovery mode (Deleted Recovery, Deep Recovery, Volume Recovery, Lost Volume Recovery) and click the "Start Scan" button.

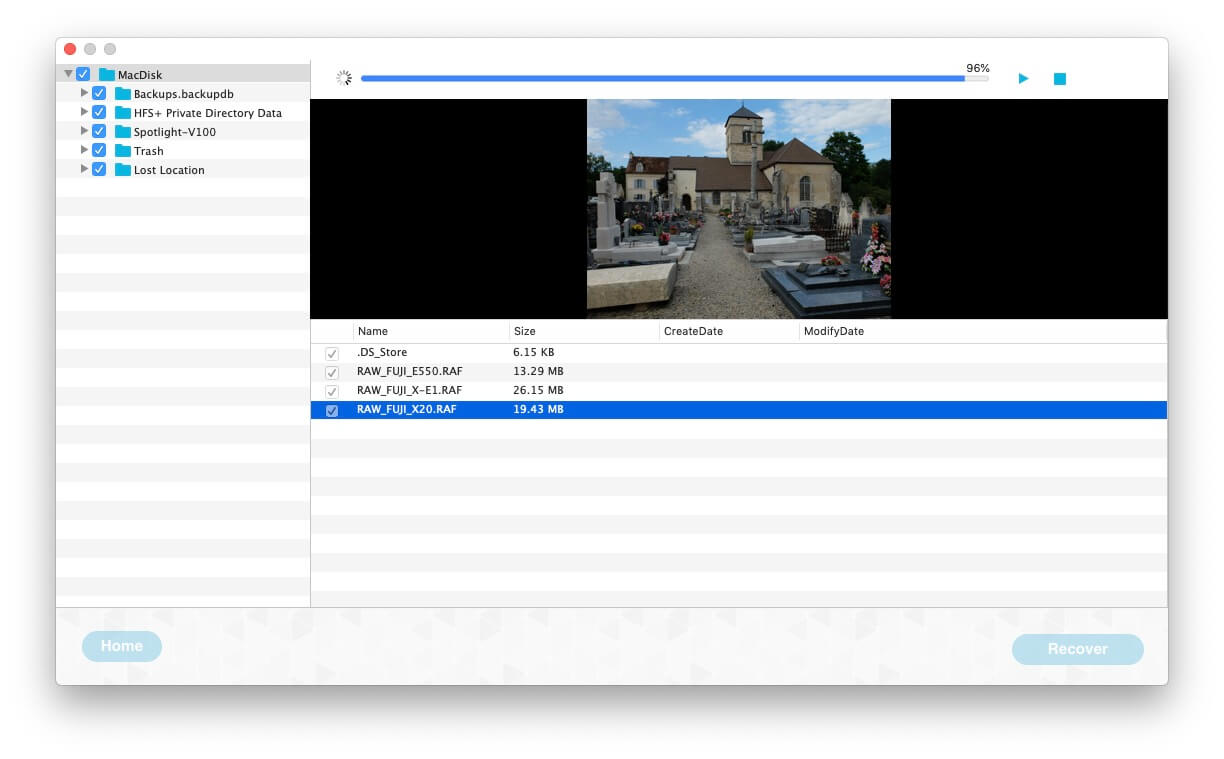
Once the scan is complete, the software will list all recovered files, which you can preview. If you do not find the lost data, return to the home view and select a different recovery mode to scan again. All scan and recovery processes are safe and will not write any data to the hard drive. When you find the lost data, select the files and click the "Recover" button to save them to another disk.

About Fireebok Studio
Our article content is to provide solutions to solve the technical issue when we are using iPhone, macOS, WhatsApp and more. If you are interested in the content, you can subscribe to us. And We also develop some high quality applications to provide fully integrated solutions to handle more complex problems. They are free trials and you can access download center to download them at any time.
| Popular Articles & Tips You May Like | ||||
 |
 |
 |
||
| Five ways to recover lost iPhone data | How to reduce WhatsApp storage on iPhone | How to Clean up Your iOS and Boost Your Device's Performance | ||
