Have you ever gotten such a wonderful voicemail that made you laugh and get you feel so elated? You just feel that it was a voicemail from your childhood friend and from loved ones. There could be many times that you have received such voicemail and you feel you need to keep them or one of them, so you could listen to it again and again. Everyone has one of those voicemails that makes them smile every time they listen to it.
I will show you the best way to transfer iPhone voicemail and Voice Memos to your computer
Transferring Voice Memos from iPhone to Computer
The ability to quickly record voice memos on the iPhone is a frequently overlooked feature. Furthermore, figuring out how to import these files from your iPhone to your computer can be tricky. Here are a couple of ways of getting your voice memos off your phone and onto your computer.
The voice memo feature is very interesting.
Once you have a voice memo recorded, there is a two main ways of transferring the voice memo to your computer. Through the iTunes and Direct Share from Phone
Via iTunes iTunes will transfer voice memos, once you enable that setting.
1. Connect your iPhone via USB cable
2. Click the name of your iPhone under Devices in the left column
3. Click the Music tab
4. Click the checkbox for Include voice memos
5. Sync your device
6. Your files will appear under a new Voice Memos playlist
7. You can right-click on a memo to perform advanced tasks or gain access to the actual audio file.
If you are having difficulty, then try these additional steps:
• Unplug iPhone from the computer after the failed sync
• In iTunes, select File –> Library –> Organize Library –> Consolidate files
• Plug in the iPhone & sync again.
Using Direct Share from Phone
You can also email or MMS the voice memo directly from your phone. If you only have a few files, emailing them may be a good option.
• From the voice memo screen
• Click the silver button in the lower right corner.
• This will take you to a list of your voice memos.
• Select the voice memo you want to share
• Press the large blue share button at the bottom right of the screen.
• Select Email or MMS and send.
Most carriers and providers do not exactly make archiving your voice mail messages a very easy task to accomplish. Now, The Fireebok Fone Rescue software allows you to store your voicemails to your computer. This is what I will explain in this article.
Steps to Fone Rescue to transfer
• First step: Downloading, Installing, and Executing Fone Rescue

- Fone Rescue
Recover lost or deleted SMS, contacts, photos, videos, notes and more for
your iPhone with ease.
For Window & Mac OS X
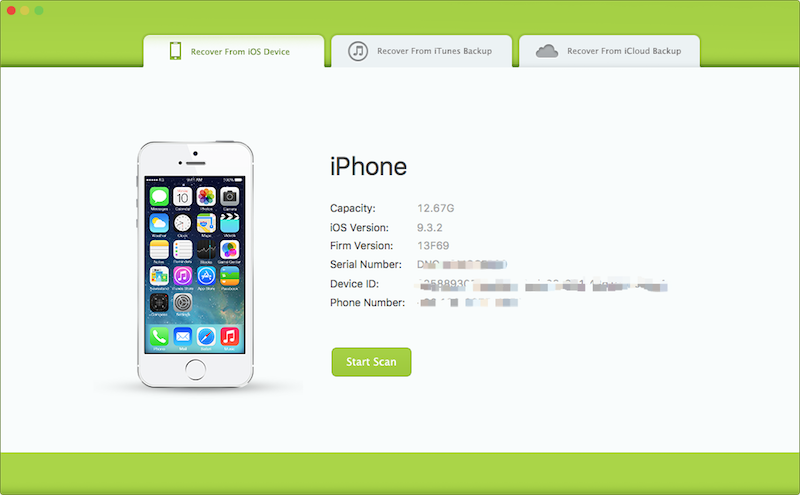
• Connect your iPhone with the computer with the USB cable
• Choose "Recover from iOS Device" and it will scan your iPhone automatically. This process may take some time, please be patient.

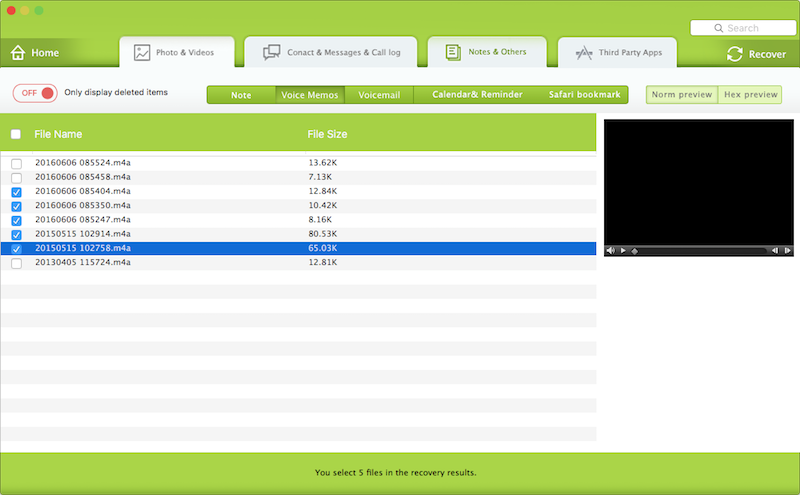
• When the scanning is completed, choose "Notes & Others" tab and click "Voicemail" and "Voice Memos" button to select the audio files to extract them to the computer.

With the steps above, you should be able to use Fone Rescue to transfer iPhone voicemail and Voice Memos to Mac or PC. The program features a very user-friendly interface that makes the process easy for even individuals who do not have very advanced technology skills.
About Fireebok Studio
Our article content is to provide solutions to solve the technical issue when we are using iPhone, macOS, WhatsApp and more. If you are interested in the content, you can subscribe to us. And We also develop some high quality applications to provide fully integrated solutions to handle more complex problems. They are free trials and you can access download center to download them at any time.
| Popular Articles & Tips You May Like | ||||
 |
 |
 |
||
| How to Recover Deleted Text Messages from Your iPhone | Top 6 reasons WhatsApp can’t backup | How to Clean up Your iOS and Boost Your Device's Performance | ||


