When iPhone users find their device or iCloud storage insufficient to house their cherished photos and videos, the need to transfer these memories to an external hard drive becomes imperative. In this article, we will explore various techniques to achieve this while preserving the original photo quality, format, and crucial metadata associated with the images.
1. Using AirDrop
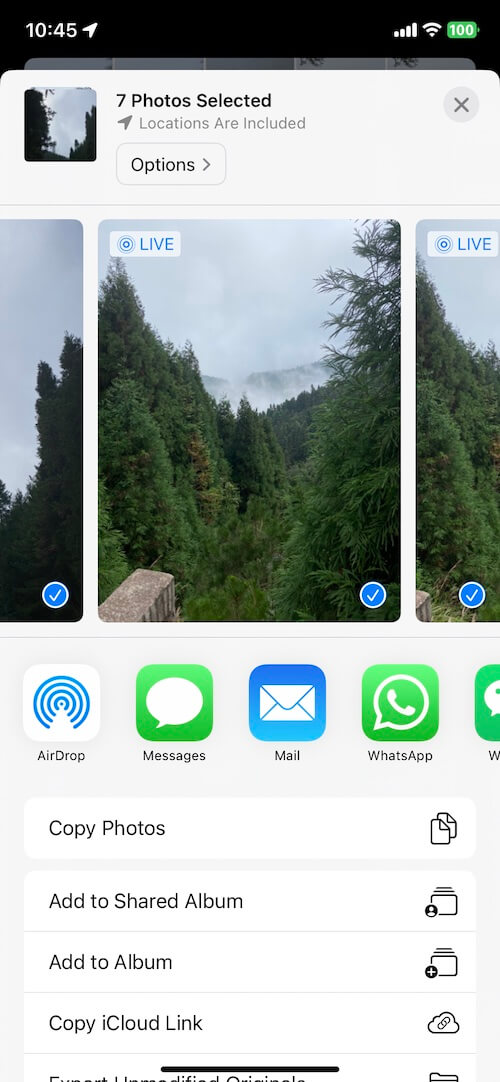
Connect your external hard drive to your Mac via a USB cable, and ensure Wi-Fi and Bluetooth are enabled on your iPhone. Open the Photos app, select desired photos and videos, and tap the Share button. Then choose AirDrop, select your Mac user, and share the files, move the received photos and videos from the Download folder to the hard drive.

2. Utilizing Image Capture
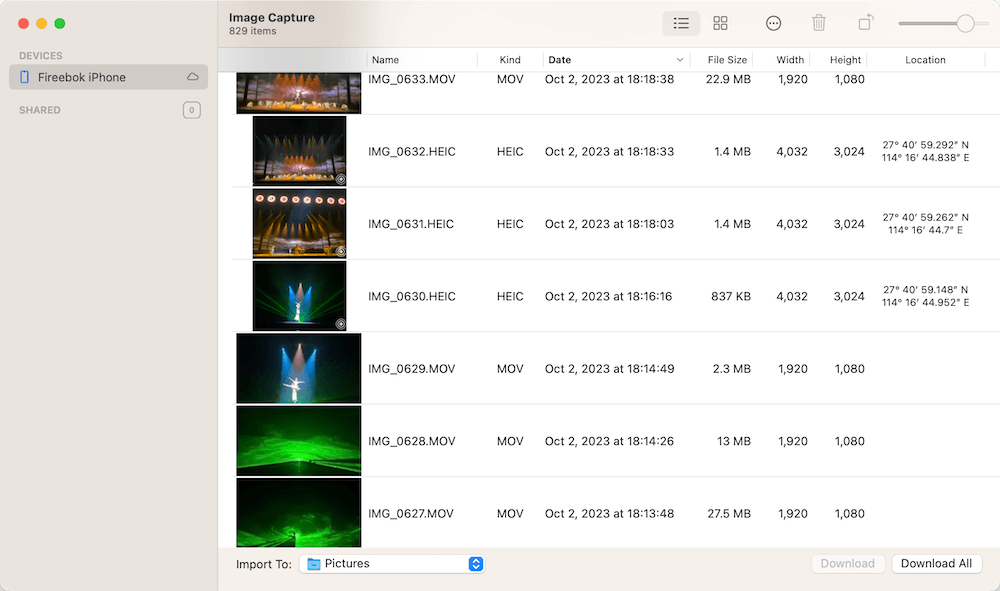
Connect your iPhone to the Mac, launch the Image Capture app located in /Applications. Then unlock your iPhone screen, Image Capture will display all photos and videos. Choose the external hard drive folder as the import location from the Import To: menu, and click Download All to transfer all photos and videos to the hard drive.

3. Using iCloud Photos
If your iCloud Photos has sufficient storage, enable iCloud Photos on your iPhone. Access www.icloud.com via a web browser, log in with your Apple ID. Download original photos and videos from iCloud Photos to a local hard drive folder.

4. Using Mac Photos App
you manage photos and videos using the Mac Photos app, you can transfer and sync photos and videos from your iPhone to the Mac Photos app. And then export original photos and videos from the Mac Photos app to the desired hard drive folder.

5. Preserving Metadata
During the transfer process, it's common for some photos and videos to lose essential metadata, such as creation dates and other details. To safeguard this vital information, employ the Photo Exifer application, a specialized photo metadata editor. Photo Exifer offers quick actions, including copying EXIF date to the created date and various other operations, ensuring the preservation of original metadata. Download and install Photo Exifer app on your Mac.
Run Photo Exifer app, and import photos into Photo Exifer, and click Quick Action -> Copy Camera date to Created date to preserve metadata.

Conclusion: Transferring photos and videos from your iPhone to an external hard drive is essential for preserving memories and creating space on your device. By employing these methods, you can safeguard both your media files and their associated metadata, ensuring a seamless transition while maintaining the integrity of your cherished memories.
About Fireebok Studio
Our article content is to provide solutions to solve the technical issue when we are using iPhone, macOS, WhatsApp and more. If you are interested in the content, you can subscribe to us. And We also develop some high quality applications to provide fully integrated solutions to handle more complex problems. They are free trials and you can access download center to download them at any time.
| Popular Articles & Tips You May Like | ||||
 |
 |
 |
||
| How to Recover Deleted Text Messages from Your iPhone | Top 6 reasons WhatsApp can’t backup | How to Clean up Your iOS and Boost Your Device's Performance | ||

