Have you ever experienced that the picture becomes blurry when you get close to taking a photo with your iPhone camera? Especially in low light, the picture is horrendous. What is causing this to happen? Is it a camera hardware issue or an iOS software issue? This post will shed light on the problem and provide the following 6 ways that will help to fix iPhone camera blur problem.

Yes, Apple has added Photographic Styles, QuickTake, the Ultra Wide camera, Night mode and other powerful camera features on our iPhones. But an increasing number of features and settings are also making it easier for the average user to turn on the wrong option with an unintentional touch. There are two main reasons for blurry photos: 1. Inappropriate camera settings. 2. The photos you see are iCloud photo thumbnails instead of the original photos.
1. Adjust Camera focus and exposure
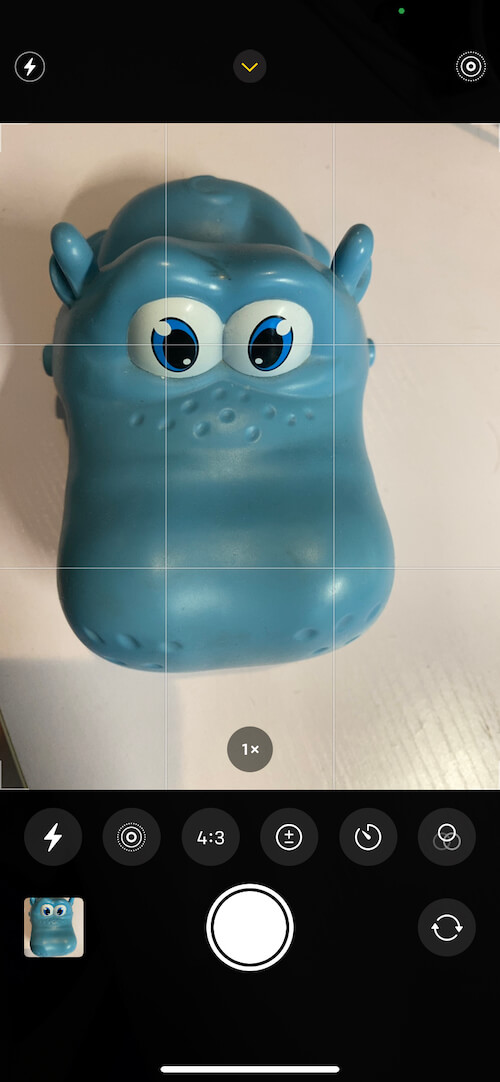
Before you take a photo, the iPhone camera automatically sets the focus and exposure, and face detection balances the exposure across many faces. You can use Exposure Compensation Control to precisely set and lock the exposure for upcoming shots. Just tap the arrow ^ , then tap ![]() and adjust your exposure level. The exposure locks until the next time you open the Camera app.
and adjust your exposure level. The exposure locks until the next time you open the Camera app.
2. Turn off Prioritize Faster Shooting
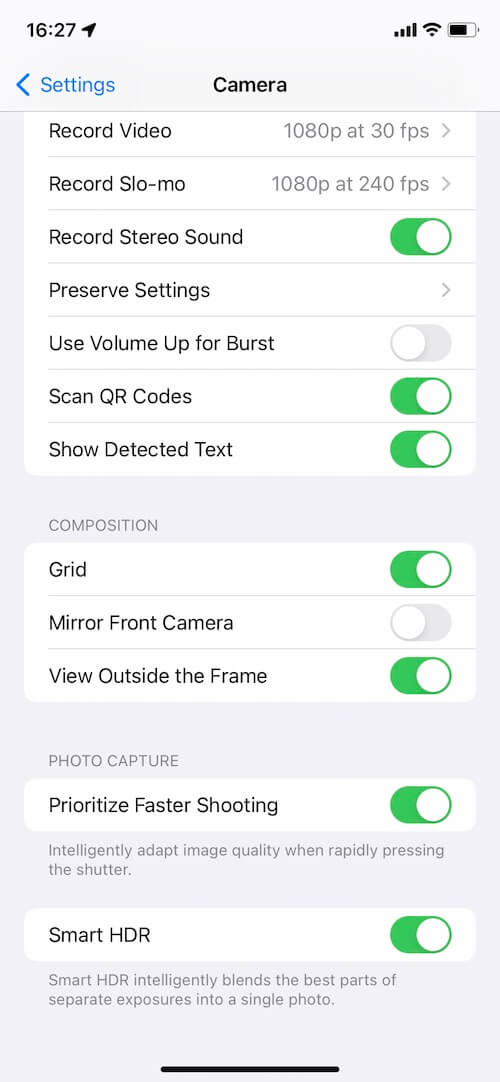
The Prioritize Faster Shooting setting modifies how images are processed—allowing you to capture more photos when you rapidly tap the Shutter button. And Prioritize Faster Shooting is on by default. Go to iPhone Settings -> Camera -> turn off Prioritize Faster Shooting.
3. Turn off Lens Correction
On iPhone 12 models and later, the Lens Correction setting adjusts photos taken with the front camera or Ultra Wide camera for more natural-looking results. Lens Correction is on by default. To turn off Lens Correction, go to Settings -> Camera, then turn off Lens Correction.

4. Turn off Scene Detection
On iPhone 12 models and later, the Scene Detection setting can identify what you’re taking a photo of and apply a tailored look to bring out the best qualities in the scene. Scene Detection is on by default. To turn off Scene Detection, go to Settings -> Camera, then turn off Scene Detection.

5. Take low-light photos with Night mode
On iPhone 11 models and later, you can use Night mode to capture photos when the camera detects a low-light environment. Night mode automatically turns on when the camera detects a low-light environment. The Night mode icon ![]() at the top of the display turns yellow when the feature is active. To try longer Night mode photos, tap the Night mode icon. Then use the slider above the shutter button to choose Max, which extends the capture time. When you take the photo, the slider becomes a timer that counts down to the end of the capture time.
at the top of the display turns yellow when the feature is active. To try longer Night mode photos, tap the Night mode icon. Then use the slider above the shutter button to choose Max, which extends the capture time. When you take the photo, the slider becomes a timer that counts down to the end of the capture time.

6. Optimize iPhone Storage for iCloud Photos
If you have iCloud Photos turned on, your photos will be stored in iCloud and before you download the original, it may appear blurry and you will see thumbnails instead of the originals. When you store photos and videos in iCloud with their original, high-resolution version, it means that your iPhone needs enough storage space to store and download those original photos. Or select Optimize iPhone Storage to save space on your iPhone device. Go to iPhone Settings -> Apple ID -> iCloud -> Photos -> iCloud Photos, and select Optimize iPhone Storage, then you can keep smaller, space-saving photos and videos on your iPhone while all your original full-resolution versions are stored in iCloud.

7. Reset iPhone Settings
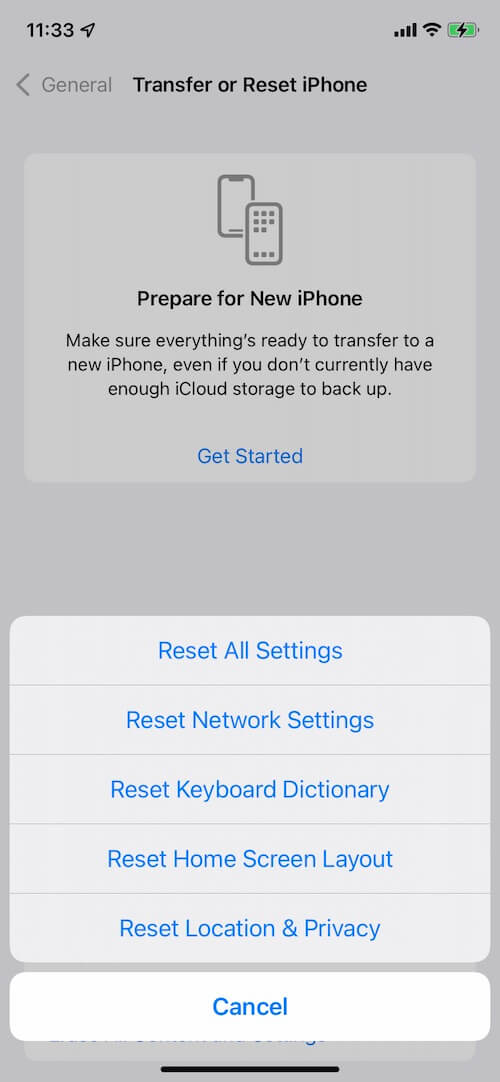
Reset all iPhone settings including camera settings. Go to iPhone Settings -> General -> Transfer or Reset iPhone (Reset iPhone in the old iOS version) -> Reset -> Reset All Settings.
About Fireebok Studio
Our article content is to provide solutions to solve the technical issue when we are using iPhone, macOS, WhatsApp and more. If you are interested in the content, you can subscribe to us. And We also develop some high quality applications to provide fully integrated solutions to handle more complex problems. They are free trials and you can access download center to download them at any time.
| Popular Articles & Tips You May Like | ||||
 |
 |
 |
||
| How to Recover Deleted Text Messages from Your iPhone | Top 6 reasons WhatsApp can’t backup | How to Clean up Your iOS and Boost Your Device's Performance | ||
