Some iPhone and Mac users reported that after upgrading to iOS 16, iPhones can’t import photos into the Mac Photos app. They were unable to install the iTunes update package because the error message "Installation failed" or "Failed to operate" completed. (com.apple.ImageCaptureCore error -9956.)”. Don’t worry, if you can’t use Photos to download iPhone photos, there are other options to make choice.
1. Use Image Capture to import photos
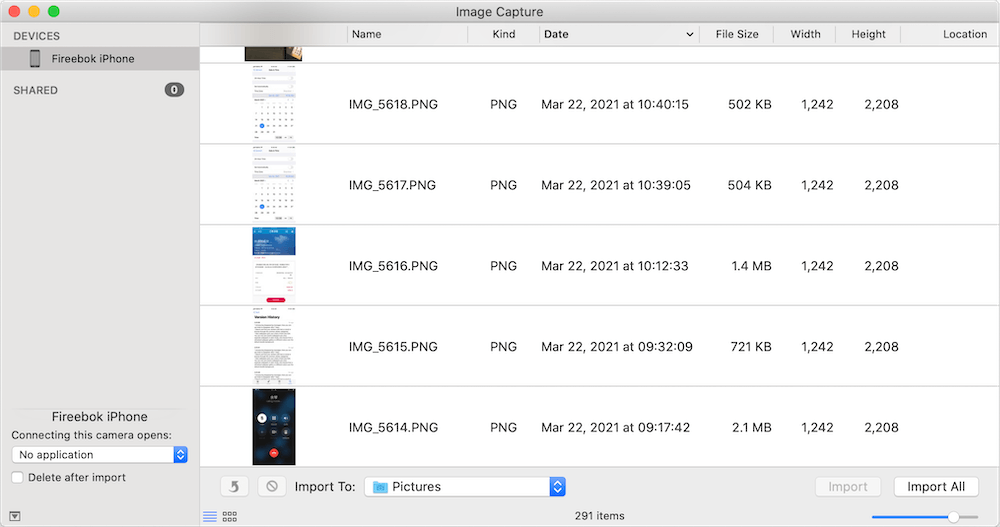
Image Capture is macOS built-in application in /Applications, unlock your iPhone and open Image Capture application, select your iPhone icon on the left sidebar, it will list all your iPhone photos and videos, click the pop-up button next to “Import To:” text label, select a folder to store photos and videos, and then select photos and click the “Import” button, or click the “Import All” button.

2. Use AirDrop to transfer iPhone photos
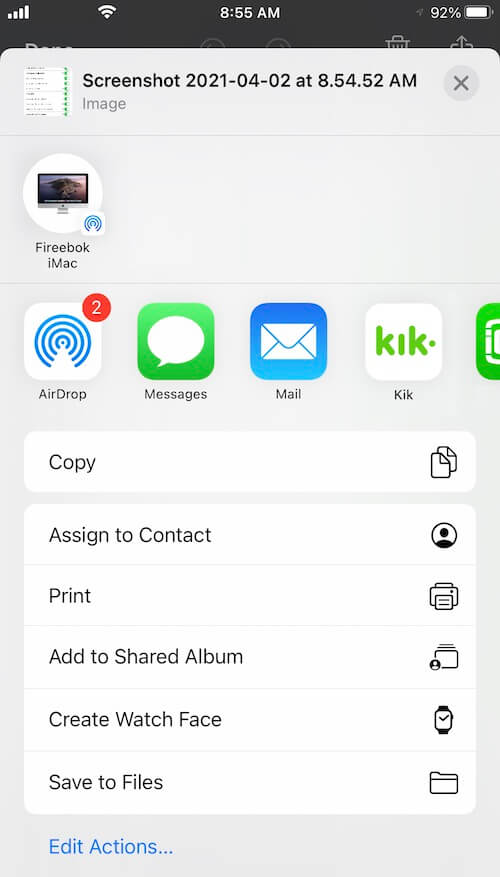
Open Photos application on your iPhone, select one more photos and videos, and tap the Share button, then tap the AirDrop icon, and tap your Mac device icon. And then click the Accept button in the notification window on Mac.

3. Download Photos from iCloud
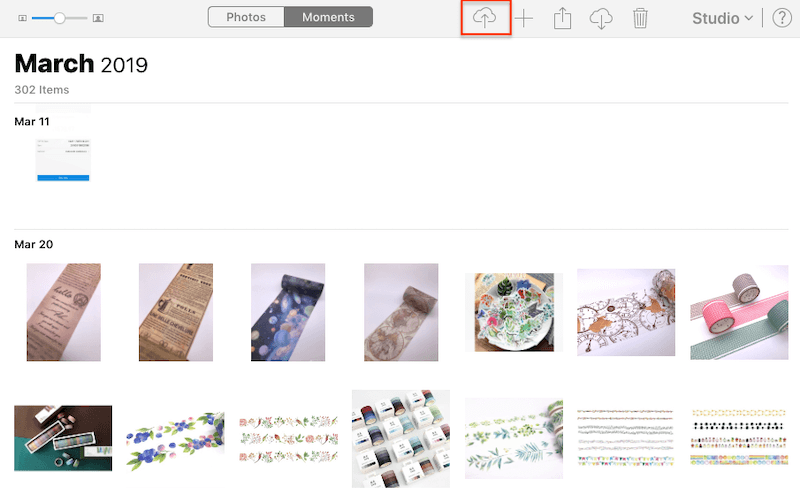
If your iPhone has iCloud Photos turned on , all photos and videos will sync to iCloud, and you can download them from the iCloud website. Go to iPhone Settings -> Photos -> iCloud Photos, to check if your iPhone turned on iCloud photos. If so, visit www.icloud.com and login with your Apple ID and password, then access Photos, it will list all your photos and videos, select them and click download button to download the original photos and videos.

How to fix imported iPhone photo date instead of exif date?
During the process of importing photos from iPhone to Mac, sometimes we find that the imported iPhone photo date is the current date, not the exif date it was taken. How to solve it? We use Photo Exifer to batch copy the photo exif date to the creation date in one click. Download and install Photo Exifer, import photos into Photo Exifer application, select photos and click Quick Action -> Copy Camera date to Created date.

About Fireebok Studio
Our article content is to provide solutions to solve the technical issue when we are using iPhone, macOS, WhatsApp and more. If you are interested in the content, you can subscribe to us. And We also develop some high quality applications to provide fully integrated solutions to handle more complex problems. They are free trials and you can access download center to download them at any time.
| Popular Articles & Tips You May Like | ||||
 |
 |
 |
||
| Five ways to recover lost iPhone data | How to reduce WhatsApp storage on iPhone | How to Clean up Your iOS and Boost Your Device's Performance | ||
