After updating to macOS Sequoia, some users have reported issues with USB flash drives or external drives not being recognized. This issue can usually be attributed to four common reasons: Incorrect Finder settings preventing the drive from being displayed. Faulty or incompatible USB cable. The drive was not mounted correctly. Disk errors or incompatible file systems on the drive. In this guide, we'll outline seven solutions to fix each potential problem.
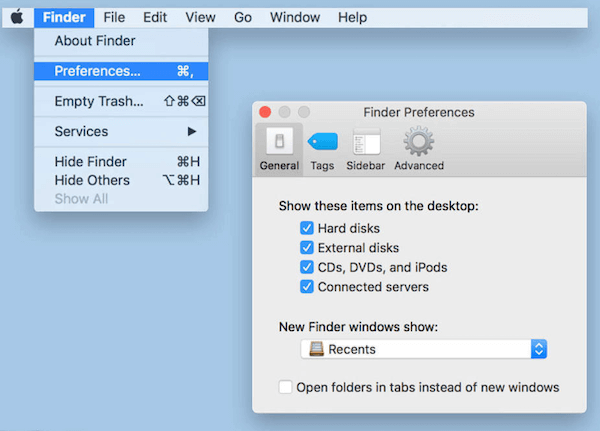
1. Show External Disks on the Desktop
If your external drive doesn’t appear on the desktop, ensure the Finder is set to display external disks: Open Finder. Go to Finder Menu -> Settings -> General. Under "Show these items on the desktop", check the box for External disks. Under "Show these items on the desktop," check the box for External disks.

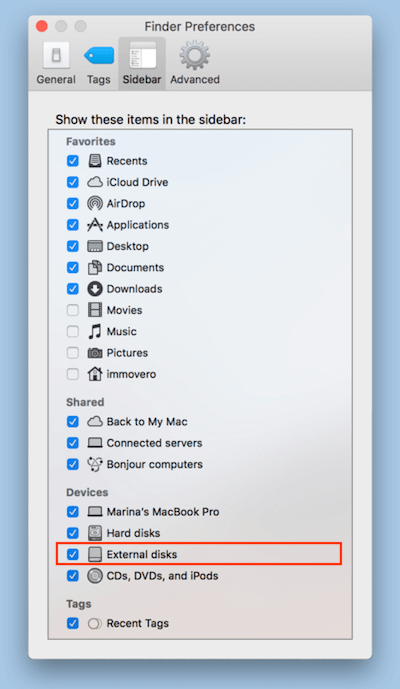
2. Show External Disks in the Finder Sidebar
If the external drive is missing from the Finder sidebar: Open Finder. Navigate to Finder Menu -> Settings -> Sidebar. Under Locations, ensure External disks is checked. This will display external drives in the Finder sidebar.

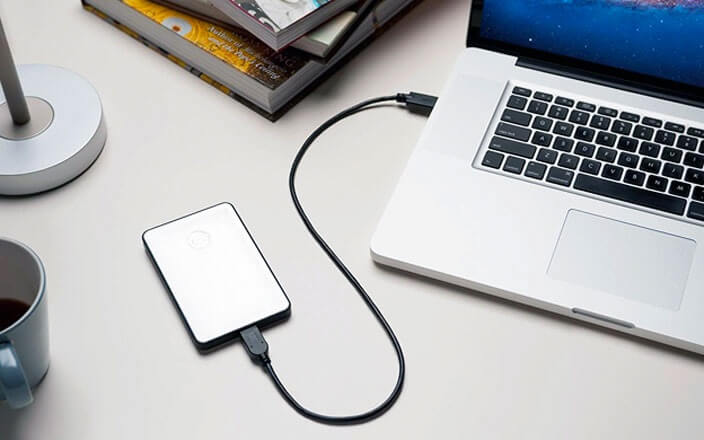
3. Use a Different USB Cable
A faulty or incompatible USB cable could prevent your drive from being recognized. Try the following: Replace the current USB cable with a different one. If the drive has both USB-A and USB-C ports, switch to the other port type to test connectivity.

4. Restart Your Mac
Sometimes macOS encounters mounting or unmounting errors, or other applications may interfere with drive recognition. To resolve this: Disconnect the USB drive. Restart your Mac by selecting Apple Menu -> Restart. Reconnect the drive after the system reboots.
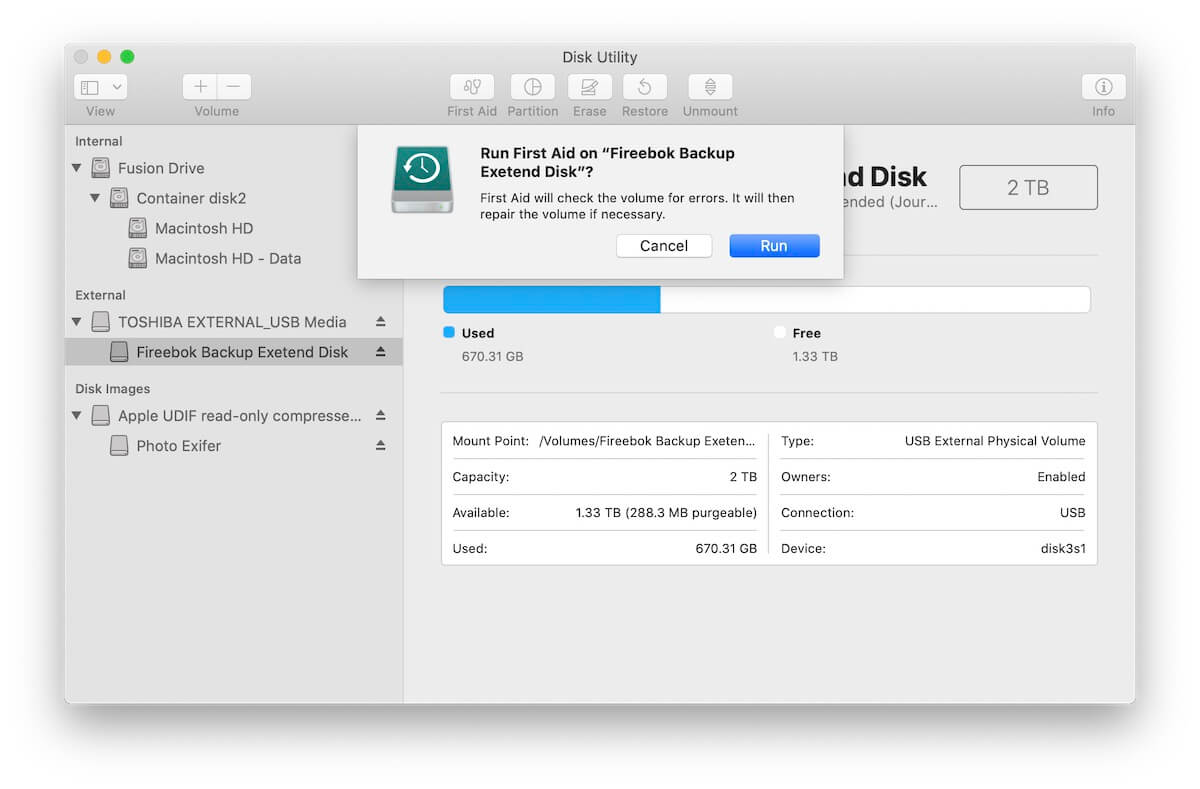
5. Repair the Disk Using Disk Utility
macOS includes a built-in tool to fix disk errors. To use Disk Utility: Open Applications -> Utilities -> Disk Utility. Select your USB flash drive or external disk from the sidebar. Click First Aid at the top, then select Run to start the repair process. Review the results to determine if the error was resolved.

6. Backup or Recover Data
If the USB drive is still unrecognized, consider backing up or recovering its data before formatting it: Downloa and install Fireebok Data Recovery. Launch the app, mount your USB drive, and run a scan to locate recoverable files. Save the recovered files to a safe location.

7. Erase and Reformat the Drive
If the above steps don’t work, reformatting the drive may resolve the issue: Open Disk Utility -> select your external drive, then click the Erase button. Enter a name for the disk. Choose a file format such as Mac OS Extended (Journaled) or APFS. Click Erase to begin reformatting.

About Fireebok Studio
Our article content is to provide solutions to solve the technical issue when we are using iPhone, macOS, WhatsApp and more. If you are interested in the content, you can subscribe to us. And We also develop some high quality applications to provide fully integrated solutions to handle more complex problems. They are free trials and you can access download center to download them at any time.
| Popular Articles & Tips You May Like | ||||
 |
 |
 |
||
| Five ways to recover lost iPhone data | How to reduce WhatsApp storage on iPhone | How to Clean up Your iOS and Boost Your Device's Performance | ||
