Mac Photo Library is a complex software package that contains folders and files as well as album structure. If you accidentally delete the entire Mac Photo Library from your Mac, what can you do to maximize the recovery of photos and other files in Photo Library? In this article, we will explore some ways to rescue and recover your Mac Photo Library. Your specific choice of recovery method will depend on whether you have ever used iCloud Photos or Time Machine backup.
Check your Mac Trash: When a deletion event occurs, the first thing you should do is open the Trash to check if the photo library package is in there. If it is, just right-click on it and select the "Put Back" option. If your Mac Photo Library is not in the Trash, you need to start the recovery process.

Before starting the recovery: Quit all running applications on your Mac immediately to avoid deleted photos and files being overwritten by new data created. The safest recovery order is to first consider using a data recovery app to scan and recover deleted photos and files from Photo Library, because partial recovered photos from iCloud Photos and Time Machine may overwrite deleted data. If you used iCloud Photos and Time Machine before, then you can recover from iCloud Photos and Time Machine backup.
1. Recover Deleted Mac Photos Library From Disk
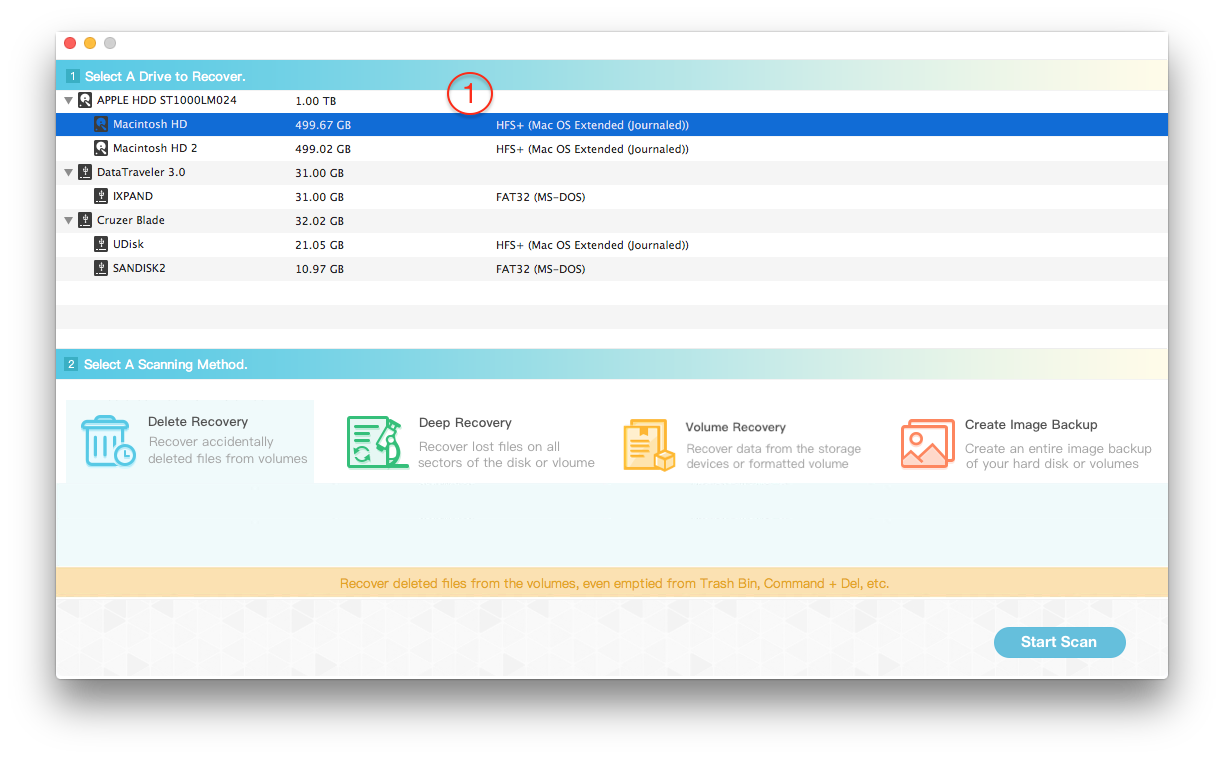
Whether your Mac photo library is stored on Mac startup disk or external hard drive, disk partitions and file systems will leave traces of data storage that can be recovered. An excellent data recovery software can help you read and recover them. Here we recommend using Fireebok Data Recovery application, which supports hard drives with APFS, Mac OS Extended(Journaled), ExFAT, FAT, NTFS file format. And it provides 5 recovery modes to scan and recover disk data. Here are the steps to recover with Fireebok Data Recovery.
Step 1. Download and install Fireebok Data Recovery, if your Mac photo library is stored on an external hard drive, please connect it to your Mac.
Step 2. Open Fireebok Data Recovery app, and select a volume of target disk, then select a recovery mode: Delete Recovery or Deep Recovery, Volume Recovery, click the Start Scan button to start.

Step 3. After scanning, you can view the recovered photos from the Mac photo library in the result view. And select the entire photo library folder in the result view page, and click the Recover button to save the selected photos and folders. If you can't find them using Deleted Recovery, go back to the home view page, scan again with Deep Recovery and Volume Recovery, and it will show different recovery results.

2. Restore Mac Photos library with Time Machine
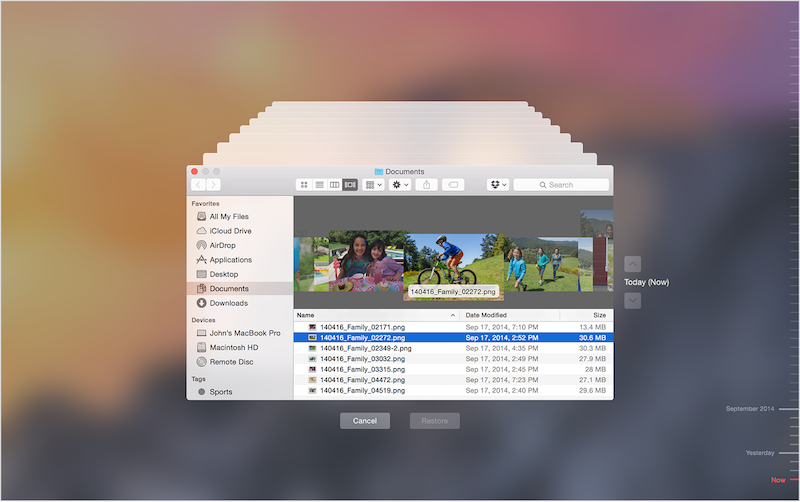
Click the Time machine menu icon at the top of Mac screen and select the “Enter Time Machine”, and use the arrows and timeline to browse the local snapshots and backups, then select the Photo Library folder you want to restore (these can include folders or your entire disk), then click Restore.

3. Restore Mac Photos from iCloud
If you turned on iCloud Photos before the deletion, then visit www.icloud.com on a browser and login with your Apple ID and passcode, then select and download iCloud photos and videos to your Mac.

In conclusion, recovering permanently deleted Mac Photo Library is not impossible, and you can try these methods to get back your photos and files.
About Fireebok Studio
Our article content is to provide solutions to solve the technical issue when we are using iPhone, macOS, WhatsApp and more. If you are interested in the content, you can subscribe to us. And We also develop some high quality applications to provide fully integrated solutions to handle more complex problems. They are free trials and you can access download center to download them at any time.
| Popular Articles & Tips You May Like | ||||
 |
 |
 |
||
| Five ways to recover lost iPhone data | How to reduce WhatsApp storage on iPhone | How to Clean up Your iOS and Boost Your Device's Performance | ||

