Have you ever used Find My to erase your iPhone, iPad, or Mac device when selling, giving away, trading, or when you couldn't find it? Some Mac users have recently reported that they accidentally erased their Mac devices using Find My, and afterwards, they faced difficulties in recovering their lost Mac data and reinstalling macOS.
To address the problems that users may encounter after erasing with Find My, this article provides solutions to help you recover your erased Mac data and reinstall macOS.
It is important to restore Mac data before installing the system to prevent the newly installed macOS from overwriting the data on the hard drive.
1. Restoring Data After Erasing a Mac Device
If you backed up your Mac with Time Machine before erasing it, select the most recent backup to restore it. If not, you can use Fireebok Data Recovery application to recover data from the hard drive.
A) Restore Data from Time Machine: Connect your backup external hard drive to your Mac. Click the Time Machine icon in the menu bar and select "Enter Time Machine." Choose the date of the Time Machine backup you need and click "Restore."

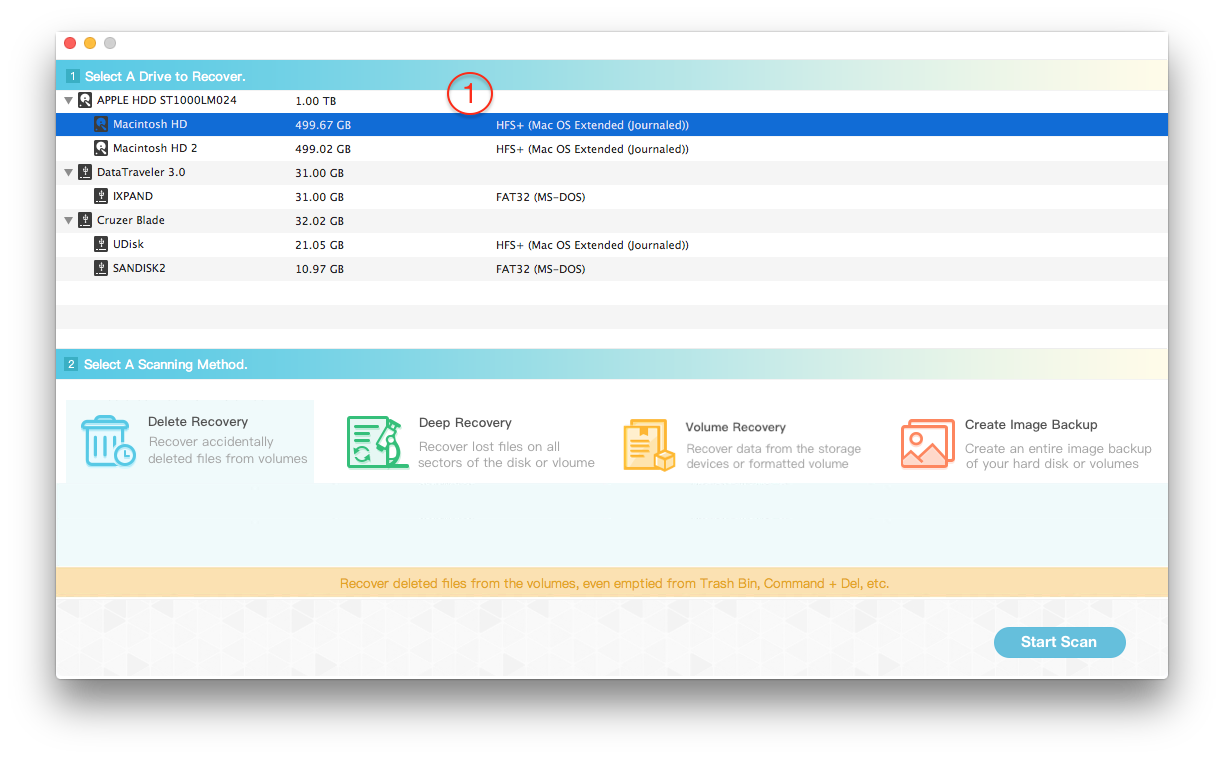
B) Recover Data with Data Recovery: Download and install Fireebok Data Recovery on your Mac. Launch Fireebok Data Recovery and select the Mac startup disk. Choose a recovery mode (Delete Recovery or Deep Recovery) and click the "Start Scan" button.

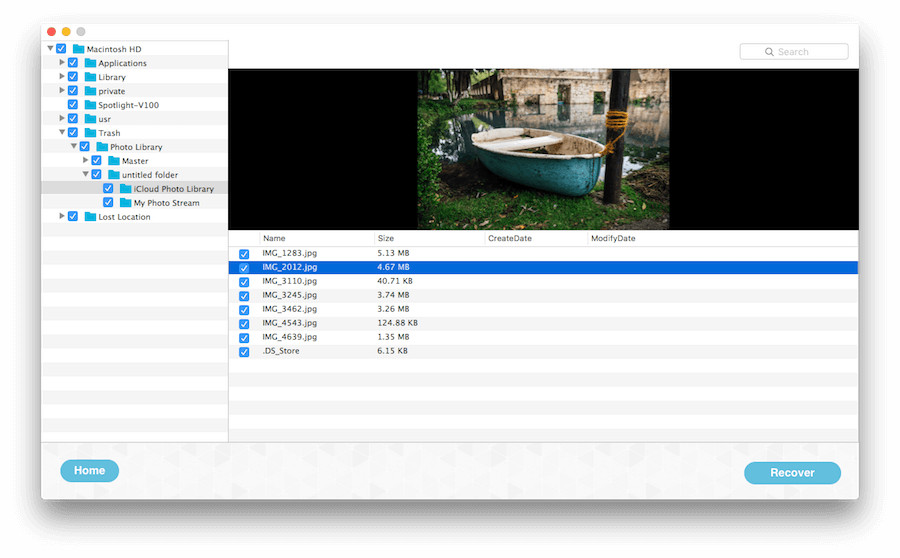
When the scan is complete, click the recovered files and folders to preview and click the Recover button to save the result files. If you can’t find the lost data in the result, click the Home button and select a different recovery mode to scan it again.

2. Unable to Install macOS After Erasing a Mac Device
If you’re using an Inter-based Mac, press the power button on your Mac to turn it on, then release the power button and immediately press and hold both the Command (⌘) key and R key until you see an Apple logo or spinning globe.
If you're using a Mac with Apple silicon, press and hold the power button on your Mac. As you continue to hold the power button, your Mac turns on and loads startup options. When you see Options, release the power button. Click Options, then click the Continue button.

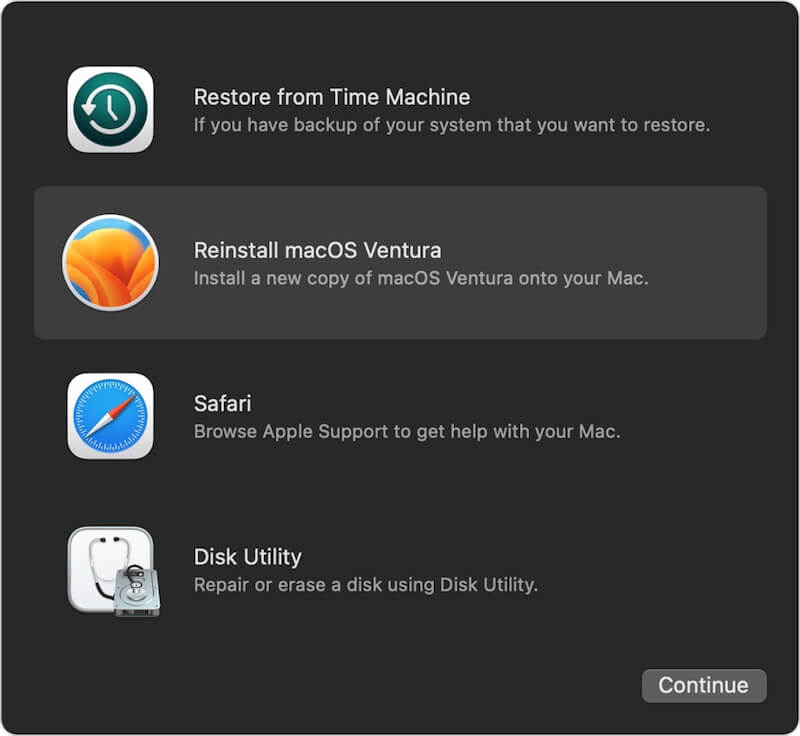
Select the Reinstall macOS Ventura(or other macOS version) option to reinstall macOS. If the install process can’t find the hard disk, reset the NVRAM will solve the issue. How to Reset the NVRAM? Hold down command + option +P +R on your keyboard immediately after your Mac begins to restart. Continue holding both keys until you see the Apple logo or a spinning globe. Then your Mac will boot normally.

About Fireebok Studio
Our article content is to provide solutions to solve the technical issue when we are using iPhone, macOS, WhatsApp and more. If you are interested in the content, you can subscribe to us. And We also develop some high quality applications to provide fully integrated solutions to handle more complex problems. They are free trials and you can access download center to download them at any time.
| Popular Articles & Tips You May Like | ||||
 |
 |
 |
||
| Five ways to recover lost iPhone data | How to reduce WhatsApp storage on iPhone | How to Clean up Your iOS and Boost Your Device's Performance | ||

