Some Mac users have encountered issues with their old iMacs and MacBooks equipped with fusion drives, leading to booting problems, black screens, and the Apple logo progress bar getting stuck at 90 percent. After attempting to boot, they might end up in recovery mode with no success, and reinstalling macOS could result in an error message stating that there is no disk available for macOS installation. If you find yourself facing these challenges, here's a step-by-step guide on how to recover data from an old Mac fusion drive.
1. Create a USB External Bootable Disk
To initiate the recovery process, you'll need an external drive or secondary volume to create a startup disk for installing the Mac operating system. Format the external drive to the Mac OS Extended file system format and ensure it has at least 14GB of free storage space. Download a macOS installer from the App Store or visit this website: https://support.apple.com/en-us/HT201372.
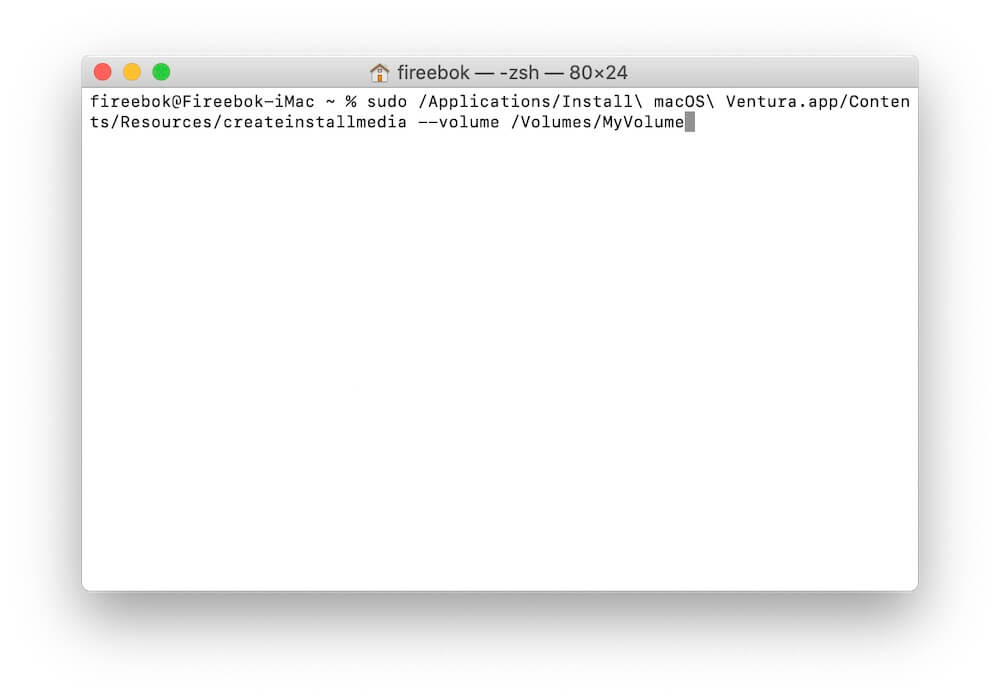
Open Terminal (/Applications/Utilities) to create the bootable installer. Use the following Terminal command for macOS EI Capitan ~ macOS Ventura: "sudo /Applications/Install\ macOS\ Ventura.app/Contents/Resources/createinstallmedia --volume /Volumes/MyVolume". If you need to install macOS Monterey, replace "macOS\ Ventura.app" with "macOS\ Monterey.app".

2. Boot Mac from the External Bootable Disk
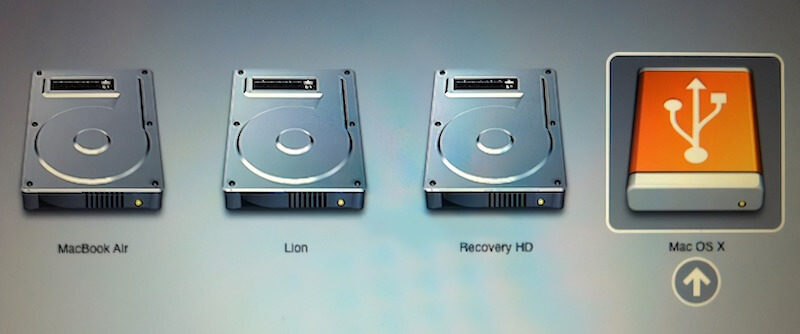
After successfully installing the Mac operating system on your external drive, follow these steps to boot your Mac from it: Connect the external bootable disk to your iMac or MacBook with the fusion drive. Power on your Mac and immediately press and hold the Option (Alt) key, select the volume containing the bootable installer and click "Continue" to proceed. Follow the on-screen instructions to complete the startup process. Once your Mac is up and running, try to open the fusion drive in Finder and copy or backup important data from the Fusion drive.

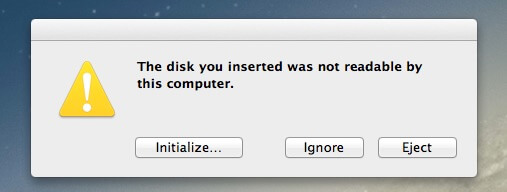
Note: If you encounter an error message stating "The disk you inserted was not readable by this computer," proceed to the next step to recover data from your Mac Fusion drive.

3.Recover Data from the Mac Fusion Drive
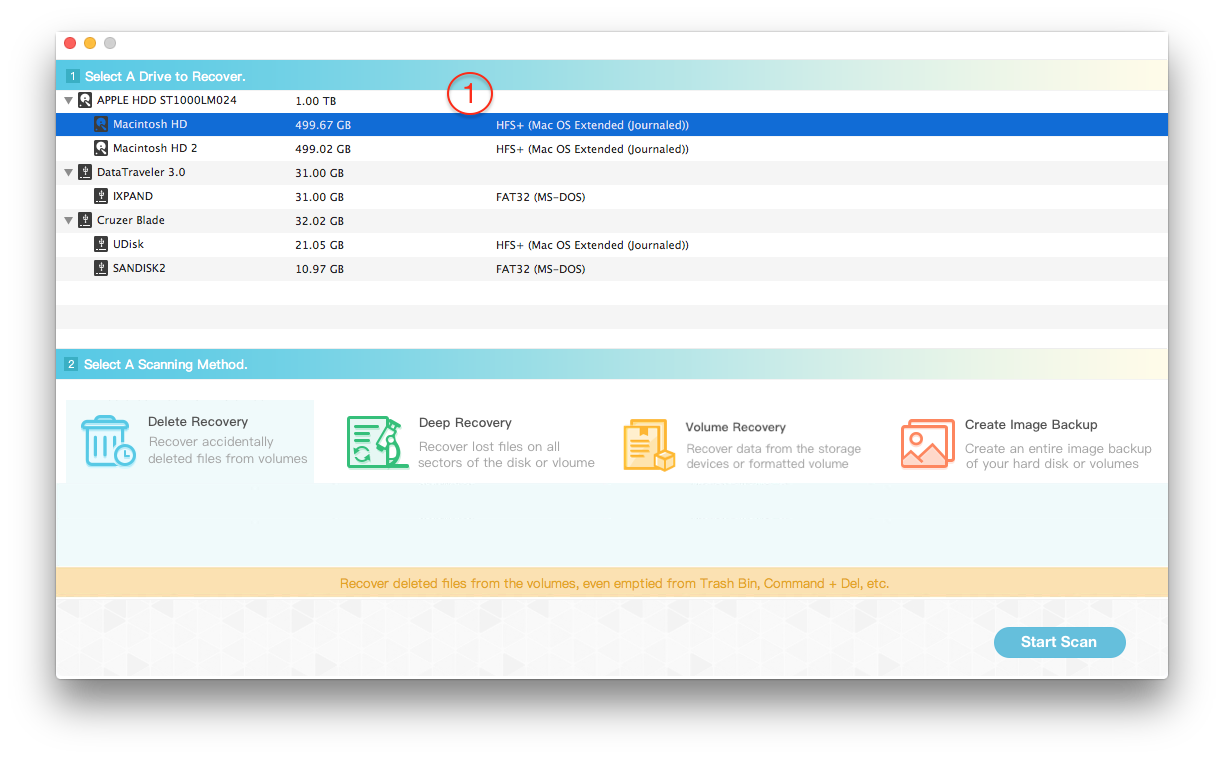
For data recovery from the Mac Fusion drive, we recommend using a third-party application - Fireebok Data Recovery. It has five different recovery modes: Delete Recovery, Deep Recovery, Volume Recovery, Lost Volume Recovery and Create Image Backup. And it supports Mac OS X 10.7 ~ macOS Ventura. Download and install Fireebok Data Recovery on your startup disk.
Launch the Fireebok Data Recovery application, choose the volume of your Fusion drive, and click "Deleted Recover" or "Deep Recovery." Click the "Start Scan" button to initiate the scanning process.

After the scanning is complete, preview and select the image and other files you want to recover. Click the "Recover" button and save the recovered files to a different disk. If you can't find the desired recovery result, return to the home view and select another recovery mode to try again.

About Fireebok Studio
Our article content is to provide solutions to solve the technical issue when we are using iPhone, macOS, WhatsApp and more. If you are interested in the content, you can subscribe to us. And We also develop some high quality applications to provide fully integrated solutions to handle more complex problems. They are free trials and you can access download center to download them at any time.
| Popular Articles & Tips You May Like | ||||
 |
 |
 |
||
| Five ways to recover lost iPhone data | How to reduce WhatsApp storage on iPhone | How to Clean up Your iOS and Boost Your Device's Performance | ||

