After updating to macOS Sequoia, some Mac users have reported that their desktop files and folders have disappeared. They’ve checked the Trash, but the files are not there. So, where are these files, and how can you recover them? If this issue has occurred on your Mac, don’t worry. In this article, we’ll guide you through three common methods to recover lost desktop photos, files, and folders on macOS Sequoia.
1. Recover Files and Folders with Fireebok Data Recovery
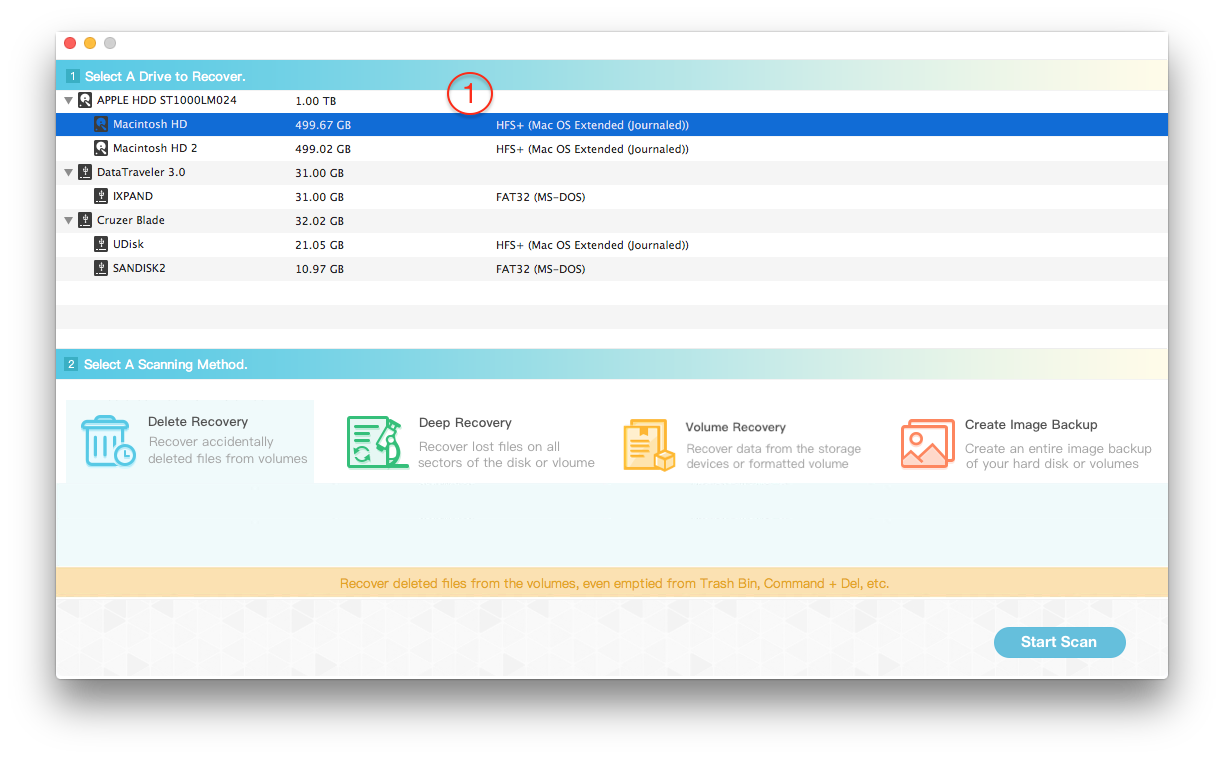
If files or folders are deleted or lost from your computer's disk or SD card, you can use the Fireebok Data Recovery application. This tool supports the latest macOS Sequoia, and it supports different storage devices with Apple File System, and other file system formats. It offers five recovery modes: Deleted Recovery, Deep Recovery, Volume Recovery, Lost Volume Recovery, and Disk Image Recovery.
Steps to Recover Files:
• Step 1: Download and install Fireebok Data Recovery on your Mac.
• Step 2: Launch the application, select the target volume or disk, choose a recovery mode, and click the Start Scan button.

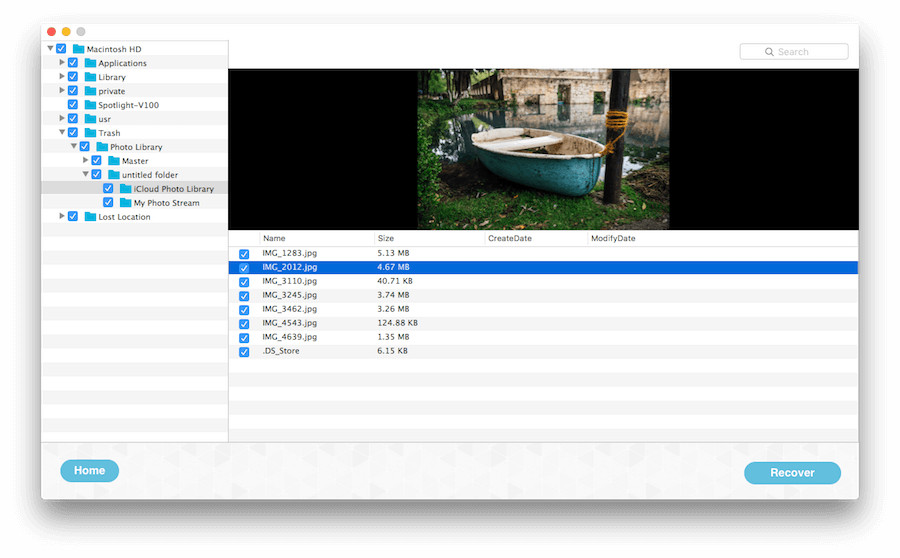
• Step 3: After the scan is complete, select the files you want to recover, and click the Recover button to save them.

2. Check iCloud Drive
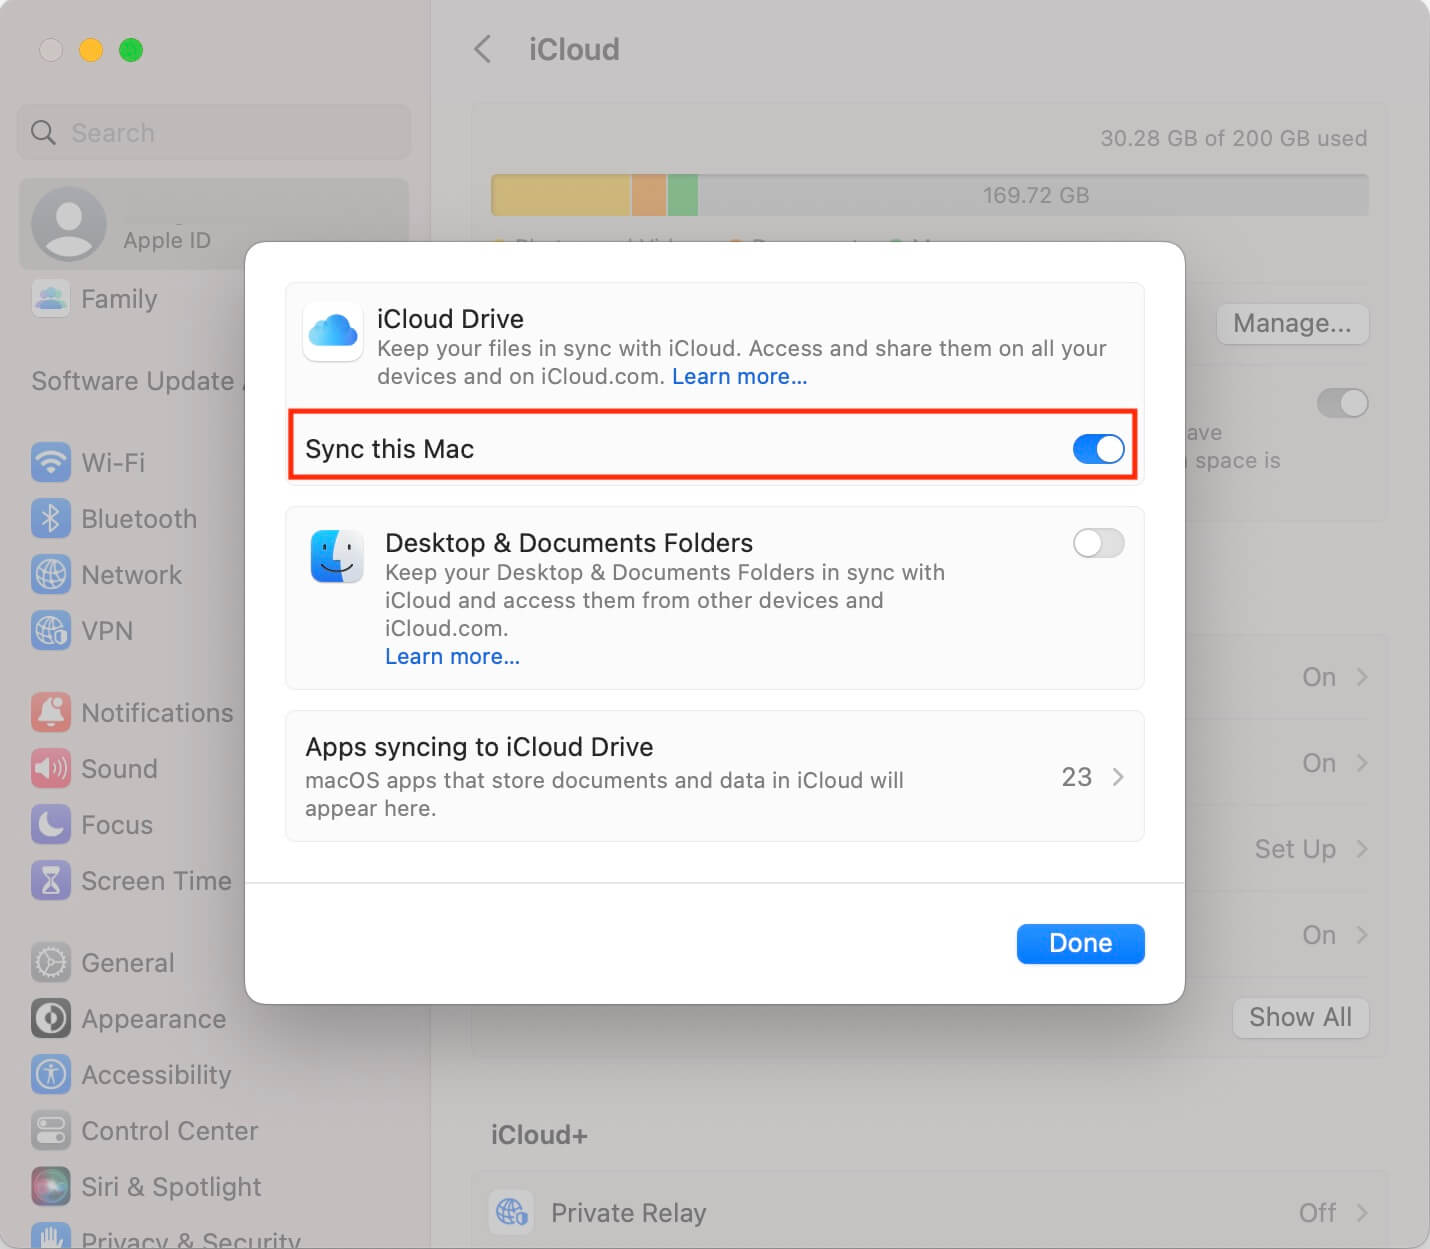
If you have enabled the option to sync your Desktop and Documents Folders with iCloud, you can access your desktop files from other iOS or Mac devices. If iCloud and iCloud Drive were turned on before the update, your desktop files and folders should automatically sync to iCloud.

Steps to Check iCloud Drive:
• Visit iCloud.com, log in with your Apple ID and password, and navigate to iCloud Drive.
• Look for your Desktop & Documents folders to find the missing files.
3. Restore from Time Machine Backup
If you have backed up your Mac with Time Machine application, you can easily restore your desktop files and folders from there.
Steps to Restore from Time Machine:
• Connect your external backup drive to your Mac.
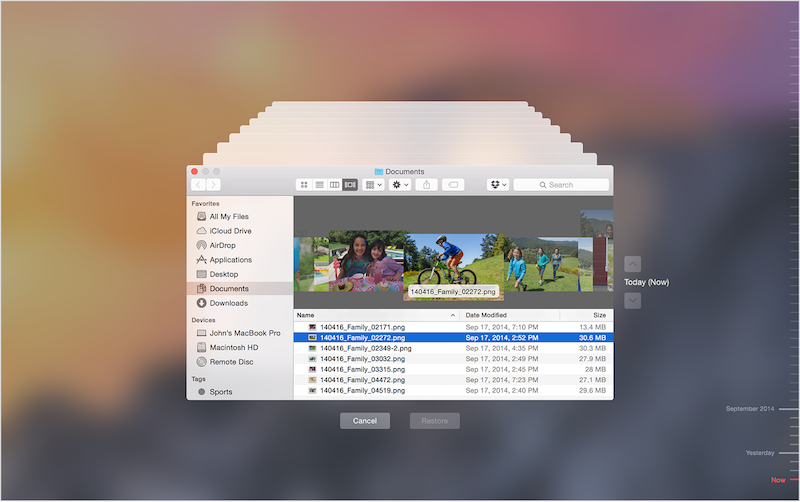
• Click the Time Machine icon in the status menu bar, then choose Browse Time Machine Backups.
• Use the timeline to select the appropriate backup, then click Restore to recover the files from that specific backup.

These three methods should help you recover lost desktop files and folders after upgrading to macOS Sequoia.
| More Related Articles | ||||
 |
1. How to encrypt Safari bookmarks on Mac? 2. How to fix your macOS system storage is so huge |
|||
About Fireebok Studio
Our article content is to provide solutions to solve the technical issue when we are using iPhone, macOS, WhatsApp and more. If you are interested in the content, you can subscribe to us. And We also develop some high quality applications to provide fully integrated solutions to handle more complex problems. They are free trials and you can access download center to download them at any time.
| Popular Articles & Tips You May Like | ||||
 |
 |
 |
||
| Five ways to recover lost iPhone data | How to reduce WhatsApp storage on iPhone | How to Clean up Your iOS and Boost Your Device's Performance | ||