Partitioning our hard drive or external storage into multiple partitions on a Mac allows us to organize different types of data files independently, or use different partitions with various file systems to back up or reinstall multiple operating systems. However, there may be instances where we require more storage space or no longer need multiple partitions, leading to the merging and deletion of partitions. Unfortunately, this process can result in the unintentional deletion of data on the affected partition or even accidental formatting of another partition. This article will provide guidance on how to recover partition data on a Mac.
1. Check Hard Drive Using Disk Utility
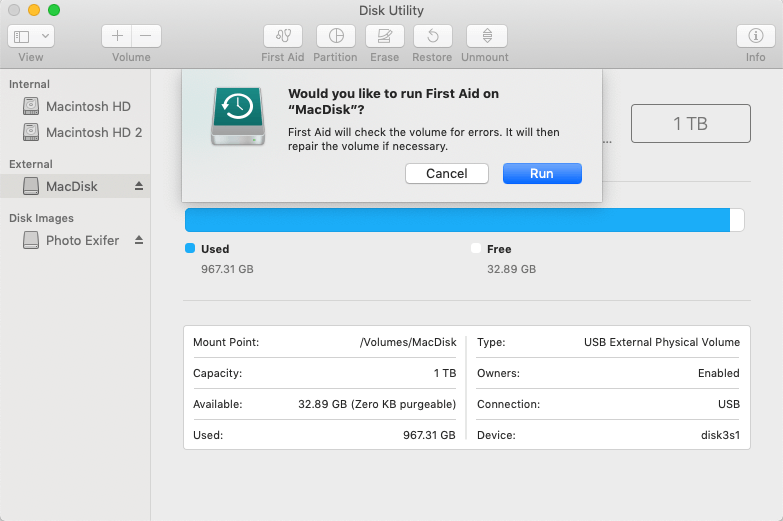
Begin by connecting your hard drive or external storage device to your Mac. Open the Disk Utility application and check the file system and condition of the partitions. If any damage is detected, try selecting the affected partition or the entire hard drive from the left window. Click the "First Aid" button located at the top of the window, and then click "Run" to initiate the repair process for the partition or hard drive.

2. Restore from a Time Machine Backup
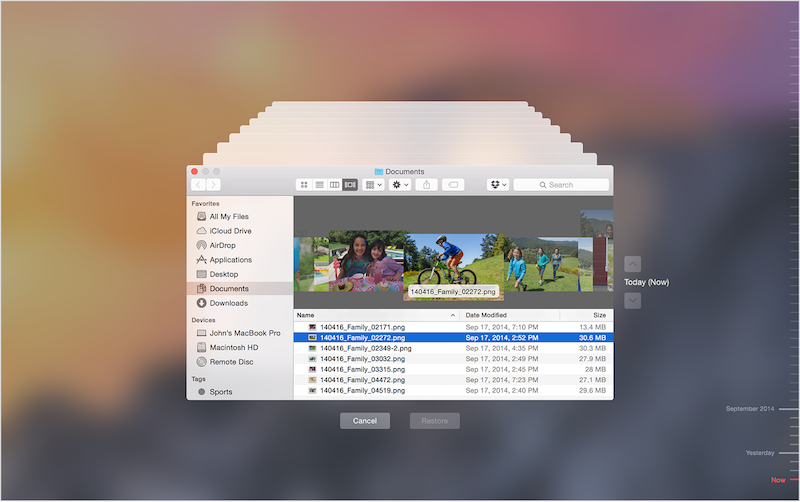
f you have previously backed up your data using Time Machine, you can easily restore the lost data from the backup. Connect the Time Machine backup external disk and click the Time Machine icon in the menu bar. Select "Enter Time Machine" and choose the most recent backup. Finally, click "Restore" to initiate the restoration process from the backup.

3. Recover Partition Data with Fireebok Data Recovery
When partitions are merged or deleted, the file systems and disk maps still retain information about the partition data. If the partition data has not been overwritten by new data, it can be recovered. Fireebok Data Recovery is a software tool that can help you recover partition data on your Mac. With support for over 550 file types and five recovery modes, we will focus on using the "Recovery Lost Volumes" feature in the software. Download and install Fireebok Data Recovery application on Mac.
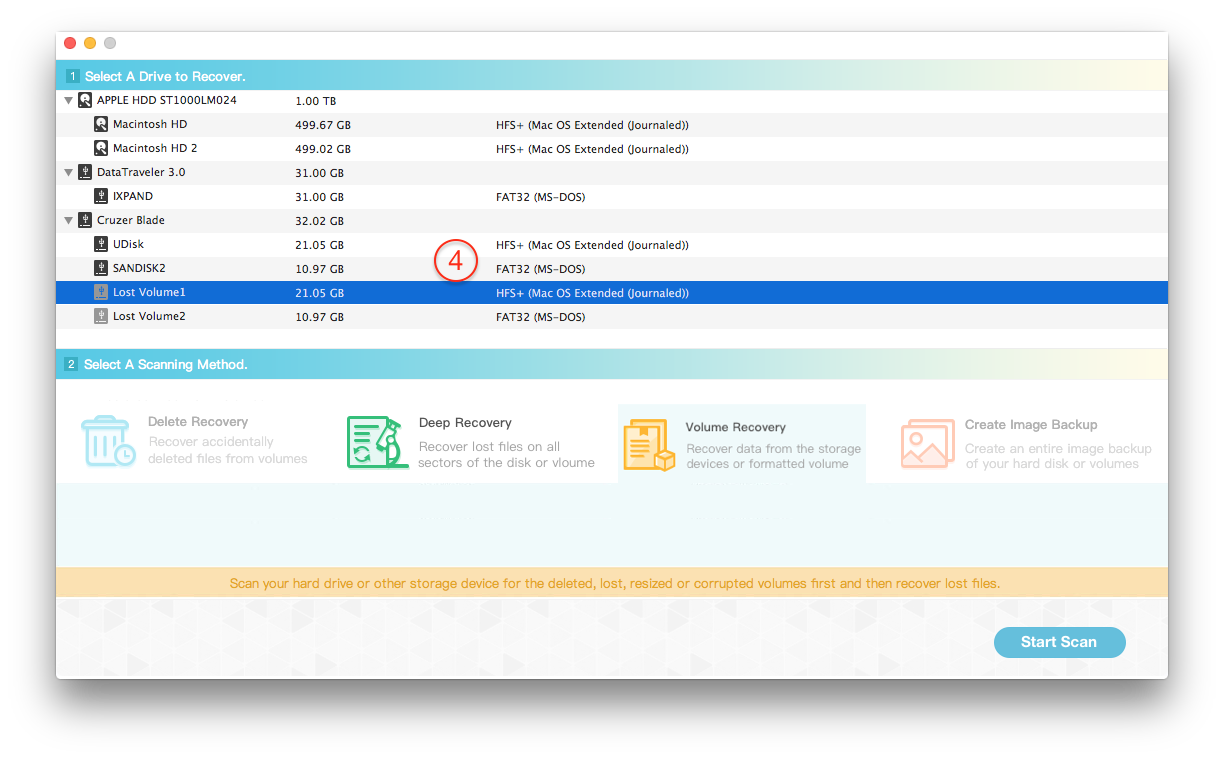
Launch Fireebok Data Recovery and select the target disk drive. Choose the "Lost Volumes Recovery" option with the "Quickly Search Volumes" feature, and click the "Start Scan" button.

After the scan is complete, all detected partitions will be added to the disk table. They will be displayed with a gray icon and labeled as "Lost Volume Num." Select the deleted or merged partition you wish to recover, and choose either the "Volume Recovery" or "Deep Recovery" mode. Click the "Start Scan" button again.

Please be patient and allow the scan to complete. You can preview the partition data during the scanning process. Once the scan is finished, click the "Recover" button and select a location to save the recovered data.

| More Related Articles | ||||
 |
1. How to fix your macOS system storage is so huge 2. 7 ways to retrieve the missing desktop files on Mac |
|||
About Fireebok Studio
Our article content is to provide solutions to solve the technical issue when we are using iPhone, macOS, WhatsApp and more. If you are interested in the content, you can subscribe to us. And We also develop some high quality applications to provide fully integrated solutions to handle more complex problems. They are free trials and you can access download center to download them at any time.
| Popular Articles & Tips You May Like | ||||
 |
 |
 |
||
| Five ways to recover lost iPhone data | How to reduce WhatsApp storage on iPhone | How to Clean up Your iOS and Boost Your Device's Performance | ||