Since macOS Mojave recommends to enable automatically Empty Trash in MacOS after 30 days in Optimse Mac Storage. Many mac users have turned on "Remove items from the Trash after 30 days". When this feature is enabled, all items in the Trash will be automatically deleted after 30 days. In this case, some Mac users report deleting the important files after emptying the trash. Because Apple uses the new Apple File system in macOS Mojave, many data recovery software can no longer support the new file system. Is there any solution or software can recover the trash files after emptying the trash on macOS Mojave? This article will show you the answer.

Before start we need to do:
Stop using your Mac computer immediately to avoid deleting the original data. Because macOS only marks the space used by deleted files on the disk to free up the storage space for the data, the original data is still on disk. Original data may be overwritten after new data is created or loaded on mac data.
Download Fireebok Data Recovery
The trash files comes from the boot disk to avoid boot disk data being overwritten, connect a USB device or external disk to the computer, and then download Fireebok Data Recovery to the USB device.
Disable SIP on MacOS Mojave
In order to recover the deleted and lost data from the startup disk on macOS Mojave, Fireebok Data Recovery needs the read-only privilege of startup disk, To grant this level of access on macOS 10.13 (High Sierra) you need to disable file system protection. This is part of the System Integrity Protection module (SIP or “rootless”) introduced in macOS El Capitan and substantially severed in High Sierra.
Step #1: Reboot your Mac
Click the menu on your Mac and select Restart.
Step #2: Boot into macOS Recovery Mode
Hold down Command + R on your keyboard immediately after your Mac begins to restart. Continue holding both keys until you see the Apple logo or a spinning globe. Startup is complete when you see the Utilities window.

Step #3: Run Terminal app
Click the Utilities menu and choose Terminal. The Terminal window will appear on your screen.

Step #4: Disable file system protection
In the "Terminal" window, type in "csrutil disable" and press "enter" then restart your Mac.

Recover the deleted Trash data
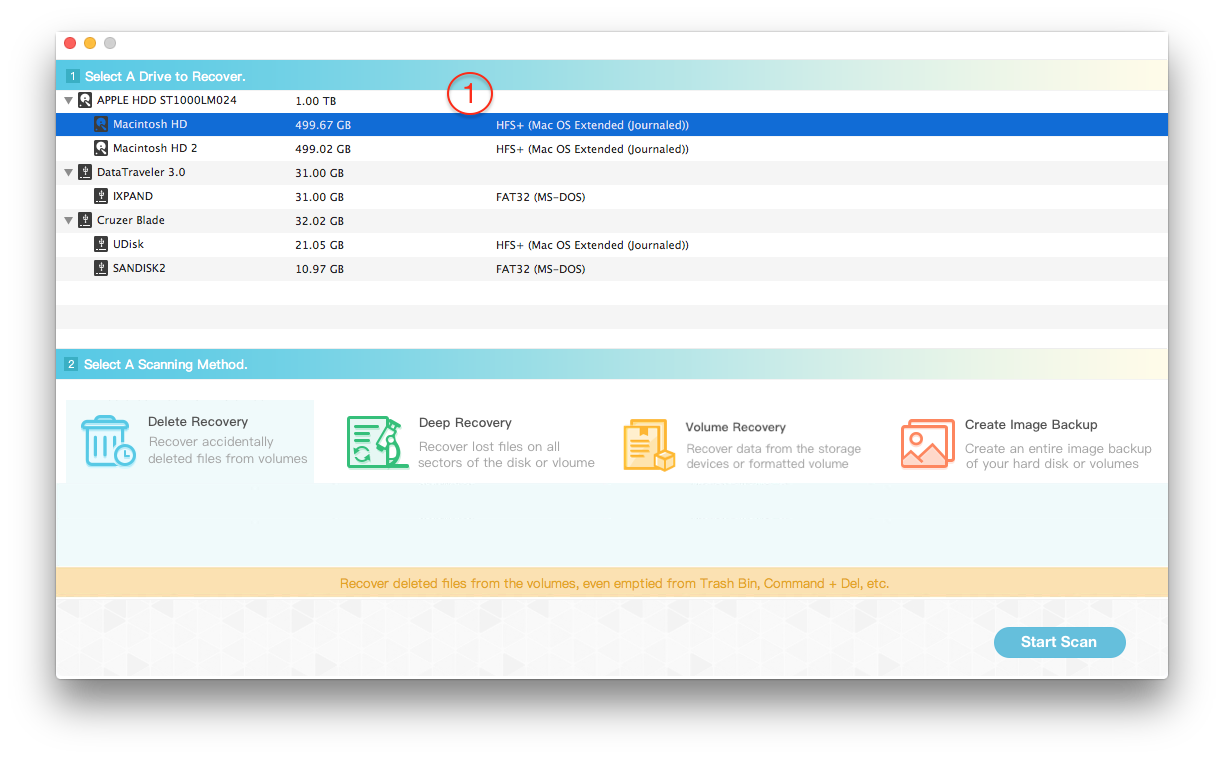
Reboot your Mac, run Fireebok Data Recovery. Choose the startup disk --Macintosh HD.
It supports for five scan modes: Deleted Recovery, Deep Recovery, Volume Recovery, Lost Volumes Recovery, Create Image Backup. Here we use the Deleted Recovery to recover the deleted data from system volume -- Macintosh HD.

After the scan has complete, you can find the deleted trash folder in the scanning result. Preview the data in the product.

Save the choose data to the USB device or external disk, do not save them to the startup disk again.
About Fireebok Studio
Our article content is to provide solutions to solve the technical issue when we are using iPhone, macOS, WhatsApp and more. If you are interested in the content, you can subscribe to us. And We also develop some high quality applications to provide fully integrated solutions to handle more complex problems. They are free trials and you can access download center to download them at any time.
| Popular Articles & Tips You May Like | ||||
 |
 |
 |
||
| Five ways to recover lost iPhone data | How to reduce WhatsApp storage on iPhone | How to Clean up Your iOS and Boost Your Device's Performance | ||
