If your Mac has failed, here's how to recover those files you need.
Most people try to get their data back after trying various recovery procedures, including using Disk Utility or the like. Your data is precious and, given the panic that’s set in, probably not fully backed up (if at all!).
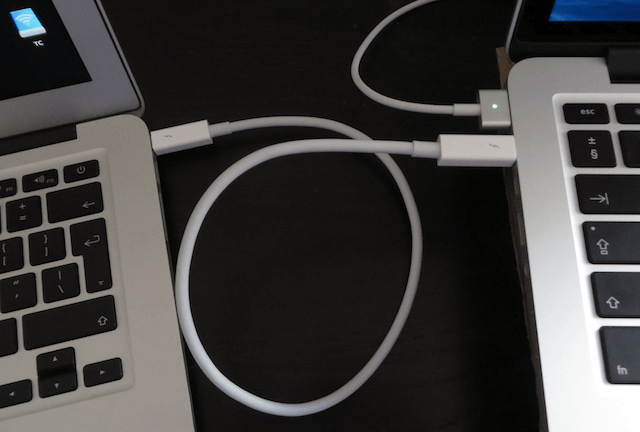
If your Mac won’t boot, you need to get the data off your computer. There are a number of ways you can do this, but the quickest, most efficient one is by using target disk mode. This uses your Mac as an external drive, accessible by another Mac connected via a FireWire or Thunderbolt cable. lean more about how to connect two Mac computers with Thunderbolt cable (https://support.apple.com/en-us/HT201164).

To put a Mac into target disk mode, start it up while holding down the T key. When the computer starts up, a large floating FireWire icon appears on-screen and the boot disk mounts on the desktop of the other computer. Treat it just like an external drive.
You can also use NewerTech’s Voyager Q which gives you access to the data on a bare hard disk
You’ve probably heard of parameter random access memory (PRAM) and non-volatile random access memory (NVRAM). The former is used on PowerPC computers; the latter on Intel-based computers. In essence, they do the same thing, namely save certain settings in a special area of memory.
The settings it handles are those for display, video and screen resolution, colors, startup volume, DVD region and recent kernel panic information. Resetting the PRAM or NVRAM will only deal with issues relating to these functions. Any other problems won’t be solved.
To reset, turn off your computer, press and hold the Command-Option-P-R keys before the gray screen appears, hold the keys down until the computer restarts and you hear the startup sound for the second time and then release the keys.
On older Power Macs, there is a power management unit (PMU) that controls a Mac’s power function for turning on/off, sleeping and waking along with the PRAM and real-time clock. Resetting this requires opening up the Mac and pressing a small button.
If you’ve been running Lion or Mountain Lion you have the option of using OS X Recovery. As this resides on a separate partition, it will work for you as long as your hard drive isn’t damaged mechanically. Restart by holding down Command-R, use Disk Utility to reformat your drive, reinstall Mac OS X and then either use a Time Machine backup or handle that side manually.

If you’re running Snow Leopard or earlier you’ll need to boot from the original DVD or from a retail version of Mac OS X. Run Disk Utility, reformat your drive, reinstall Mac OS X and then use Time Machine or your own backups.
Extra Tip: Recover lost data on your Mac computer
Professional Mac data recovery software - Fireebok Data Recovery for Mac allows you to restore all lost data due to macOS update or other reasons within 2 steps. If you lost any data while installing macOS High Sierra, just download it and let it help get all lost data now:

- Data Recovery
Recover data lost due to accidental deleting, formatting, virus infection,
and other unknown reasons.
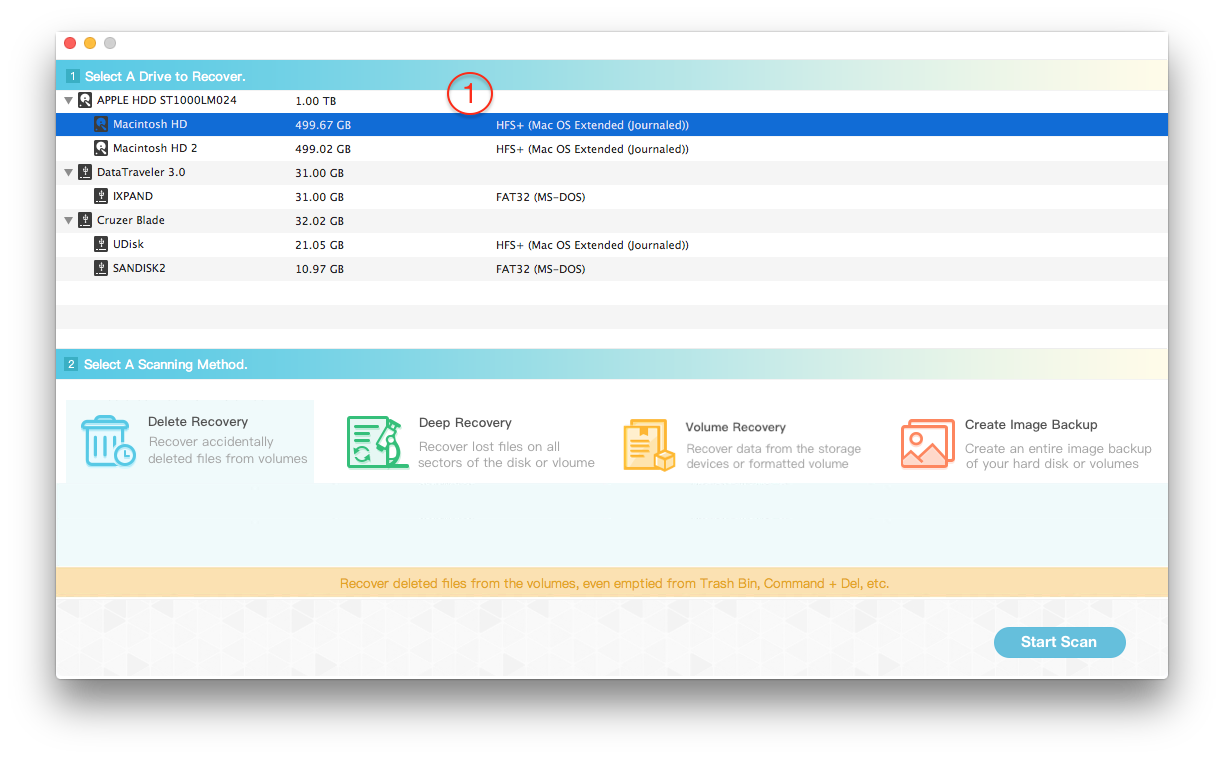
Step 1: Launch the program and Select the partition or volume where the deleted file stored

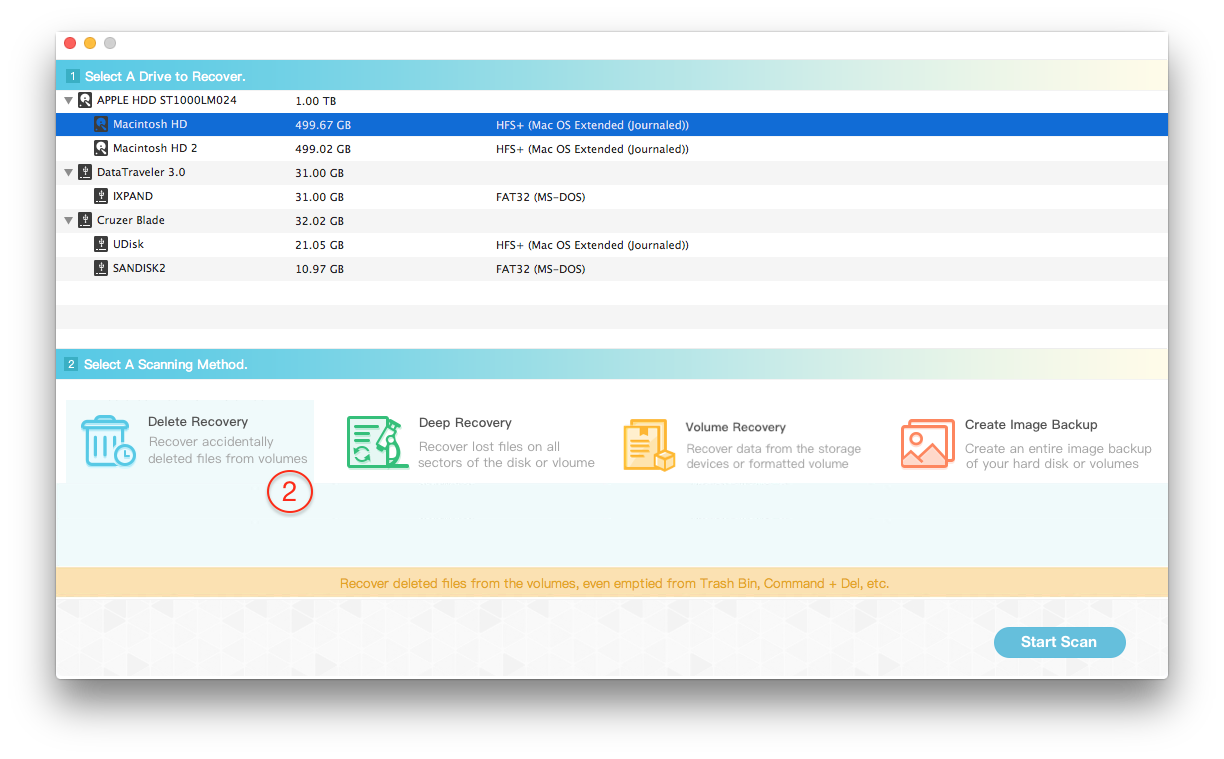
Step 2: Choose "Deep Recovery" and click "Start Scan" button

Step 3: Preview the scanning result and select them to save to the different disk or USB device.

About Fireebok Studio
Our article content is to provide solutions to solve the technical issue when we are using iPhone, macOS, WhatsApp and more. If you are interested in the content, you can subscribe to us. And We also develop some high quality applications to provide fully integrated solutions to handle more complex problems. They are free trials and you can access download center to download them at any time.


