Numerous Mac users have reported experiencing sluggish performance after updating to macOS Sonoma. Symptoms include a delay of up to 5 minutes before the desktop appears, along with unresponsive Safari and Finder applications. This common issue can be attributed to several factors, including slow read/write speeds of the boot disk, an overloaded CPU, depleted computer memory, blocked system tasks, and irregular connections with external devices. Fortunately, the following strategies can help address the problem of slow Mac performance in the new Sonoma system.
1. Disconnect the Time Machine Backup Drive
If your Mac is connected to an external hard drive for Time Machine backups, disconnect it to halt ongoing backup processes. This action prevents heavy disk data read/write operations and potential errors caused by Time Machine backup failures.
2. Unplug External Monitors and USB Devices
Some users have reported issues with external monitor connectivity after updating to macOS Sonoma. To prevent complications arising from external devices, unplug both external monitors and USB peripherals connected to your Mac.
3. Reset NVRAM (Non-Volatile Random-Access Memory)
NVRAM is a small, fast-access memory that stores essential system settings for an Intel-based Mac. To reset NVRAM, shut down your Mac, then press and hold Command + Option + P + R immediately after restarting. Continue holding these keys until you see the Apple logo or a spinning globe. Your Mac will boot normally after this process.

4. Disable iCloud Drive Sync
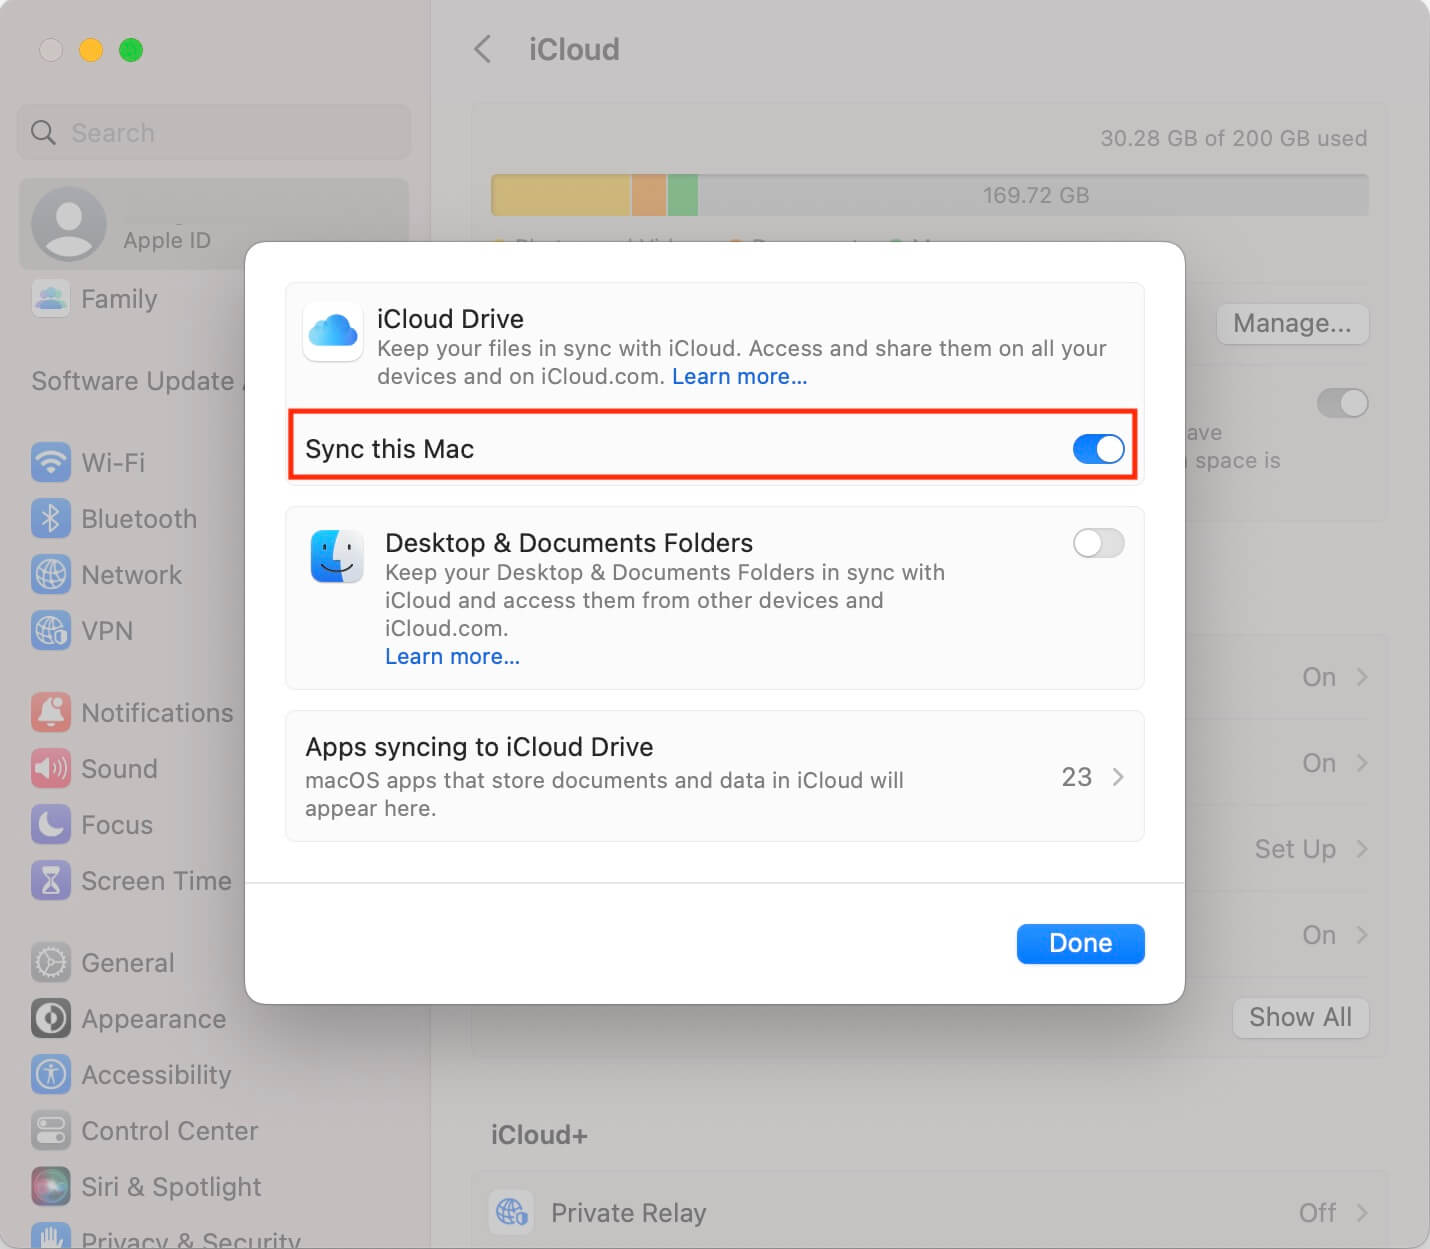
To avoid exceptions caused by iCloud Drive data synchronization, disable iCloud Drive sync on your Mac. Navigate to System Settings -> Apple ID -> iCloud -> iCloud Drive, and then disable the "Sync this Mac" option.

5. Check Startup Disk Type
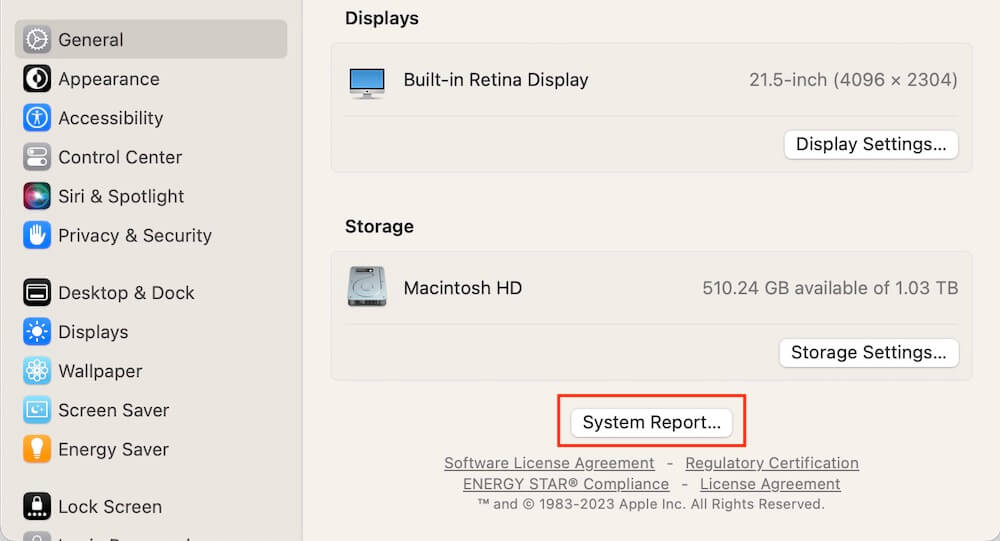
Go to System Settings -> General -> About -> scroll down and click on "System Report..." to examine your Mac's Startup Disk type. macOS Sonoma might perform slowly with Hard Disk Drives (HDD) or Hybrid Hard Drives (HHD). If your startup disk falls into these categories, consider downgrading your Mac to an older macOS version. Or you can install macoS Sonoma onto an external SSD and then boot your Mac from the external SSD.

6. Downgrade macOS
If you backed up your Mac before upgrading to macOS Sonoma, you can downgrade without losing data. Access macOS Recovery mode by holding down Command + R immediately after restarting your Mac. Keep holding these keys until you see the Apple logo or a spinning globe. Once in Recovery mode, click "Restore From Time Machine Backup" and follow the step-by-step process to select the appropriate backup.

Conclusion: By following these steps, you can potentially resolve the issue of your Mac slowing down after updating to macOS Sonoma, ensuring a smoother and more efficient computing experience.
| More Related Articles | ||||
 |
1. How to sync all your bookmarks on different browsers on Mac? 2. How to fix your macOS system storage is so huge |
|||
About Fireebok Studio
Our article content is to provide solutions to solve the technical issue when we are using iPhone, macOS, WhatsApp and more. If you are interested in the content, you can subscribe to us. And We also develop some high quality applications to provide fully integrated solutions to handle more complex problems. They are free trials and you can access download center to download them at any time.
| Popular Articles & Tips You May Like | ||||
 |
 |
 |
||
| Five ways to recover lost iPhone data | How to reduce WhatsApp storage on iPhone | How to Clean up Your iOS and Boost Your Device's Performance | ||
