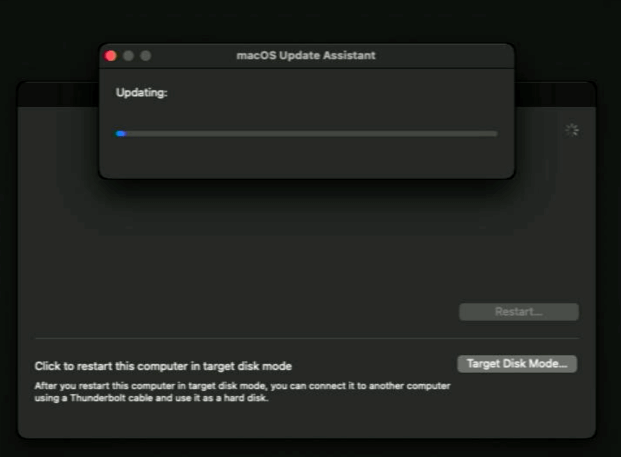
Some Mac users report that their Macs gets stuck in the macOS update Assistant process when updating macOS 11.2. Even if the macOS update Assistant process is completed, they can’t find the startup disk in the Target Disk Mode. After shutting down or restarting from the Apple Menu, the macOS update Assistant process will restart again without ending. Worse, if we cannot access the computer normally, the computer data will be lost. How to solve? If you’re looking for a solution for this problem, this article will provide some solutions to fix it.

1. Force shut down Mac
If you get stuck in the progress of macOS Update Assistant that cannot be shut down by using the Apple menu, please press and hold the power button/TouchID for 5 to 10 seconds to force shut down the Mac.
The reason for this problem is that the boot disk does not have enough storage space to complete the decompression and installation of the macOS update package. Even if we enter macOS Recovery mode to reinstall macOS, we will encounter this problem. The key to the problem is that we cannot delete the startup disk file after falling into this endless loop.
2. Erase the Mac and reinstall macOS
If you have a recently Time Machine backup, you can consider erasing while Mac and reinstall macOS, and then restore data from the latest Time Machine backup. Here is the Apple Support document about how to access macOS Recovery to erase your Mac and reinstall macOS(https://support.apple.com/en-us/HT211983). And you can restore data from Time Machine backup in macOS Recovery -> Restore from Time Machine.

3. Free up disk storage space
To free up disk storage space on the startup disk, the following article will provide two ways to mount this startup disk in other macOS systems to delete some files.
a). You need an external drive installed macOS Mojave and later, connect the external drive with the Mac. Hold down Option keyboard after reboot the Mac, and select the external drive to boot. After accessing macOS Mojave, you can delete files from the mounted startup disk. Disconnect the external drive and reboot the computer after removing about 30 GB files, the macOS Big Sur 11.2 update will complete the installation.
If you don't know how to quickly find and delete 30 GB unnecessary files, you can use PowerSuite to find large files, duplicate files and other junk files on your Mac.

b). You need another Mac installed macOS Hight Sierra or Mojave, and A USB-C to USB-C 3.0 Cable, or a ThunderBolt 3 Cable.
After connecting two Macs with a thunderBolt 3 cable, access the target disk mode and boot from the host Mac. Then you can view the mounted target startup disk and then delete about 30GB files. Then disconnect the thunderBolt 3 cable, reboot your Mac with macOS Big Sur to complete the update installation.
About Fireebok Studio
Our article content is to provide solutions to solve the technical issue when we are using iPhone, macOS, WhatsApp and more. If you are interested in the content, you can subscribe to us. And We also develop some high quality applications to provide fully integrated solutions to handle more complex problems. They are free trials and you can access download center to download them at any time.
| Popular Articles & Tips You May Like | ||||
 |
 |
 |
||
| Five ways to recover lost iPhone data | How to reduce WhatsApp storage on iPhone | How to Clean up Your iOS and Boost Your Device's Performance | ||
