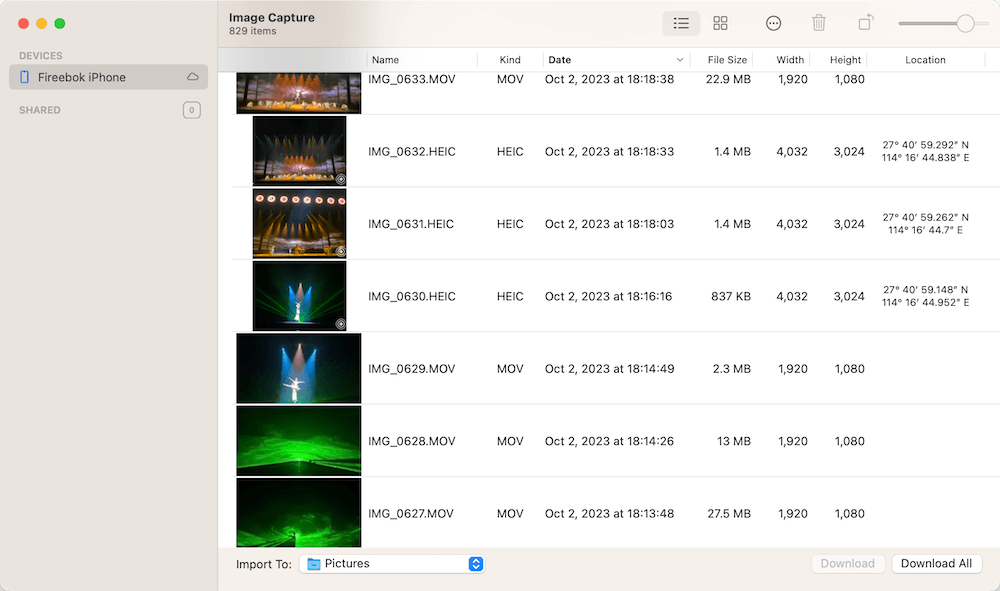
Many users transfer photos and videos from their iPhones and iPads to their Macs using the Image Capture application. However, some Mac users have mistakenly deleted their iPhone photos in Image Capture, thinking that the transferred photos were already downloaded on their Macs. Unfortunately, Image Capture deleted the photos from both the iPhone and the Mac, and they couldn't find the photos on either device. If you're facing this issue, this article will guide you on how to recover deleted photos from Image Capture.

1. Recover photos from iCloud Photos
Have a check if your iPhone have enabled iCloud Photos, if so, you can try to recover photos from iCloud Photos. Open a browser and visit www.iCloud.com and then sign in with your Apple ID account and access iCloud Photos, open the Recently Deleted folder on the left side of the window, and select photos you want to recover.

2. Recover photos from iPhone backup
If your iPhone have previously backed up with iCloud or your local computer, you can recover photos from the iPhone backup. To restore from the iCloud backup, you need to erase the current iPhone all content and data in iPhone Settings -> General -> Transfer or Reset iPhone -> Reset iPhone -> Erase All Content and Settings, then set up iPhone and restore iCloud backup. To restore from the iPhone backup on a computer, you need to open iTunes or Finder app, and click the Restore Backup…, then select the iPhone backup to restore.

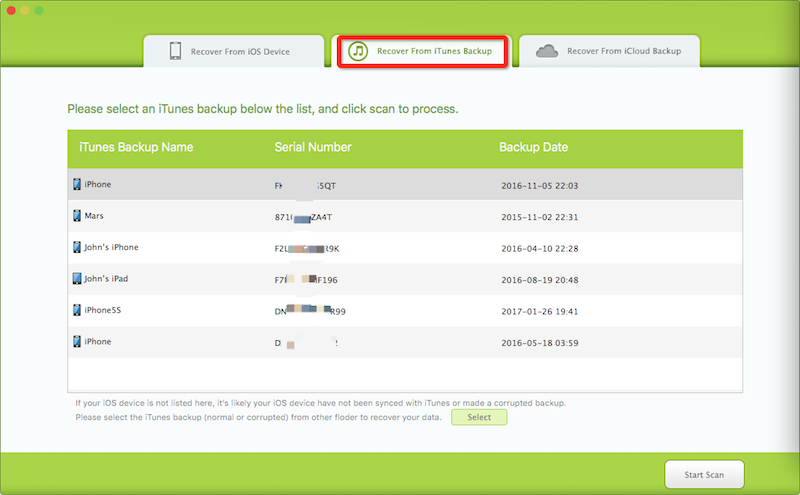
When restoring data from an old iCloud backup or an iPhone local backup, keep in mind that all current data on your iPhone will be replaced and overwritten with the backup data. Alternatively, you can extract photos from the iPhone backup and iCloud backup without overwriting the current data. Here are the steps to extract photos from the iPhone backup using the Fone Rescue application:
Run Fone Rescue applications and select "Recover Photos from iTunes Backup" or "Recover photos from iCloud backup" tab, and select an iPhone backup to scan.

Once the scan is complete, select photos in Photos & Videos tab, and click “Export the selected medias” or “Export all medias” button to extract and save.

3. Recover deleted photos from Mac Disk
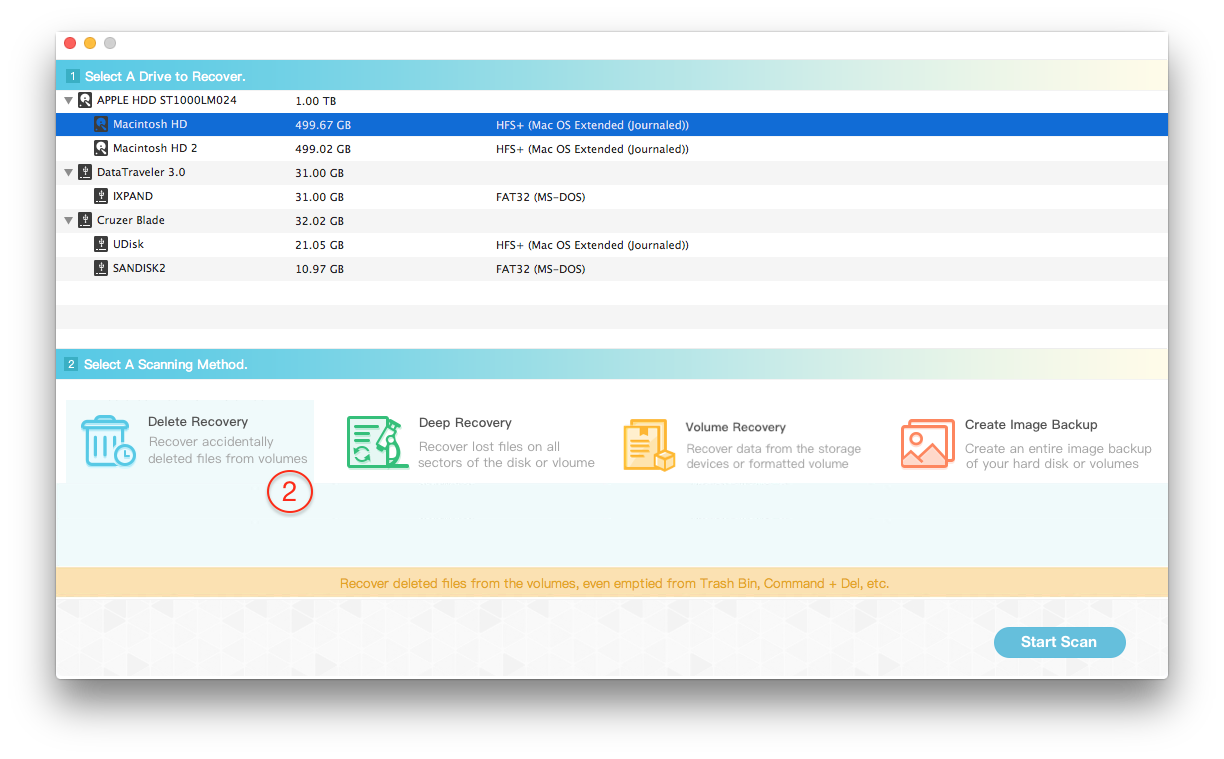
If you don't have an iPhone backup, you can try to recover photos from your Mac disk. Once some photos deleted from Mac disk, it still leaves a trail of data blocks. Here we use Data Recovery application to recover deleted photos from Mac Disk. Download and install Fireebok Data Recovery app on your Mac.
Run Data Recovery application, if you’re using macOS 10.14 and later, you need to disable the SIP to get the read permission of Mac startup Disk. Select the partition of Mac Startup Disk, and select "Delete Recovery", "Deep Recovery" mode, and click the "Start Scan" button.

You can preview the recovered photos and other files in the result view, and select photos you want to recover.

| More Related Articles | ||||
 |
1. How to find and remove duplicate photos from Photos? 2. How to batch rename photos within the Photos app on Mac? |
|||
About Fireebok Studio
Our article content is to provide solutions to solve the technical issue when we are using iPhone, macOS, WhatsApp and more. If you are interested in the content, you can subscribe to us. And We also develop some high quality applications to provide fully integrated solutions to handle more complex problems. They are free trials and you can access download center to download them at any time.
| Popular Articles & Tips You May Like | ||||
 |
 |
 |
||
| Five ways to recover lost iPhone data | How to reduce WhatsApp storage on iPhone | How to Clean up Your iOS and Boost Your Device's Performance | ||

