Once we find that we lost or deleted some important Mac data, the first thing that comes to our mind is choosing to restore them from a Time Machine backup. But at the same time we need to face the problem that restoring from a Time Machine backup will replace the current data on the Mac. If they are just a few different versions of files and folders, choosing to replace and rewrite them will do the trick.

However, when you restore your photo library from Time Machine Backup, things start to get more complicated. Because the current photo library also contains some very important new photos and videos, you cannot directly replace the current photo library with the old one to complete the Time Machine restore process. In addition, if your photo library backup is from the old iPhoto photo library, you are currently using the new Photos application. Incompatible versions of the photo library can also cause Time Machine recovery to fail. How to solve the above problem while restoring photo library from Time Machine backup?
1. Restore Photo library from Time Machine backup directly
Of course, not everyone has the above concerns. If you just want to restore the photo library directly from Time Machine backup, the process is as follows:
a). Quit Photos application
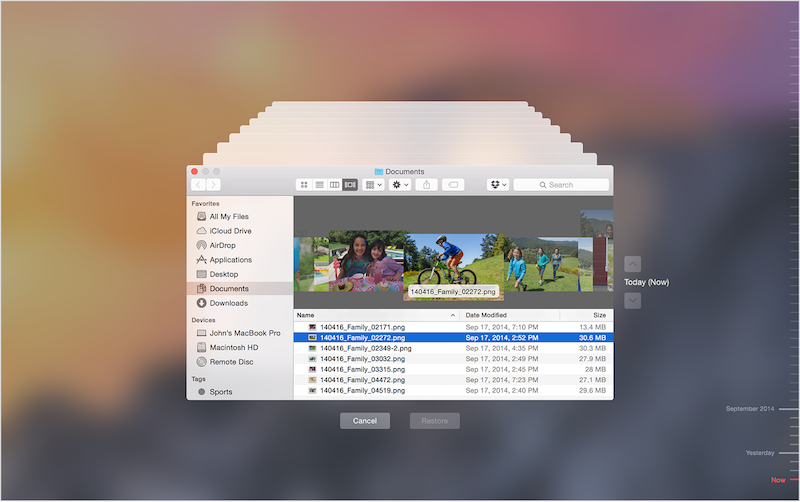
b). Click the Time Machine icon in the menu bar and choose Enter Time Machine, choose the date of Time Machine backup what you need, navigate to the backup of your photo library, then click to select it, and then click Restore.

2. Manually restore Photo library using Finder
Open Finder, and access your Time Machine Backup Volume in Finder(~/Backups.backupdb) and select a date folder of your Time Machine backup, navigate to the backup of your photo library(Macintosh HD -Data/Users/~/Pictures), and then find the Photo Library.photoslibrary or iPhotos Library.photolibrary folder, and right click it to copy it to another place.

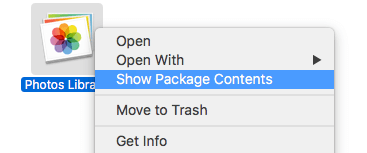
Right click the Photo Library.photoslibrary or iPhotos Library.photolibrary, and choose Show Package Contents. Access the Masters or original folder, you will find all original photos are stored under this folder. And choose photos you want to, and then import them into Photos application, it will work.

But if it’s the Photo Library.photoslibrary in macOS 10.15 and later, all original photos and videos were renamed and even the creation date was wrong. If we import these photos directly into the Photos app, it will mess up the photo management. Next we use a third-party application- Photo Exifer to solve this problem.

3. Use Photo Exifer to export photos with Photo metadata
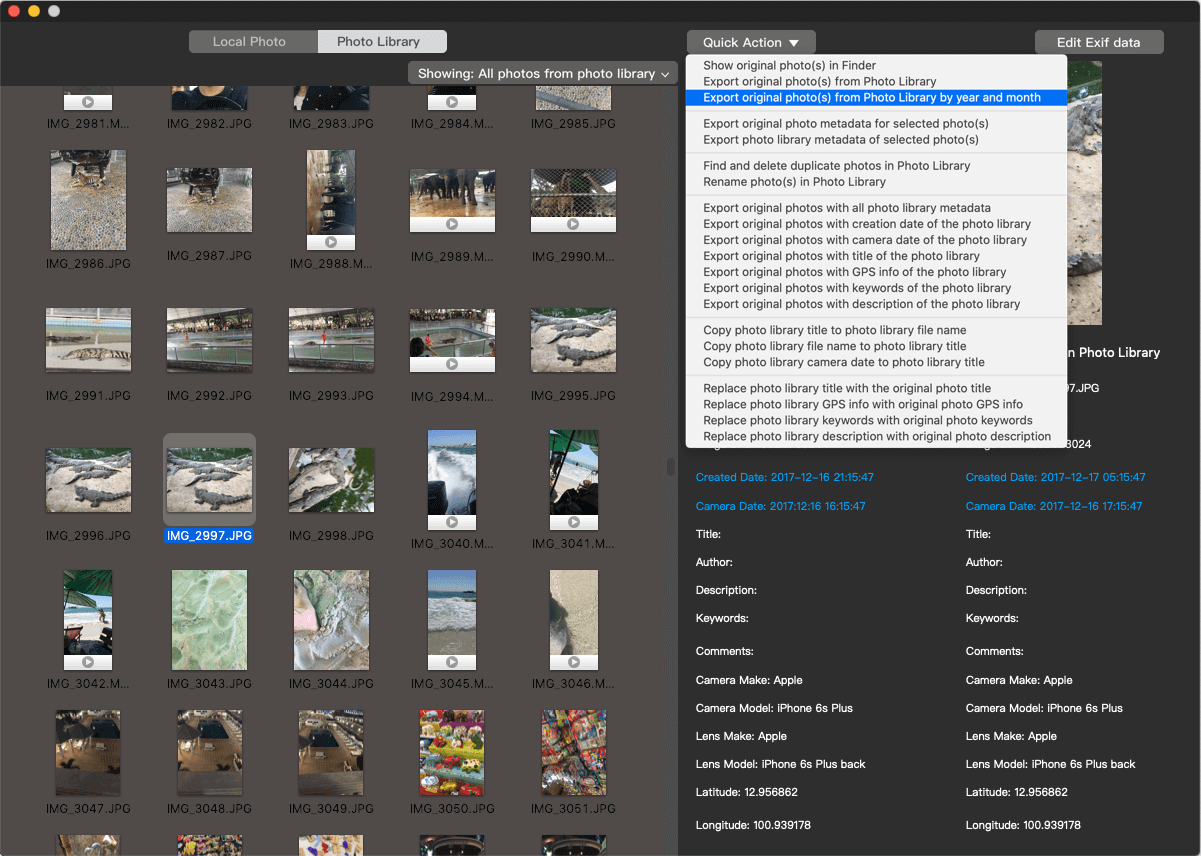
Download and install Photo Exifer application on your Mac, run Photo Exifer application, and go to File Menu -> Open Photo Library… -> choose the Photo Library.photoslibrary, it will read all photos and video with filename and other photo metadata tags.
And then select photos and videos in Photo Exifer after scanning, click Quick Action -> Export original photo(s) from Photo Library by year and month, or Export original photos with all photo library metadata. It will export all select photos with original file name and other photo metadata.

| More Related Articles | ||||
 |
1. How to find and remove duplicate photos from Photos? 2. How to batch rename photos within the Photos app on Mac? |
|||
About Fireebok Studio
Our article content is to provide solutions to solve the technical issue when we are using iPhone, macOS, WhatsApp and more. If you are interested in the content, you can subscribe to us. And We also develop some high quality applications to provide fully integrated solutions to handle more complex problems. They are free trials and you can access download center to download them at any time.
| Popular Articles & Tips You May Like | ||||
 |
 |
 |
||
| Five ways to recover lost iPhone data | How to reduce WhatsApp storage on iPhone | How to Clean up Your iOS and Boost Your Device's Performance | ||