After upgrading to macOS Sequoia 15 and later, some Mac users reported that their Mac search does not work when using Spotlight or Finder, and the search results may only be some files recently accessed or viewed, not all relevant results. Or many search results come from unknown places that we don't need. If you have encountered similar problems, in this article we will guide you how to make Mac Spotlight or Finder work and control Mac search to get the correct search.
1. Rebuild the Spotlight Index
Mac uses Spotlight function search results, we can rebuild Spotlight index for the startup disk or other folders, just turn off Spotlight indexing for the item and turn it back on.
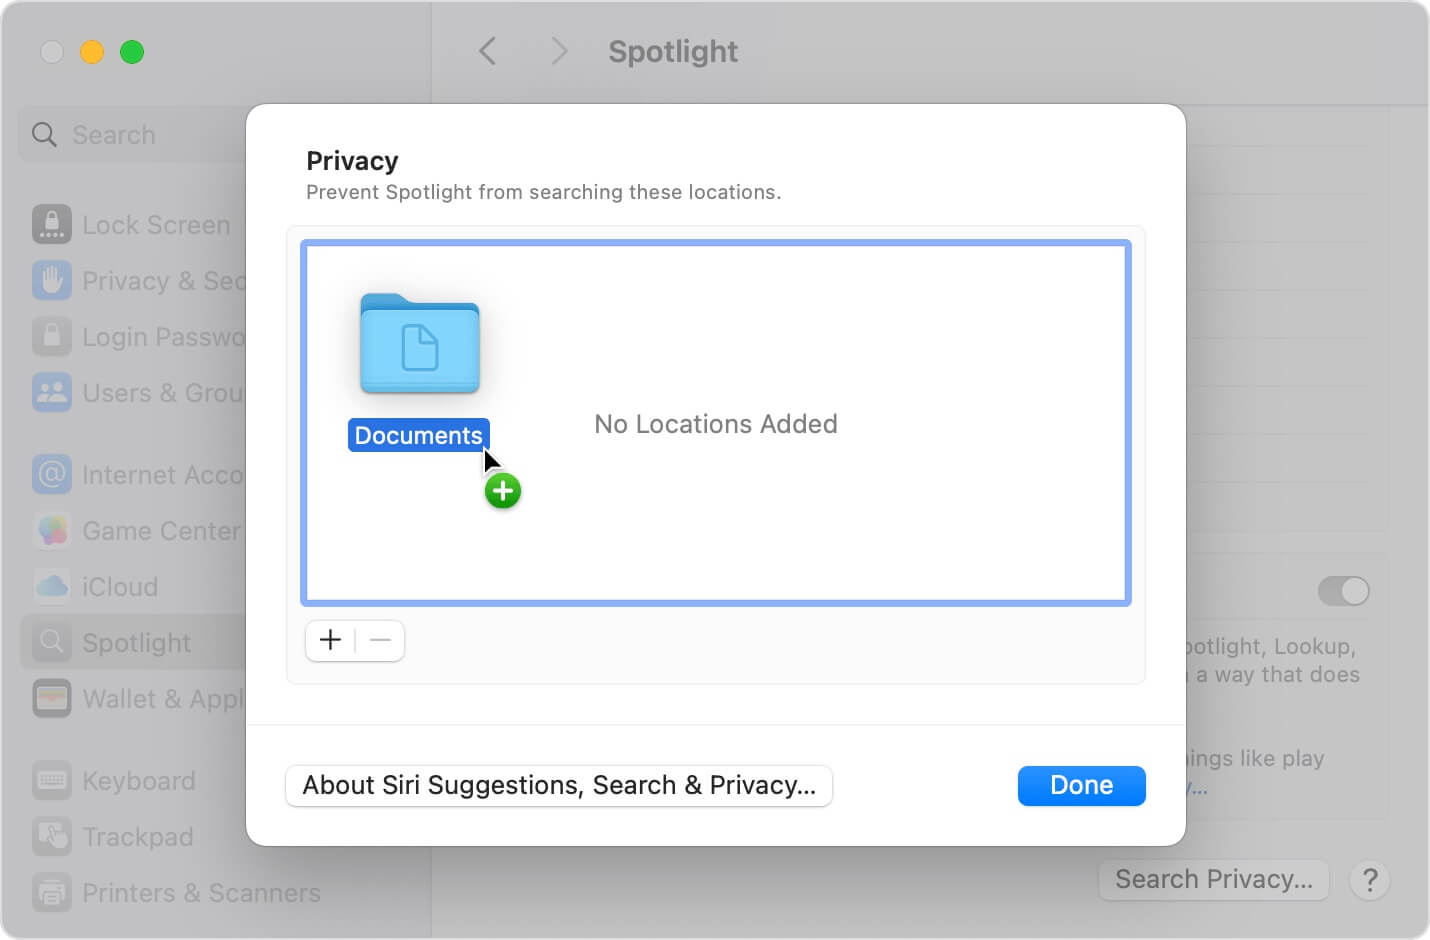
1. Choose Apple menu -> System Settings -> Spotlight (Siri & Spotlight in macOS Sonoma or macOS Ventura) -> Scroll down and click the Search Privacy (Spotlight Privacy... in macOS Sonoma or macOS Ventura...) button on the right.
2. Add the Desktop, Documents, Applications, Downloads, Pictures, Music, Movies and other folders you want to index. After that, click the Delete button (-) to remove these added folders from the list so that you can re-index again.

2. Fix Search Issues for iCloud Data
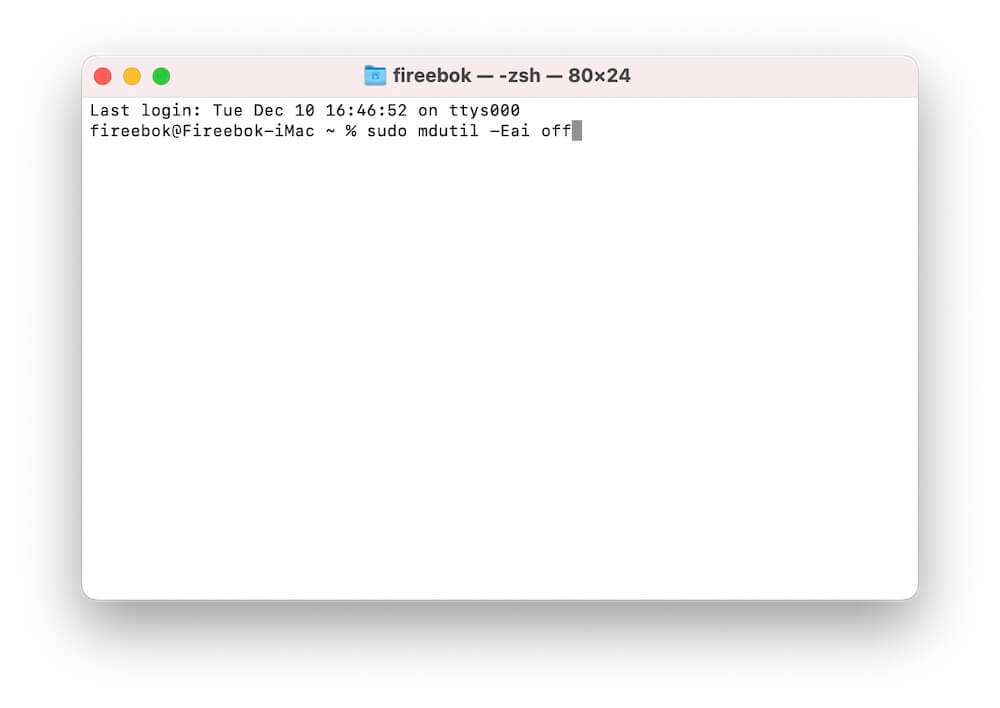
If you have problems searching iCloud data (such as iCloud Calendar, iCloud Notes, or other synced iCloud files) on your Mac. The above rebuilding Spotlight index may not solve the problem for you. But you can use the command tool -mdutil to manage Spotlight indexing for this problem. Find the Terminal application (/Applications/Utilities) on your Mac and add it to Full Disk Access in (System Settings -> Privacy and Security -> Full Disk Access).
Open the Terminal application and copy these commands line by line to process:
1. sudo mdutil -Eai off
2. sudo mdutil -Eai on
3. mdutil -as

3. Exclude External Drives from Spotlight Search
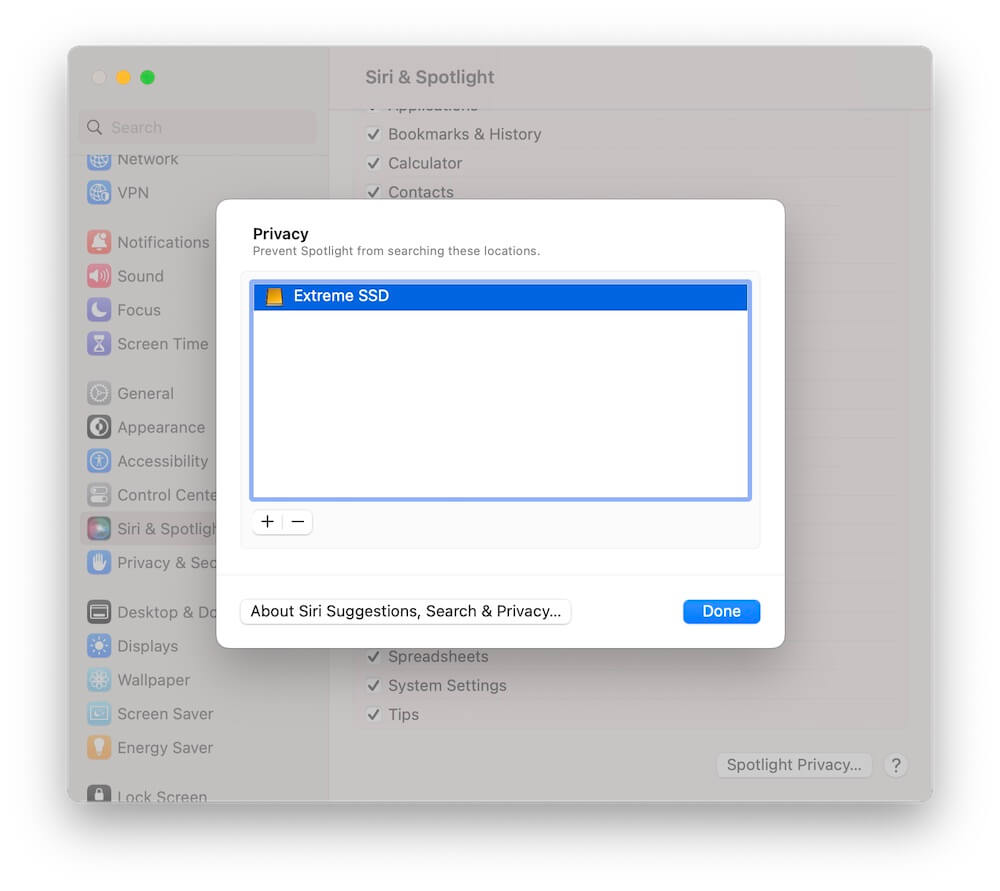
If your Mac has an external hard drive or Time Machine backup external drive connected, add them to the Spotlight Do Not Search list to prevent Spotlight from searching these items. Avoid the search function affected by USB connection problems, file permission problems, or different file systems of external drives.
1. Choose Apple menu -> System Settings -> Spotlight (Siri & Spotlight in macOS Sonoma or macOS Ventura) -> Scroll down and click the Search Privacy (Spotlight Privacy in macOS Sonoma or macOS Ventura...) button on the right.
2. Add external drives to the exclusion list: Click the “+” button, select the external drive, and add it to the list.

3. This prevents Spotlight from indexing and searching these drives, which can improve search performance for internal storage.
By following these steps, you can resolve search issues in macOS Sequoia and regain control over Spotlight and Finder results. If problems persist, consider contacting Apple Support for further assistance.
About Fireebok Studio
Our article content is to provide solutions to solve the technical issue when we are using iPhone, macOS, WhatsApp and more. If you are interested in the content, you can subscribe to us. And We also develop some high quality applications to provide fully integrated solutions to handle more complex problems. They are free trials and you can access download center to download them at any time.
| Popular Articles & Tips You May Like | ||||
 |
 |
 |
||
| Five ways to recover lost iPhone data | How to reduce WhatsApp storage on iPhone | How to Clean up Your iOS and Boost Your Device's Performance | ||
