If you’re using iPhoto or Photos application to manage all photos and videos from iPhone, digital camera for years, there will be lots of photos and videos in iPhoto or Photo Library. Have you ever encountered a situation where Photo library could not be loaded or opened on a Mac? Or all photos and videos disappeared from the Photos app after the macOS update? When you storing the Photo library on a computer or external disk drive. Photos may be deleted or the photo library corrupted for some reason. If you’re going to recover those photos and photo library, this article may be helpful to you.
1. Repair Photo Library
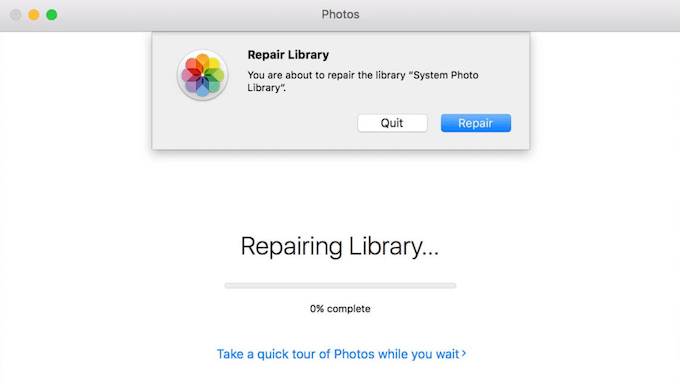
The Photo library repair tool may resolve the issues when the library’s database and other reason cause. First quit iPhoto or Photos application on the computer. Then hold down Option-Command and double-click the iPhoto or Photos application icon. Click Repair button to start the repair process in the dialog. The repair time depends on the size of your library, this might take some time. When the process is completed, Photos opens the library.

2. Extract and recover photos from a corrupted Photo library
If the Photo library repair tool can’t fix the issue, you need extract and recover photos from the photo library manually. Check the photo library location in Photos.app -> Preferences... -> General -> Library Location.
Then find the photo library package, right click the Photo(iPhoto) Library.photoslibrary, and choose Show Package Contents. All photos and videos original file are stored in Master folders. They are grouped by the date they were imported into the photo. Copy and backup them to another location.

3. Recover photos or whole Photo library from the computer or external drive
If you find some photos lost in the Master folders, or you can’t find the whole photo library package in the library location. It means that they are been deleted by other malicious application. The only solution that we use data recovery software to recover from the disk drive. Here we recommend to use Fireebok Data Recovery, it has 5 recovery modes and support the recovery more than 500+ file format from a computer or external drive. It will help you to recover lost photos and the whole photo library folder.
a). Download and install Fireebok Data Recovery on the computer
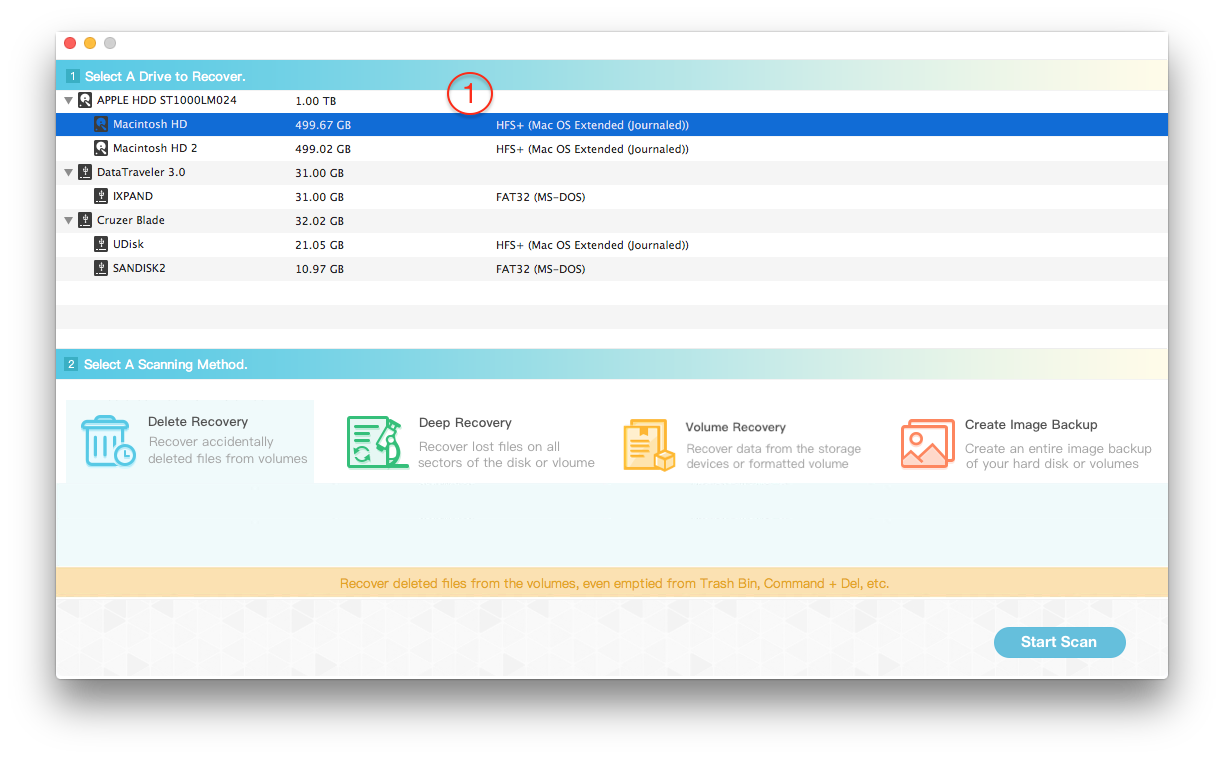
b). Run Fireebok Data Recovery, select the volume stored the photo library location, system disk volume or external disk volume. Then choose the Delete Recovery mode first and click the Start Scan button.

c). When the scan is complete, you can preview photos from the photo library. If you need to recover the whole photo library, please select the whole photo library folder in the product, then click the Recover button to save. And don’t save them to the same volume which stored the photo library location before, to avoid overwriting the original disk data.

If you can’t find them with the Delete Recovery, use Volume Recovery and Deep Recovery to scan, they will be slower than the Delete Recovery, and the scan time depends on the size of the volume.
About Fireebok Studio
Our article content is to provide solutions to solve the technical issue when we are using iPhone, macOS, WhatsApp and more. If you are interested in the content, you can subscribe to us. And We also develop some high quality applications to provide fully integrated solutions to handle more complex problems. They are free trials and you can access download center to download them at any time.
| Popular Articles & Tips You May Like | ||||
 |
 |
 |
||
| Five ways to recover lost iPhone data | How to reduce WhatsApp storage on iPhone | How to Clean up Your iOS and Boost Your Device's Performance | ||


