Wondering how to retrieve or recover lost photos after macOS Catalina update? First you need to know where the photos are stored before the update? Stored in the Photos app or other location on your Mac? If they stored in Photos, Photos uses photo library to manage and organize all imported photos. If the photo library is corrupted, deleted or moved to another location, Photos application will can’t find the stored photos. Finding Photo library will help us find the lost photos. If the lost photos were previously stored in other location, for example ~/Pictures. how to get them back? Don’t worry they still can be recovered. We’re going to tell you how to use 6 ways to recover lost photos on macOS Catalina.
1. Recover from the Mac Trash
First we need to check the Trash on Mac. If photos or photo library has been moved to Trash, we can put them back to the original place.

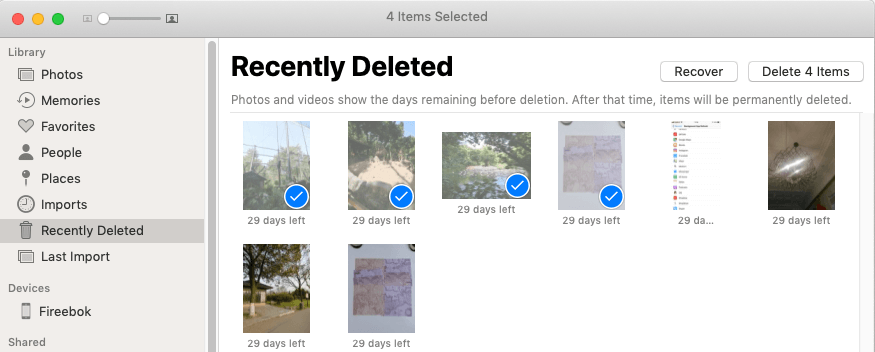
2. Recover from the Recently Deleted folder in Photos
Open Photos and check the Recently Deleted folder in the left sidebar. Deleted photos can be stored in 30 days, select them and click the Recover them.

3. Recover from iCloud Photo
If some photos are synced from iCloud Photos, when other iOS devices and Mac devices with the same iCloud account delete those photos from iCloud, it will automatically deleted from your computer. But you can still find them in the iCloud Recently Deleted album. Select and recover them.

4. Recover from Photo Library
Have a check If the Photo Library is corrupted, deleted or moved to another location. Run Photos applications, go to Preferences... -> General -> Library Location. Then you can find the photo library package, right click the Photo(iPhoto) Library.photoslibrary, and choose Show Package Contents. All photos and videos original file are stored in Master folders. Copy and recover them to another location.

5. Recover from Time Machine Backup
If you have backed up your Mac with Time Machine before upgrading to macOS Catalina. Connect your Time Machine backup disk, then click the Time Machine icon in the menu bar and Enter Time Machine. Select a right backup with the timeline, then click Restore to restore from the backup.

6. Recover from the Disk drive
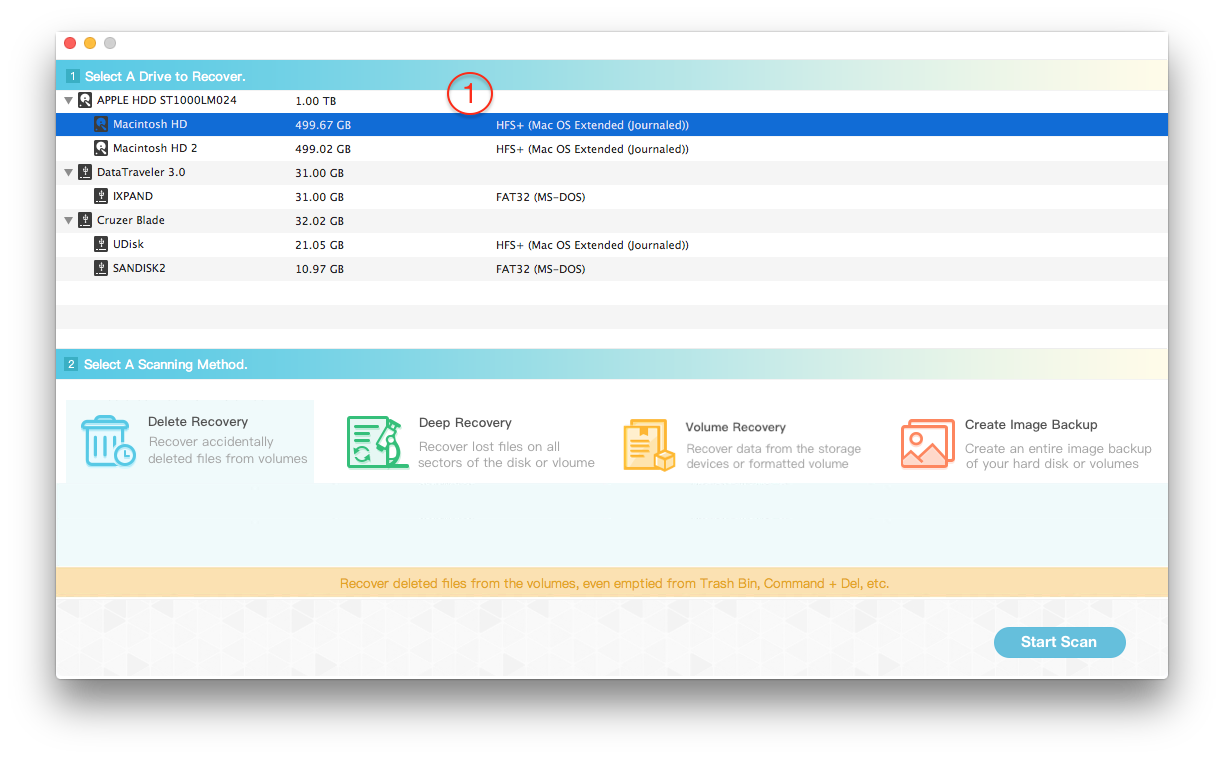
If you can’t find lost photos with the above ways, or your lost photo are not in Photos application, or you lost photos in the external disk and so on. You can use data recovery software to recover them from the disk drive. Here we use Fireebok Data Recovery to recover lost photos, which has five recovery modes and supports 500+ file types.
a). Download and install Data Recovery on the computer.
b). Select the disk drive, here we choose Macintosh HD to scan, and we choose the Deleted Recovery. If we can't get the recovery results, we can use other recovery mode in the next scan.

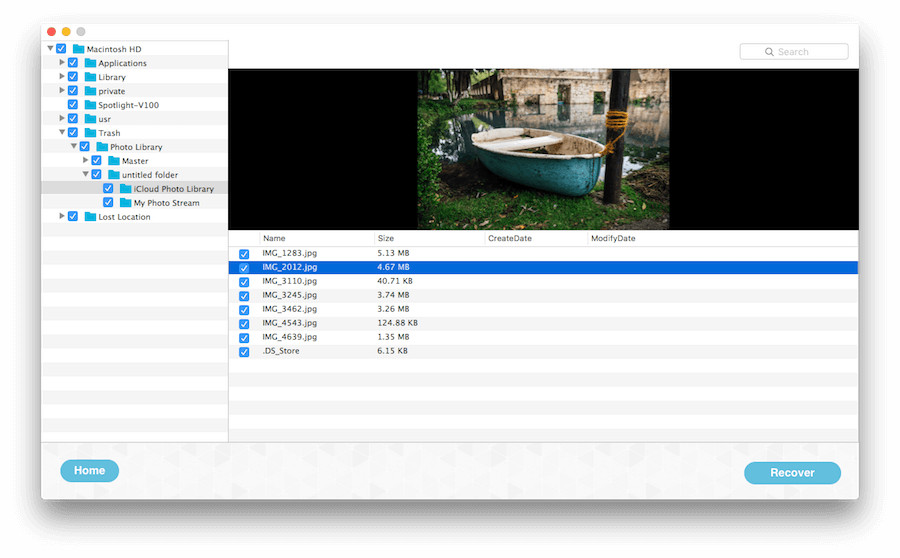
c). Once the scan is complete, you can preview and recover lost photos from photo library or other location.

About Fireebok Studio
Our article content is to provide solutions to solve the technical issue when we are using iPhone, macOS, WhatsApp and more. If you are interested in the content, you can subscribe to us. And We also develop some high quality applications to provide fully integrated solutions to handle more complex problems. They are free trials and you can access download center to download them at any time.
| Popular Articles & Tips You May Like | ||||
 |
 |
 |
||
| Five ways to recover lost iPhone data | How to reduce WhatsApp storage on iPhone | How to Clean up Your iOS and Boost Your Device's Performance | ||
