Many Mac users have reported that their photo library, iTunes library and other user data were lost after updating to macOS Big Sur. Such events typically occur during the upgrade process, that’s why we need to back up our Mac before updating. Is there any way to retrieve and recover deleted or lost data in macOS Big Sur? Don't worry, in this article we'll show you how to recover them in 3 common ways.
Why some user data lost during the macOS upgrade process?
There are two main reasons: a). Different versions of photos and iTunes use different file structures and database structures to store and original these photos and media files. There was an unusual error in the data during the new transfer and storage.
b). Different versions of the macOS file system and applications have changed, before macOS 10.13, macOS used HFS plus as a file system to store files, macOS 10.14 to macOS 11.0 used APFS to store all user data and system data. If you are updating from the old macOS to the new macOS Big Sur, use Time Machine Backup to back it up.
1. Recover data From the Time Machine Backup
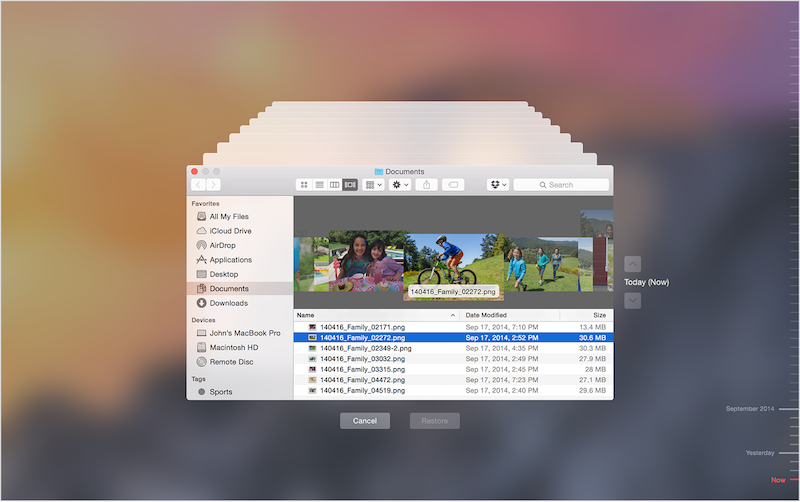
If you have an old Time Machine Backup in the external hard drive, you can choose to recover the deleted or lost data from the backup. Connect the external hard drive with the Mac, and click the Time Machine icon in the state menu bar and click the “Enter Time Machine ” menu item, find the latest Time machine backup in the backup timeline, and then click the Restore to start the restore process.

2. Recover data From from iCloud Drive
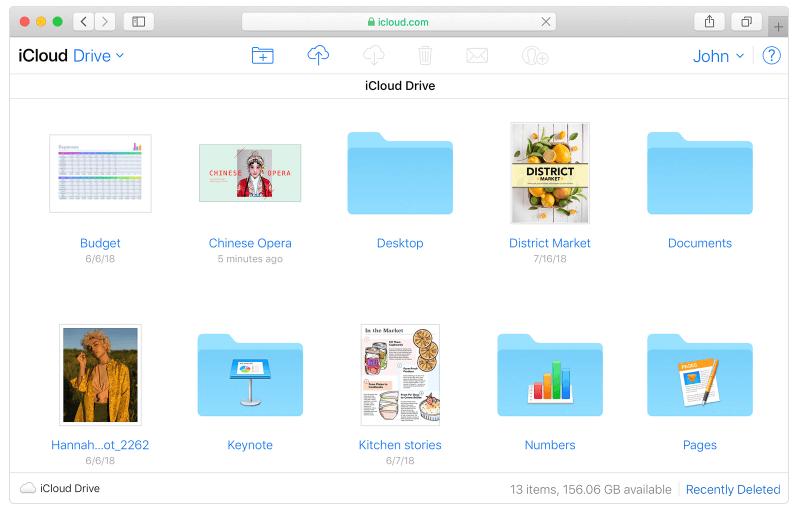
Many user data on Mac syncs with the iCloud Drive, such as photos, contacts, bookmarks and some user folders (such as ~/Desktop folder, ~/Documents folder). When they lost from the Mac, you can choose to recover from the iCloud Drive. Visit www.icloud.com in a browser to login with your Apple ID and Password, and then access iCloud Drive to search the lost data, if you find them, you can download to the Mac.

3. Recover data with Mac Disk
When macOS deletes any data from your Mac, it marks the data that needs to be deleted in the disk file system. The original data are still stored on disk unless the new write data overrides the old data. First quit other running applications to avoid data overwriting, and then we can use data recovery software which supports the macOS Big Sur to recover lost data from the Mac disk. Here we use Fireebok Data Recovery that can support the macOS Big Sur. In addition, it has 5 recovery modes to rescue the deleted and lost data.
Download and install Fireebok Data Recovery on the Mac. To recover Mac startup Disk in macOS Big Sur, you need to disable the SPI(System Integrity Protection), and here is the guide about how to disable the SPI
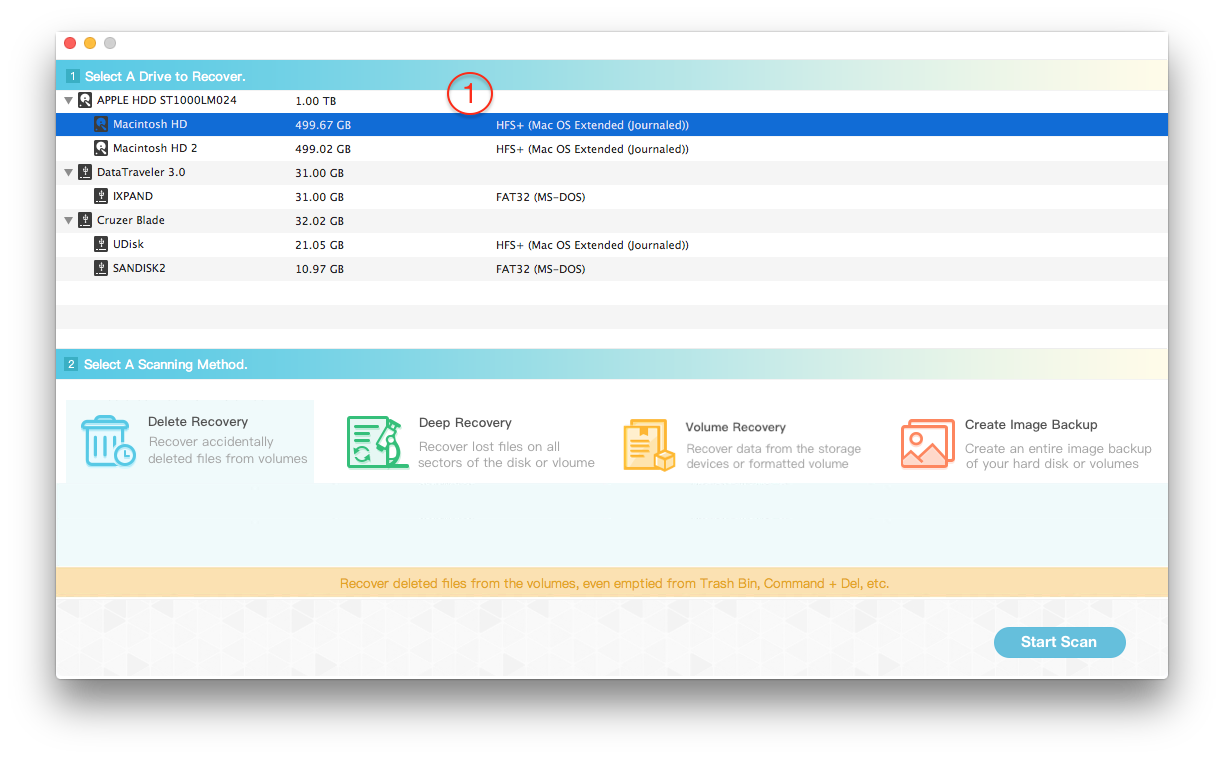
Run Fireebok Data Recovery, select the Mac startup Disk, and then select a recovery mode, we select Delete Recovery and click the Start Scan button.

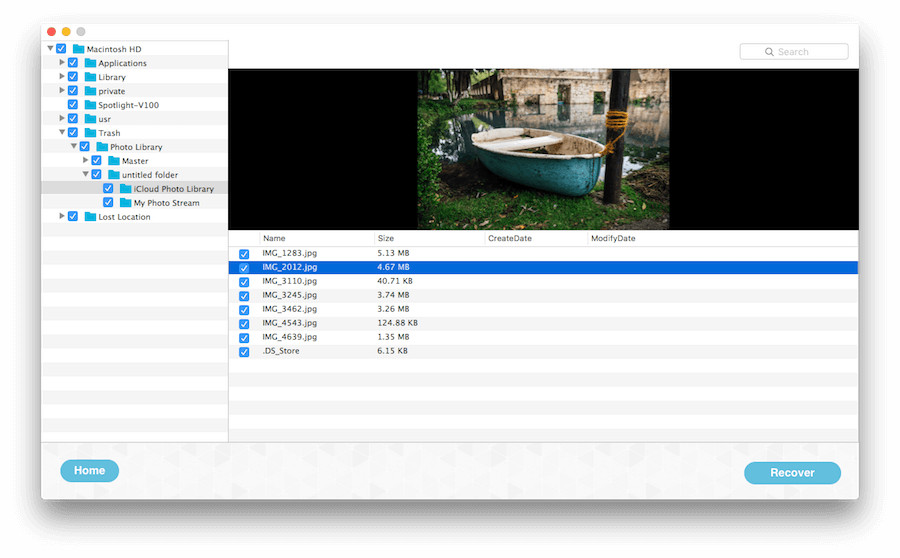
Once the scan is complete, click the result file and folder to preview and click the Recover button to save the result files. If you can’t find the lost data in the result, click the Home button and select the Deep Recovery mode and other recovery mode to scan it again.

| More Related Articles | ||||
 |
1. How to encrypt Safari bookmarks on Mac? 2. How to fix your macOS system storage is so huge |
|||
About Fireebok Studio
Our article content is to provide solutions to solve the technical issue when we are using iPhone, macOS, WhatsApp and more. If you are interested in the content, you can subscribe to us. And We also develop some high quality applications to provide fully integrated solutions to handle more complex problems. They are free trials and you can access download center to download them at any time.
| Popular Articles & Tips You May Like | ||||
 |
 |
 |
||
| Five ways to recover lost iPhone data | How to reduce WhatsApp storage on iPhone | How to Clean up Your iOS and Boost Your Device's Performance | ||