Mac user account is setup we we bought a new Mac. One day we may need to change the name of the current user account and home folder. But we recently received a help email that a customer lost his local data on the Macbook after renaming user account. This article will discuss how to properly rename the current user account and home folder, and how to recover lost Mac local data after renaming a user account.
How to rename the current user account and home folder?
1. Backup your Mac with the Time Machine hard drive, it may damage your account data when renaming the user account and home folder.
2. Log out the user account that you want to rename, then login to another different administrator account. (If you don't have another administrator account, you can create one in Users & Groups preferences.)
3. Open the Finder, click the menu “Go”->"Go to Folder…" ->enter “/Users”, find the user’s home folder. Then rename the user's home folder without using any spaces in the new name.
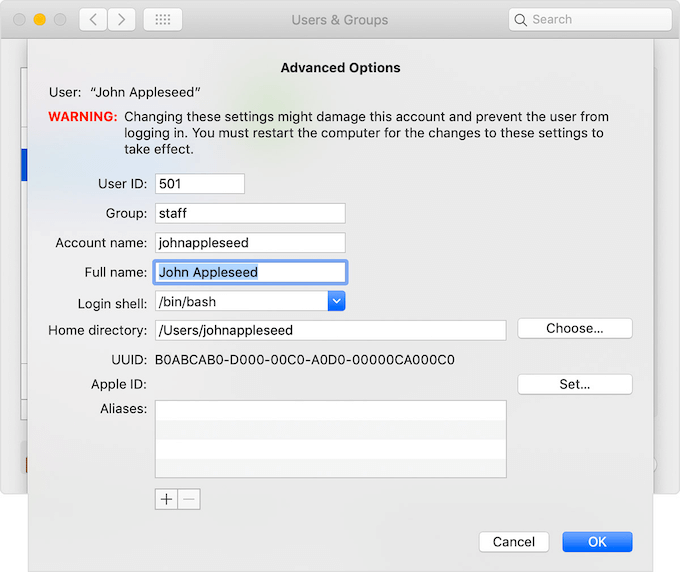
4. Go to System Preferences -> Users & Groups, and control- click the user you’re renaming and choose Advanced Options. Change the “Account name” field to match the new name of the home folder. It should have no spaces.

5. The account name also appears in the “Home directory” field, after /Users/. Change that account name to match the new name of the home folder.
6. Click OK, then restart your Mac. Log in to the renamed account, then it will work.
How to recover lost Mac local data after renaming a user account?
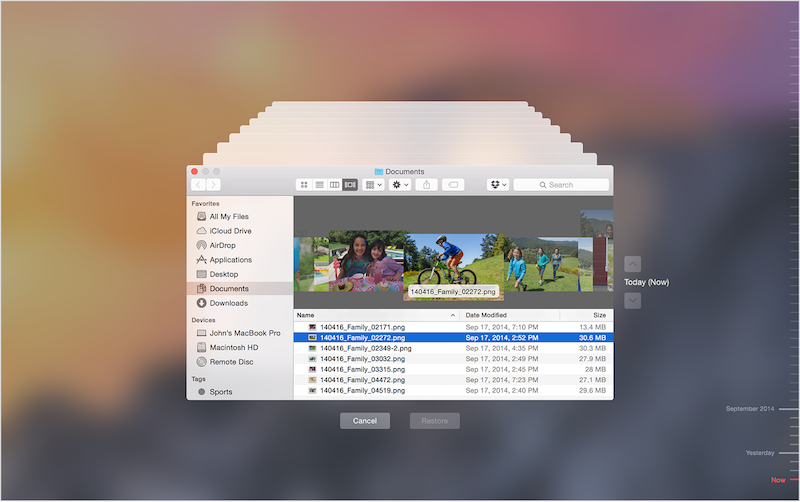
As we mentioned above, renaming your username may lose your user data when you used the wrong operation. If the cause has occurred before you read the article. How to recover those lost Mac local data? If you have made a TimeMachine backup before, Connect your Time Machine backup disk, then click the Time Machine icon in the menu bar and Enter Time Machine. Select a right backup with the timeline, then click Restore to restore from the backup.

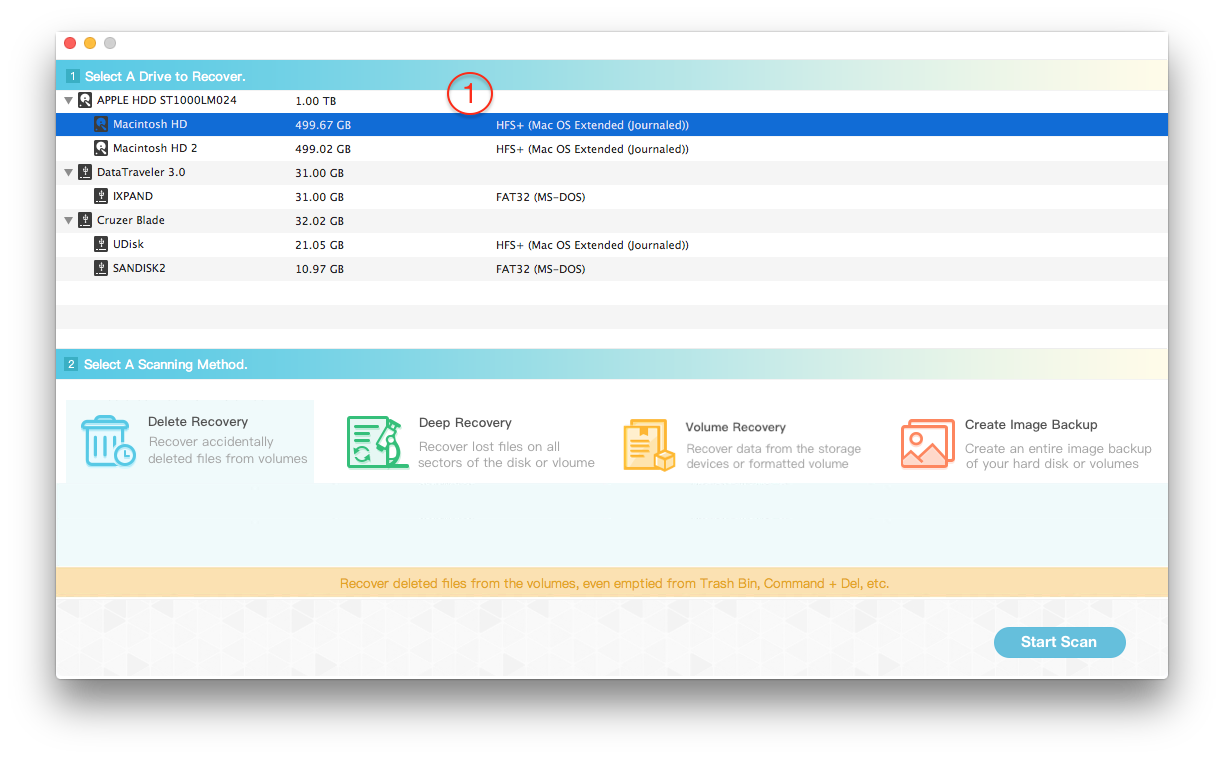
How to restore this Mac local data without any backup? We recommend using Fireebok Data Recovery to recover the local user data. It has 5 recovery modes: Deleted Recovery, Deep Recovery, Volume Recovery, Lost Volume Recovery, Create Image Backup. In addition, it can support the latest macOS 10.15.
1. Download and install Fireebok Data Recovery on the Mac.
2. Run Fireebok Data Recovery(if you’re using macOS 10.13 and later, please disable the SIP first, learn more here)
3. Select the system hard drive or the system volume, and select Deleted Recovery or other recovery mode, click Start Scan.

4. After the scan is complete, you will find the recovered local data and you can preview them. Then click Recover button to save them in another different hard drive.

About Fireebok Studio
Our article content is to provide solutions to solve the technical issue when we are using iPhone, macOS, WhatsApp and more. If you are interested in the content, you can subscribe to us. And We also develop some high quality applications to provide fully integrated solutions to handle more complex problems. They are free trials and you can access download center to download them at any time.
| Popular Articles & Tips You May Like | ||||
 |
 |
 |
||
| Five ways to recover lost iPhone data | How to reduce WhatsApp storage on iPhone | How to Clean up Your iOS and Boost Your Device's Performance | ||
